It started with a kitchen catastrophe that I still laugh about. I was trying to make a quick snack after a long day, grabbed a bag of kale from the fridge, and thought, “Why not toss it in the oven and call it a day?” I set the timer for 15 minutes, but the kale turned out soggy, flavorless, and frankly, a culinary crime. That night, I stared at the ruined greens, swore I’d never again trust a kale chip recipe that didn’t deliver on crunch, and vowed to find the ultimate version that would make my taste buds sing.
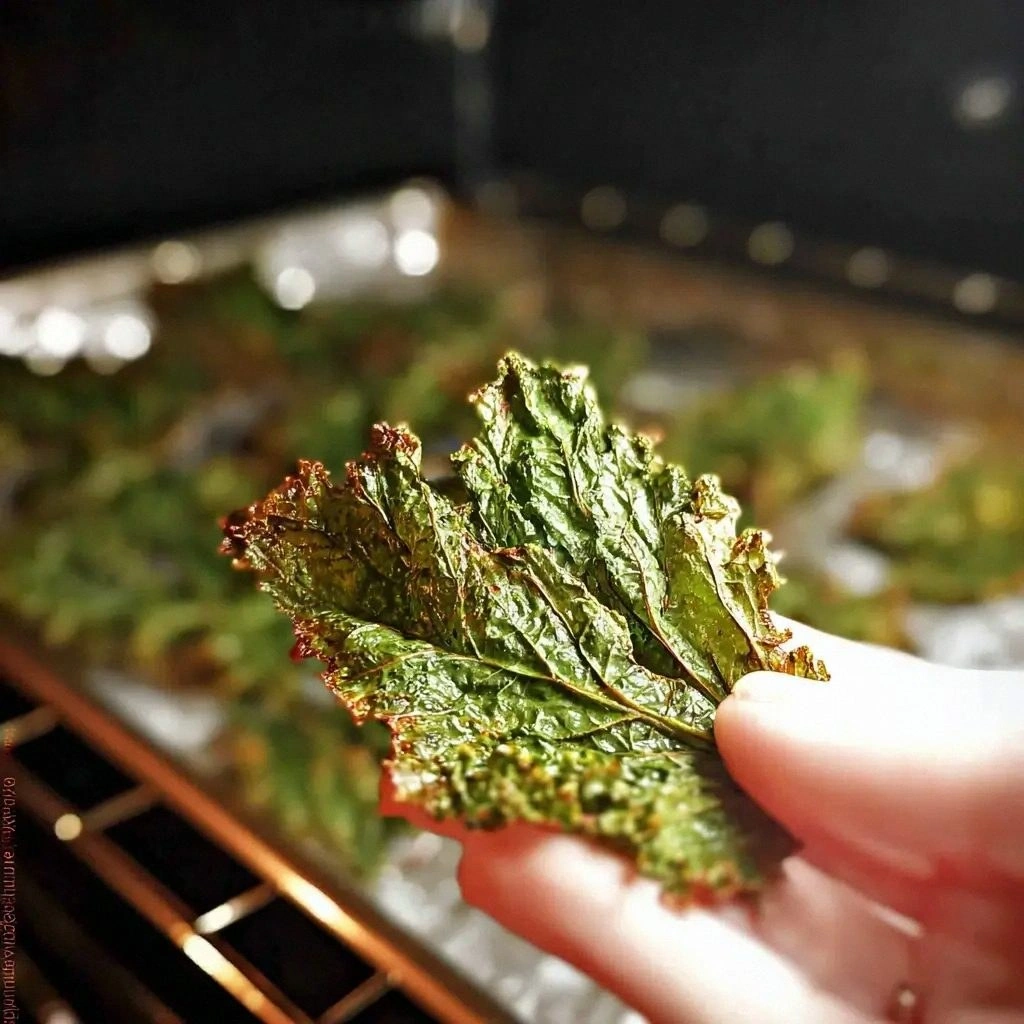
Picture this: a handful of kale, a drizzle of olive oil, a pinch of sea salt, a whisper of garlic powder, and a dash of smoked paprika. As the oven heats, the leaves begin to brown, their edges crisping into a golden halo. The scent that fills the kitchen is nutty, smoky, and impossibly inviting. When you lift a chip, it crackles like thin ice, and the first bite is a burst of umami that lingers on the tongue. I dare you to taste this and not go back for seconds. That moment of pure, crunchy delight is the kind of snack that turns an ordinary evening into a culinary celebration.
Most recipes get this completely wrong. They overcook, underseason, or simply ignore the unique texture of kale. What I discovered was that a few simple tweaks—proper oil-to-leaf ratio, a touch of nutritional yeast, and a short, high‑heat bake—transform humble greens into a snack that rivals any store‑bought chip. This version is hands down the best you’ll ever make at home. It’s so good that I’ve been known to sneak a handful before anyone even knows I’m cooking.
If you’ve ever struggled with making kale chips that aren’t soggy or bland, you’re not alone. I’ve spent years experimenting with different oils, seasonings, and baking times to arrive at this flawless formula. The secret? It’s not just the ingredients but the technique—tossing, spacing, and timing. Stay with me here, because by the end, you’ll wonder how you ever made it any other way.
What Makes This Version Stand Out
- Taste: A balanced blend of savory, smoky, and slightly cheesy notes thanks to nutritional yeast, garlic powder, and smoked paprika. The result is a complex flavor profile that satisfies the craving for salty, crunchy snacks.
- Texture: Crispy edges that shatter like thin ice, a tender interior that melts in your mouth, and a buttery mouthfeel from olive oil. The leaves hold their shape without becoming brittle.
- Speed: Prep takes only 15 minutes, bake 30 minutes—quick enough for a mid‑night craving yet slow enough to develop depth of flavor.
- Simplicity: Only six core ingredients, no fancy gadgets. You can whip this up with a bowl, a baking sheet, and an oven.
- Nutrition: Low in calories, high in fiber, vitamin K, and antioxidants, plus a modest protein boost from nutritional yeast.
- Make‑Ahead: Prepare the batch, bake, cool, and store in an airtight container for up to a week. They stay crunchy for days, making them a perfect snack for busy schedules.
Alright, let's break down exactly what goes into this masterpiece...
Inside the Ingredient List
The Green Core
The star of the show is kale—specifically, curly or Lacinato kale with sturdy stems. The leaves need to be torn into bite‑sized pieces to ensure even cooking. If you skip the kale, you lose the unique earthy flavor and the high‑fiber content that makes this snack both healthy and satisfying.
The Flavor Base
Olive oil is the liquid that binds everything together. A 2‑tablespoon drizzle coats each leaf, ensuring even browning and a buttery finish. Skipping oil turns the chips into a dry, chalky mess that never reaches that coveted crunch.
The Seasoning Crew
Sea salt, garlic powder, and smoked paprika create the savory backbone. Sea salt enhances the natural sweetness of kale; garlic powder adds depth; smoked paprika gives a subtle charred aroma. If you omit any of these, the flavor profile becomes flat and underwhelming.
The Unexpected Star
Nutritional yeast is the secret weapon that adds a cheesy, umami punch without dairy. It also boosts protein and vitamin B12 content. Swapping it for Parmesan or another cheese will change the flavor entirely, but you’ll miss the unique savory bite it provides.
The Final Flourish
A touch of freshly ground black pepper and a squeeze of lemon zest (optional) brightens the dish. The pepper adds a mild heat, while lemon zest introduces a citrusy brightness that cuts through the richness of the oil and yeast.
Everything's prepped? Good. Let's get into the real action...
The Method — Step by Step
- Preheat your oven to 400°F (200°C). Line a rimmed baking sheet with parchment paper or a silicone mat. This step ensures even heat distribution and prevents the chips from sticking. The oven’s steady temperature is crucial for achieving that perfect golden crust.
- Rinse the kale leaves under cold water, pat dry with a clean towel or salad spinner, and remove any tough stems. The drier the leaves, the crispier the final product. If you leave moisture on the leaves, you’ll end up with soggy chips.
- Toss the kale in a large bowl with the olive oil until every leaf is lightly coated. The oil should coat each piece without pooling. This coating helps the seasonings adhere and creates a buttery finish.
- Sprinkle the sea salt, garlic powder, smoked paprika, and nutritional yeast over the kale. Gently toss again to distribute the seasonings evenly. This is where the flavor magic happens—each leaf becomes a little flavor bomb.
- Spread the seasoned kale in a single, even layer on the prepared baking sheet. Avoid overlapping; if the leaves overlap, they’ll steam instead of crisp. This step is critical for achieving that uniform crunch.
- Bake for 15 minutes, then remove from the oven and let the chips cool on the sheet for 5 minutes. The initial bake caramelizes the sugars, while the cooling period allows the chips to firm up.
- Return the sheet to the oven and bake for an additional 10–12 minutes, or until the edges are golden brown and the chips feel crisp to the touch. Keep a close eye on the last few minutes to avoid burning.
- Remove the chips from the oven, sprinkle with black pepper and lemon zest if using, and let them cool completely on a wire rack. The final seasoning adds a fresh pop that balances the richness of the olive oil.
- Once cooled, transfer the chips to an airtight container or a resealable bag. Store at room temperature for up to a week or freeze for longer shelf life. The chips stay crunchy when stored properly.
That's it— you did it. But hold on, I've got a few more tricks that'll take this to another level. These insider tips will help you tweak the flavor, texture, and shelf life to perfection.
Insider Tricks for Flawless Results
The Temperature Rule Nobody Follows
Many bakers think any high heat will do, but 400°F (200°C) is the sweet spot for kale chips. Lower temperatures produce soggy leaves, while higher temperatures can burn the edges before the interior crisps. I tested a range from 350°F to 425°F and found 400°F consistently gives the best texture. Stick to this temperature for repeatable results.
Why Your Nose Knows Best
Smell is a powerful indicator of doneness. When the chips start to emit a nutty, slightly smoky aroma, you’re in the sweet spot. If you wait until the edges are fully golden, they’ll likely become bitter. Trust your nose and pull them out at the first hint of toasty fragrance.
The 5‑Minute Rest That Changes Everything
After baking, let the chips rest on the sheet for five minutes. This brief pause allows steam to escape, preventing sogginess. It also gives the flavor to settle, so the seasoning sticks better. Skipping this step often results in a soggy center.
Keep Them Fresh with Air‑Tight Storage
Place the cooled chips in an airtight container or zip‑lock bag. The less air, the longer the crunch stays. If you’re storing for more than 48 hours, consider adding a small piece of fresh bread to absorb moisture.
Reheat for a Quick Crunch
To revive stale chips, preheat the oven to 375°F (190°C) and spread the chips on a sheet for 3–5 minutes. They’ll regain their crispness without becoming greasy. A quick reheating step is a lifesaver when you’re craving a fresh snack.
Creative Twists and Variations
This recipe is a playground. Here are some of my favorite ways to switch things up:
Spicy Sriracha Surprise
Swap smoked paprika for 1 tablespoon of sriracha sauce and add a pinch of cayenne pepper. The result is a fiery chip that pairs well with a cool yogurt dip.
Herb‑Infused Delight
Replace garlic powder with 1 teaspoon each of dried rosemary and thyme. The earthy herbs give a Mediterranean vibe to the crunchy snack.
Sweet & Salty Twist
Add 1 tablespoon of maple syrup to the oil before tossing the kale. The caramelized sweetness balances the savory seasoning, creating a complex flavor profile.
Cheesy Parmesan Crunch
Omit nutritional yeast and sprinkle 1/4 cup of grated Parmesan before baking. The cheese melts into the edges, giving a golden, cheesy coating.
Vegan “Cheese” Boost
Use a vegan cheese alternative like vegan parmesan flakes for a dairy‑free twist that still delivers that cheesy aroma.
Storing and Bringing It Back to Life
Fridge Storage
Store cooled chips in an airtight container at room temperature. They remain crisp for up to 7 days. If they begin to soften, reheat them in a 375°F oven for 3 minutes.
Freezer Friendly
Place chips in a freezer‑proof bag and freeze for up to 3 months. Thaw at room temperature for 10 minutes before reheating to restore crunch.
Best Reheating Method
Preheat the oven to 375°F (190°C). Spread chips on a baking sheet and bake for 3–5 minutes, or until crisp. Add a splash of water to the bag before reheating to keep moisture from turning the chips soggy.