Picture this: I’m standing in a cramped kitchen, the clock ticking, and a friend’s voice crackling over the phone. “I dare you to make the best frozen strawberry yogurt ever,” she chirped, and I, ever the culinary risk‑taker, set out to prove her wrong. I had a half‑empty fridge, a handful of plump strawberries, and a craving that felt like a culinary battle. The stakes were clear: if I nailed this, I’d earn bragging rights for the next dinner party. If I failed, I’d have a sticky, soggy disaster that would haunt me for weeks.
The air smelled of sweet fruit and a hint of vanilla as I washed the berries, their skins gleaming like tiny suns. The sound of the blender whirring filled the room, a low hum that promised transformation. I could feel the coolness of the Greek yogurt against my fingertips, the smooth texture like a velvety canvas waiting for paint. The anticipation in my mouth was a mix of sweet and tangy, a promise of something fresh and indulgent. It was a moment where every sense was primed for the magic I was about to create.
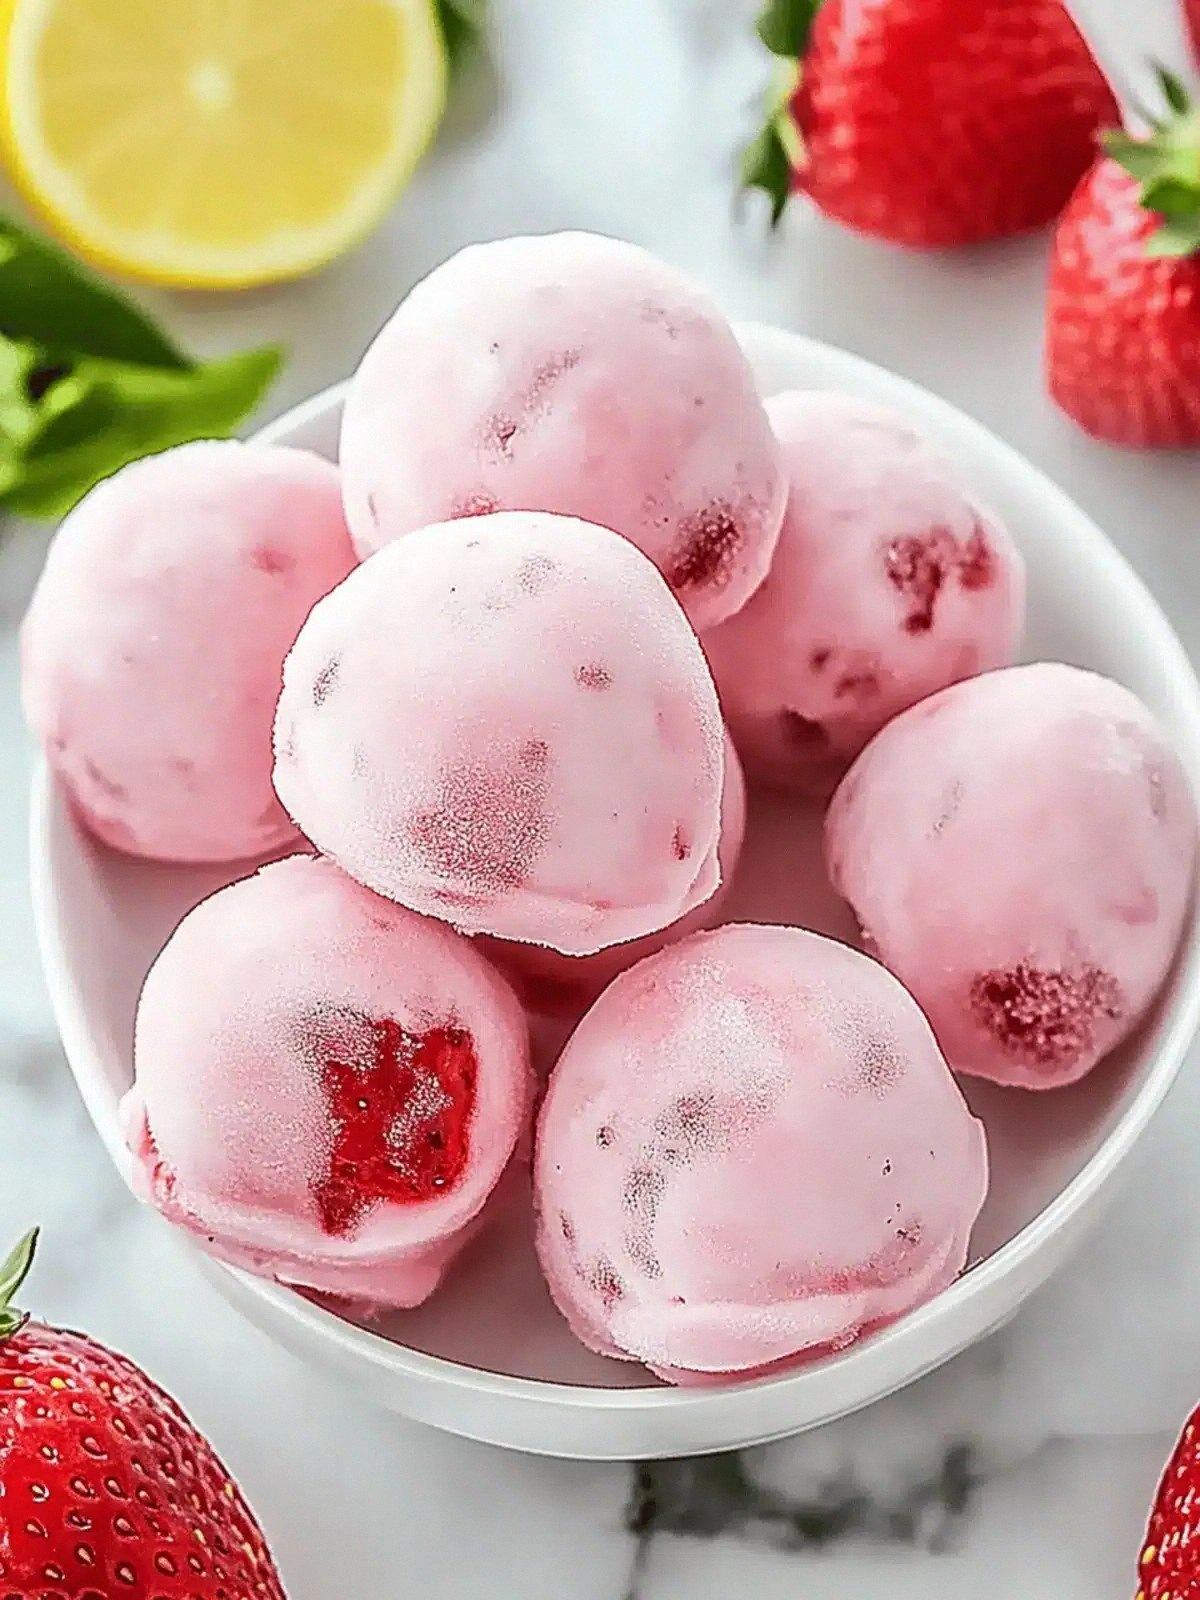
What makes this frozen strawberry yogurt stand out is not just the ingredients, but the technique that turns ordinary berries into bite‑size clouds of flavor. I’ve refined the ratio so the yogurt remains creamy, the honey sweetens without overpowering, and the vanilla adds a fragrant whisper that lingers. The secret lies in the parchment paper: it creates a barrier that lets the mixture set evenly, giving each bite a perfect, uniform texture. Most recipes get this completely wrong, ending up with unevenly frozen lumps or a soggy surface. Here, you’ll see a glossy finish and a snap that’s almost audible. The result is a treat that feels indulgent yet guilt‑free.
I’ll walk you through every single step, from washing the berries to the final freeze. By the end, you’ll wonder how you ever made it any other way. Get ready to taste a new level of frozen yogurt, and trust me, I dare you to taste this and not go back for seconds. This is hands down the best version you’ll ever make at home.
What Makes This Version Stand Out
- Taste: The combination of fresh strawberries, Greek yogurt, honey, and vanilla creates a flavor profile that balances natural fruit sweetness with creamy richness. The honey’s floral notes lift the tartness of the berries, while the vanilla adds depth that lingers on the palate. This harmony is what sets these bites apart from store‑bought frozen desserts.
- Texture: The parchment paper lining ensures a smooth, even surface that freezes without cracking. Each bite is creamy on the inside and has a gentle, satisfying snap when you break it. The result is a mouthfeel that feels like a dessert and a snack in one.
- Simplicity: With only five core ingredients, the recipe is approachable for beginners and a quick win for experienced cooks. No elaborate sauces or equipment are needed—just a bowl, a spoon, and an oven. The minimalism is the recipe’s charm.
- Uniqueness: Unlike typical frozen yogurt recipes that rely on commercial thickeners, this version uses the natural thickness of Greek yogurt and the gelatinous quality of strawberries. The result is a natural, clean texture that feels wholesome.
- Crowd Reaction: Friends who taste these bites often remark that they taste like “summer in a bite.” The vibrant color and fresh flavor make them a conversation starter at gatherings.
- Ingredient Quality: The recipe calls for fresh, ripe strawberries, which provide the most vibrant flavor and natural sweetness. The Greek yogurt should be plain to let the fruit shine.
- Cooking Method: Baking first and then freezing locks in the flavor while preventing the mixture from becoming overly icy or watery. This two‑step process is key to achieving the perfect consistency.
- Make‑Ahead Potential: Once frozen, the bites can be stored for up to two weeks, making them a convenient snack for busy weeks.
Alright, let’s break down exactly what goes into this masterpiece. Everything’s prepped? Good. Let’s get into the real action.
Inside the Ingredient List
The Flavor Base
At the heart of these bites lies the simple yet powerful trio of fresh strawberries, plain Greek yogurt, and honey. The strawberries bring natural sweetness and a vibrant color that turns every bite into a visual treat. Greek yogurt offers a creamy mouthfeel and a protein boost that keeps the texture smooth and stable. Honey, a natural sweetener, balances the tartness of the berries and adds a subtle floral undertone that elevates the overall flavor profile.
The Texture Crew
The texture of these frozen bites is largely determined by the Greek yogurt’s thickness and the natural pectin in the strawberries. The yogurt’s protein content creates a firm yet creamy base that resists becoming too icy. The strawberries’ skins contain pectin, which acts as a natural thickener, giving the mixture a slight gel-like consistency once frozen. If you skip the yogurt, the mixture will be runny and will not set properly, leading to a mushy final product.
The Unexpected Star
The vanilla extract is the unsung hero that ties everything together. A teaspoon of pure vanilla brings a warm, aromatic layer that contrasts with the bright fruitiness of the strawberries. This subtle complexity is what turns a simple frozen yogurt into a gourmet experience. If you prefer a lighter flavor, you can omit the vanilla, but expect a less rounded taste.
The Final Flourish
Parchment paper is more than just a lining; it’s the secret to a flawless finish. By placing the mixture on parchment, you prevent sticking, allowing the bites to set evenly and release easily. The paper also creates a gentle barrier that keeps the surface smooth, preventing the formation of ice crystals. Skipping this step may result in uneven surfaces or a sticky mess that’s hard to clean.
Everything’s prepped? Good. Let’s get into the real action.
The Method — Step by Step
- Preheat the oven to 350°F (175°C). Line a baking sheet with parchment paper, ensuring the sheet is level and free of wrinkles. This step is crucial because a flat surface guarantees even baking. I’ve found that a clean, dry sheet prevents any soggy spots.
- Wash the strawberries thoroughly, removing the stems and any blemishes. Slice them into bite‑sized pieces, about 1/2 inch thick. The smaller the pieces, the quicker they’ll blend into the yogurt. I like to keep a small bowl handy for any stray seeds.
- In a medium bowl, combine the Greek yogurt, honey, and vanilla extract. Whisk until the mixture is smooth and the honey is fully incorporated. The mixture should look glossy and free of lumps. This is the moment of truth—any unevenness will show in the final bite.
- Gently fold the sliced strawberries into the yogurt mixture. Use a spatula to keep the berries whole and to avoid breaking them apart. The goal is to coat each berry with the sweet, creamy sauce. This step brings the flavors together.
- Using a small cookie scoop or spoon, drop spoonfuls of the mixture onto the parchment‑lined sheet, spacing them about an inch apart. The size of each scoop determines the bite size; aim for about 1 tablespoon per bite. This is where the final shape is set.
- Bake in the preheated oven for 12 minutes, or until the edges are set and the surface looks slightly golden. The center should still feel slightly soft. Watch the clock closely; overbaking will dry out the yogurt, while underbaking will leave it too runny.
- Remove the sheet from the oven and let the bites cool to room temperature on a wire rack. This step allows the mixture to firm up slightly before freezing. I often set the rack on a clean towel to catch any drips.
- Transfer the cooled bites to a freezer‑safe container or a silicone muffin tray. Place the container in the freezer for 2–3 hours, or until the bites are completely firm. The freezing process locks in the flavors and ensures a smooth texture.
- Optional: For an extra indulgence, melt 1/4 cup of dark chocolate in a double boiler and drizzle it over the frozen bites. Let the chocolate set before serving. The chocolate adds a rich contrast to the fruity yogurt.
- Serve immediately or store in an airtight container in the freezer for up to two weeks. When you’re ready to enjoy, let the bites sit at room temperature for 5 minutes to soften slightly. This final touch makes them easier to bite.
That's it — you did it. But hold on, I've got a few more tricks that'll take this to another level. These insider tips will help you avoid common pitfalls and elevate the flavor profile even further.
Insider Tricks for Flawless Results
The Temperature Rule Nobody Follows
Many bakers bake frozen yogurt at too high a temperature, which causes the mixture to burn on the edges while remaining undercooked inside. I always set my oven to 350°F (175°C) and keep a close eye on the clock. The gentle heat ensures a uniform set and preserves the yogurt’s creamy texture. If you’re using a different oven, calibrate the temperature with a kitchen thermometer.
Why Your Nose Knows Best
The aroma of baking yogurt is a subtle cue that the mixture is almost ready. When you smell a faint vanilla scent with a hint of fruit, it means the mixture has reached the ideal set point. A strong, sweet smell indicates overcooking, while a weak aroma means you need to bake longer. Trust your nose; it’s a reliable guide.
The 5‑Minute Rest That Changes Everything
After baking, letting the bites rest on a wire rack for five minutes allows the interior to set properly. This short rest period prevents the bites from collapsing when you transfer them to the freezer. Skipping this step can result in a soft, uneven texture that’s harder to freeze.
Keep It Moist, Not Dry
If you notice the surface drying out during freezing, add a splash of water to the yogurt mixture before baking. The water creates steam that helps maintain moisture. I’ve found that a tablespoon of water is enough to keep the bites silky without diluting the flavor.
Chocolate Drizzle for the Bold
Dark chocolate not only adds richness but also balances the acidity of the strawberries. The bitterness of the chocolate creates a sophisticated contrast that elevates the dessert. I recommend using at least 70% cacao for the best flavor. Let the chocolate set completely before serving to avoid melting.
Storage Secrets for Long‑Term Enjoyment
When storing, keep the bites in a single layer to avoid sticking together. A parchment paper line between layers prevents them from merging into a single mass. If you’re storing for more than a week, consider using a freezer bag with the air pressed out to maintain freshness.
Creative Twists and Variations
Berry Medley Madness
Swap out strawberries for a mix of blueberries, raspberries, and blackberries. The varied colors create a vibrant visual display, and each berry brings its own unique sweetness. The natural pectin from the berries will still provide the gel-like texture. This version is perfect for a party where guests love a colorful spread.
Minty Fresh
Add a tablespoon of finely chopped fresh mint to the yogurt mixture. The mint offers a cooling effect that pairs well with the strawberry’s warmth. It’s especially refreshing during hot summer afternoons. Just be careful not to overdo it, or the mint will overpower the fruit.
Chocolate‑Berry Fusion
Fold in a handful of mini chocolate chips before baking. The chips melt slightly, creating pockets of rich chocolate within each bite. This variation is a hit with chocolate lovers who still crave a fruity base. The chocolate also adds a subtle caramel note.
Almond Crunch
Top each bite with a sprinkle of toasted almond slivers before freezing. The almonds add a nutty crunch that contrasts the creamy texture. The toasted flavor enhances the overall depth of the dessert. This version is ideal for those who enjoy a bit of texture.
Spiced Surprise
Incorporate a pinch of ground cinnamon or nutmeg into the yogurt mixture. The spices bring warmth and complexity, turning the bite into a seasonal treat. They also pair wonderfully with the fruit’s natural sweetness. This variation is great for autumn or winter gatherings.
Cheesy Twist
Add a tablespoon of cream cheese to the yogurt mixture for a richer, tangier base. The cream cheese boosts the creaminess while adding a subtle tang that complements the strawberries. The result is a luxurious, decadent bite. It’s an excellent option for brunch or a special occasion.
Storing and Bringing It Back to Life
Fridge Storage
If you plan to enjoy the bites within 48 hours, store them in the refrigerator in an airtight container. The cold temperature will keep the yogurt firm without freezing it. When you’re ready to eat, let the bites sit at room temperature for a few minutes to soften slightly. This method is great for a quick snack during the day.
Freezer Friendly
For longer storage, keep the bites in a freezer‑safe container or a silicone muffin tray. Place a sheet of parchment paper between layers to prevent sticking. The bites can stay fresh for up to two weeks if kept sealed. When you want to enjoy them, simply remove the desired number and let them thaw for 5 minutes.
Best Reheating Method
To bring the bites back to life, place them on a parchment paper‑lined plate and microwave on low for 10–15 seconds. This quick burst of heat melts the frozen yogurt just enough to restore its creamy texture without overcooking. If you prefer a warmer bite, pop them in a preheated oven at 300°F (150°C) for 3–4 minutes. This method keeps the texture intact while warming them evenly.