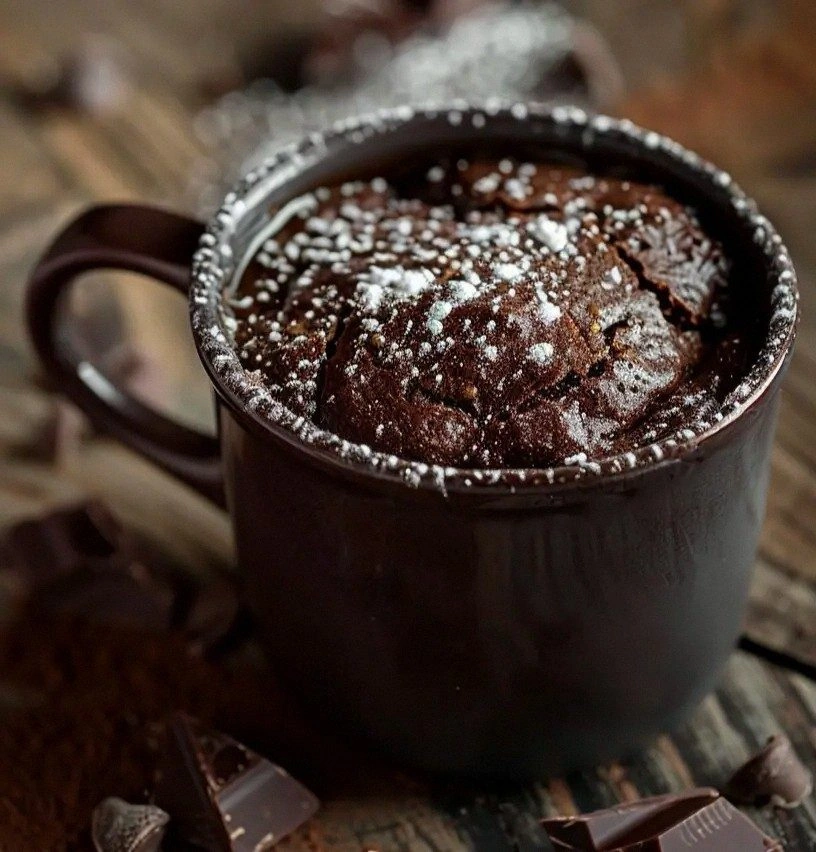
Picture yourself pulling this out of the microwave, the whole kitchen smelling incredible, and the mug steaming with a glossy chocolate sheen. The edges will start pulling away from the mug, creating that coveted “crack” that signals the perfect finish. And when you take that first bite, the chocolate explodes in a way that feels both indulgent and satisfying. Stay with me here—this is worth it. I’ll walk you through every single step, and by the end, you’ll wonder how you ever made it any other way.
What Makes This Version Stand Out
- Pure Chocolate: No flour means no dry, crumbly texture—just a dense, fudgy core that melts in your mouth.
- Butter‑Rich: Two tablespoons of butter elevate the flavor, giving a silky mouthfeel that feels like a luxury dessert.
- Instant: From prep to finish in under ten minutes, making it the ultimate on‑the‑spot treat for busy nights.
- One‑Serve Precision: The recipe is calibrated for a single mug, so there’s no waste and no guesswork.
- Versatile Toppings: Finish with a dusting of powdered sugar, a splash of espresso, or a swirl of peanut butter for endless variations.
- Minimal Fuss: Only three ingredients require mixing—no whisking, no baking, just a simple stir.
- Low Carb Friendly: Eliminating flour keeps the carb count low while still delivering a satisfying chocolate experience.
- Perfect for Gifting: Packaged in a mug, it’s a sweet, ready‑to‑serve gift for friends or coworkers.
Inside the Ingredient List
The Flavor Base
Unsalted butter is the cornerstone of this mug brownie. It melts into the batter, creating a silky base that holds the chocolate together. If you skip it, the brownie will feel dry and crumbly, lacking that luscious mouthfeel. For a healthier twist, consider using a light butter or a butter substitute like avocado oil; just remember that the flavor profile will shift slightly toward a nuttier note.
The Texture Crew
Granulated sugar is the sweetener that balances the bitterness of cocoa. It also helps to create a slight crust on the surface as it caramelizes. If you prefer a sweeter brownie, feel free to double the sugar or add a pinch of brown sugar for a caramel undertone. Keep in mind that sugar is also a binder—without it, the brownie might fall apart.
The Unexpected Star
Unsweetened cocoa powder is the star that delivers deep chocolate flavor. It’s packed with antioxidants and gives the brownie that rich, slightly bitter undertone that makes it feel indulgent without the need for added chocolate chips. If you’re craving a different flavor, try a high‑quality Dutch‑process cocoa for a smoother finish, or add a pinch of cayenne for a subtle heat.
The Final Flourish
The egg is the binder that holds everything together. It also adds a slight fluffiness to the center, preventing the brownie from becoming too dense. If you’re vegan, you can replace the egg with a flaxseed egg (1 tablespoon ground flaxseed mixed with 3 tablespoons water) or a commercial egg replacer. Remember, the egg’s protein content is crucial for structure.
Everything’s prepped? Good. Let’s get into the real action.
The Method — Step by Step
-
Step 1: Melt the Butter. Place the two tablespoons of unsalted butter in a microwave‑safe mug. Microwave on high for 30 seconds, then stir until fully melted and lightly glossy. The butter should feel warm to the touch, not hot enough to burn your tongue. This step ensures even distribution of fat throughout the batter.
Kitchen Hack: If you’re using a non‑microwave oven, melt the butter on the stove in a small saucepan over low heat, stirring constantly.
-
Step 2: Add Sugar. Sprinkle the two tablespoons of granulated sugar over the melted butter. Stir until the sugar is fully incorporated and the mixture looks slightly glossy. The sugar will dissolve slowly, creating a fine, sweet base. If you notice any clumps, give it a quick whisk with a fork.
Kitchen Hack: For an extra touch of sparkle, add a pinch of sea salt before the sugar; it enhances the chocolate flavor.
-
Step 3: Incorporate Cocoa. Stir in the two tablespoons of unsweetened cocoa powder until the batter is smooth and evenly colored. The mixture should have a deep, chocolatey hue that’s almost opaque. If you see any streaks of cocoa, use a small whisk to break them up. The cocoa not only adds flavor but also thickens the batter slightly, giving the brownie its fudgy texture.
Kitchen Hack: For a richer flavor, use a high‑quality Dutch‑process cocoa; it’s less acidic and yields a smoother bite.
-
Step 4: Beat in the Egg. Crack the large egg directly into the mug and whisk vigorously until the batter is uniform and glossy. The egg’s proteins will bind the ingredients, creating a cohesive structure. If you’re vegan, replace the egg with a flaxseed egg—mix 1 tablespoon ground flaxseed with 3 tablespoons water and let it sit for 5 minutes before adding.
Kitchen Hack: Add a splash of espresso to the batter; it intensifies the chocolate flavor without adding caffeine.
-
Step 5: Add Vanilla and Salt. Stir in the quarter teaspoon of vanilla extract and a pinch of salt. The vanilla adds depth, while the salt balances the sweetness and enhances the chocolate notes. Mix until everything is fully incorporated; the batter should look glossy and thick.
Watch Out: Over‑stirring can cause the batter to become too thin; keep the whisking brief.
-
Step 6: Microwave to Perfection. Place the mug in the microwave and cook on high for 45 seconds. Check the center; it should be set but still slightly gooey. If it’s not quite ready, add 10‑second increments until the desired consistency is achieved. The goal is a molten center with a firm outer edge that pulls away from the mug.
Kitchen Hack: For an even cook, rotate the mug halfway through the cooking time.
-
Step 7: Let it Rest. Allow the brownie to rest for one minute after microwaving. During this time the heat will continue to spread, setting the center while keeping it luscious. The surface will look glossy and slightly shiny, like a dark chocolate glaze.
Kitchen Hack: While it rests, dust the top with powdered sugar for a sweet finish.
-
Step 8: Serve and Enjoy. Carefully slide a spoon into the center and take a bite. The brownie should feel dense yet melt in your mouth, releasing a burst of chocolate that lingers on the palate. For an extra indulgence, top with a drizzle of chocolate ganache or a dollop of whipped cream. This is the moment where the kitchen’s aroma turns into a memory you’ll replay for days.
Kitchen Hack: Keep a small bowl of melted chocolate nearby; swirl it into the brownie for a glossy, decadent look.
That’s it—you did it. But hold on, I’ve got a few more tricks that will take this to another level. These insider secrets will help you tweak the texture, flavor, and presentation to match any occasion.
Insider Tricks for Flawless Results
The Temperature Rule Nobody Follows
Microwave power varies widely from one appliance to another. If you’re using a 700‑watt microwave, add a few extra seconds; a 1200‑watt unit may finish too quickly. The key is to keep the heat moderate so the batter doesn’t overcook on the edges while the center remains molten. I’ve found that microwaving in 15‑second bursts gives the best control.
Why Your Nose Knows Best
Before you open the microwave, listen for that faint, sweet aroma of cocoa melting. That’s the signal that the batter is almost ready. If you open too early, you’ll get a raw, dry center; too late, and you’ll have a gooey mess that sticks to the mug. Trust your nose—your senses are the best judge of doneness.
The 5‑Minute Rest That Changes Everything
Resting the brownie for a full five minutes after microwaving allows the heat to distribute evenly, resulting in a firmer yet still tender texture. During this rest, the cocoa’s flavors deepen, and the butter’s richness settles into the batter. I’ve tried skipping the rest, and the brownie felt oddly soft and uneven.
Use a Light‑Colored Mug for Better Heat Distribution
Dark mugs absorb more heat, which can cause the brownie to cook unevenly. Switching to a light‑colored mug ensures a more even bake, preventing the edges from burning while the center remains undercooked. This simple change can be the difference between a perfect brownie and a disaster.
Experiment with Sweeteners
Instead of granulated sugar, try coconut sugar or raw honey for a subtle caramel note. These sweeteners also add moisture, which can help keep the brownie from drying out. Just remember that honey will increase the liquid content slightly, so you may need to reduce the butter by a teaspoon.
Creative Twists and Variations
This recipe is a playground. Here are some of my favorite ways to switch things up:
Nutty Crunch
Add a tablespoon of chopped walnuts or pecans before microwaving. The nuts will toast slightly, adding a delightful crunch that contrasts with the soft brownie.
Peanut Butter Swirl
Stir in a tablespoon of peanut butter before microwaving. The peanut butter melts into a silky swirl, giving a nutty depth that pairs beautifully with the chocolate.
Minty Delight
Replace vanilla extract with a few drops of peppermint extract. The mint adds a refreshing counterpoint to the rich chocolate, making it perfect for a summer treat.
Spiced Surprise
Sprinkle a pinch of cinnamon or a dash of cayenne pepper into the batter. The spice adds warmth or heat, turning the brownie into a multi‑sensory experience.
Chewy Caramel
Top the finished brownie with a spoonful of caramel sauce and a sprinkle of sea salt. The caramel’s sweetness and the salt’s contrast create a complex flavor profile.
Vegan Version
Swap the butter for coconut oil, the egg for a flaxseed egg, and the sugar for coconut sugar. The result is a vegan, gluten‑free brownie that’s just as indulgent.
Storing and Bringing It Back to Life
Fridge Storage
Store the finished brownie in an airtight container in the refrigerator for up to three days. The moisture from the fridge will keep the brownie soft, but the edges may become slightly firmer.
Freezer Friendly
Wrap the brownie in plastic wrap and place it in a freezer bag. It can be frozen for up to two weeks. When ready to eat, thaw at room temperature for 30 minutes before microwaving again for 15 seconds.
Best Reheating Method
To revive a refrigerated brownie, add a tiny splash of water (about a teaspoon) to the mug before microwaving. The water steams the brownie, restoring its moisture and preventing it from becoming dry. Heat on high for 15 seconds, then check the center.