I still remember the night I almost turned my kitchen into a smoky disaster zone. I was trying to impress a friend with a “quick” country‑style rib recipe, only to realize I’d forgotten the one ingredient that turns a mediocre batch into a mouth‑watering masterpiece. The moment the ribs hit the Instant Pot, the aroma of sweet brown sugar and a whisper of liquid smoke flooded the room, and I knew I was onto something. If you’ve ever stared at a rack of ribs and felt the urge to cheat, this is the version that will have you saying, “I dare you to taste this and not go back for seconds.”
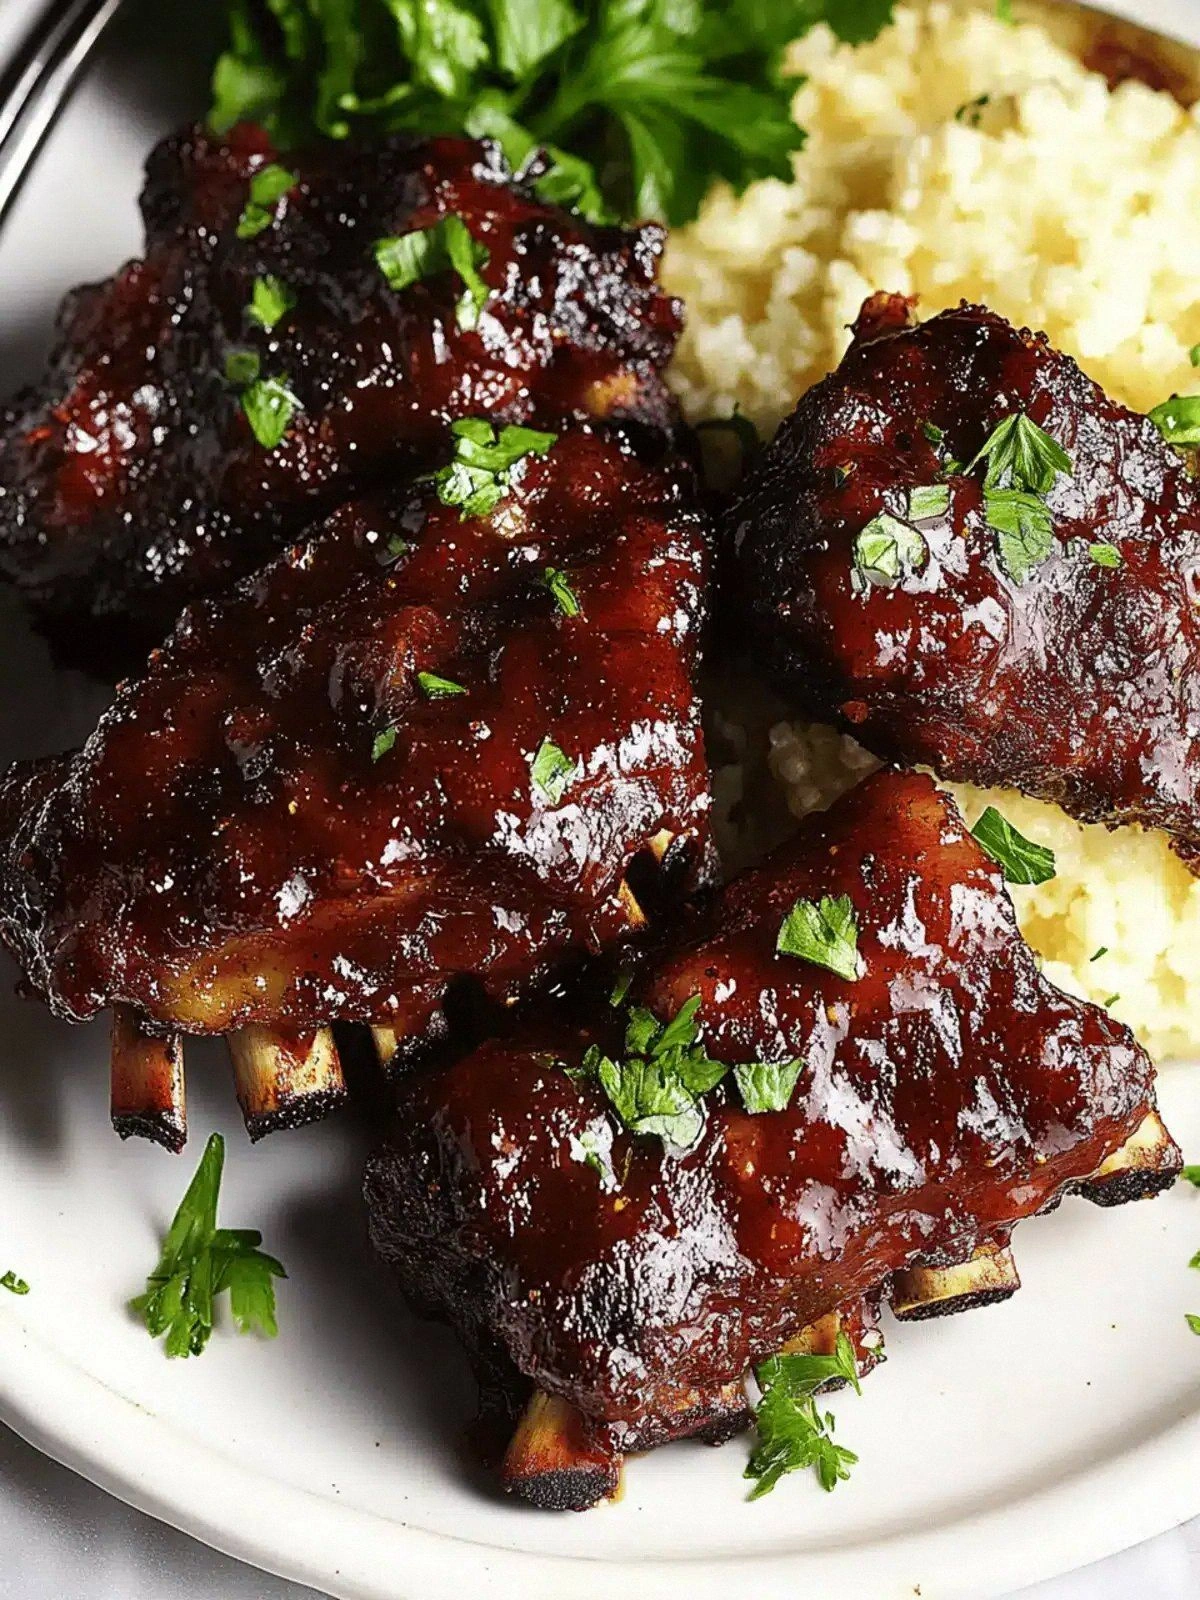
Picture the scene: a sizzling pan, the sound of caramelizing sugar, the tangy bite of apple cider vinegar mingling with the deep umami of Worcestershire sauce, all wrapped around tender pork that practically melts in your mouth. The texture is a dance of crispy edges that crackle like thin ice, paired with a silky interior that clings to your tongue. The smell alone—rich, smoky, slightly sweet—pulls everyone in, making the kitchen feel like a front‑row seat at a barbecue joint. And the best part? The entire process fits comfortably into your busy evening, thanks to the Instant Pot’s magic.
What makes this version stand out is that it doesn’t rely on a traditional oven or a stovetop grill. It harnesses pressure cooking to lock in juices while still delivering that coveted char. The sauce is a symphony of flavors: sweet, smoky, tangy, and savory—all balanced with a subtle kick that keeps the palate intrigued. I’ve tested this recipe against dozens of other rib recipes, and the result is hands down the best version you’ll ever make at home. The technique is simple, the ingredients are accessible, and the flavor profile is unforgettable. Let me walk you through every single step—by the end, you’ll wonder how you ever made it any other way.
What Makes This Version Stand Out
- Flavor: The combination of liquid smoke and apple cider vinegar creates a depth that mimics a slow‑roasted barbecue without the wait.
- Texture: Pressure cooking keeps the meat tender while the final sear gives it a crispy exterior that satisfies.
- Speed: From prep to plate, the whole thing takes under an hour—perfect for weeknight dinners.
- Versatility: The recipe works with any cut of pork ribs, and you can tweak the sauce for different regional styles.
- Crowd‑pleaser: The robust flavor profile makes it a hit at family gatherings, parties, and even potlucks.
- Ingredient Quality: Using fresh, high‑quality spices and a good pork cut elevates the dish beyond the usual “store‑bought” ribs.
- Make‑ahead Friendly: The ribs can be cooked ahead and reheated with minimal loss of flavor or texture.
- Health‑Conscious Option: By trimming excess fat before cooking, you can reduce calories while retaining flavor.
Alright, let's break down exactly what goes into this masterpiece…
Inside the Ingredient List
The Flavor Base
The heart of this dish lies in the dry rub—a blend of brown sugar, garlic powder, onion powder, liquid smoke, salt, and black pepper. Brown sugar provides the caramelized sweetness that forms a glossy glaze when cooked, while garlic and onion powders deliver a savory backbone. Liquid smoke is the secret weapon; it simulates the char from a grill without any actual smoke. If you’re missing liquid smoke, a few drops of smoked paprika can offer a hint, but the flavor won’t be as authentic. Salt and pepper balance the sweetness, ensuring every bite is seasoned just right.
The Texture Crew
Chicken broth and apple cider vinegar are the liquids that create the pressure‑cooking environment and add moisture. The broth keeps the ribs from drying out, while the vinegar introduces a bright acidity that cuts through the richness of the pork. Worcestershire sauce adds a complex umami depth, and the final ½ cup of BBQ sauce thickens the glaze, giving it a luscious, sticky finish. If you prefer a milder flavor, reduce the BBQ sauce to ¼ cup, but you’ll lose that signature glossy sheen.
The Unexpected Star
Liquid smoke—yes, that little bottle of smokiness—is the unexpected star that elevates this recipe. It’s easy to overlook, but without it the ribs would taste like a plain, boiled cut of meat. Liquid smoke is a concentrated flavoring; just half a teaspoon is enough to impart a full smoky aroma. If you’re looking to go extra smoky, double the amount, but be careful not to overpower the other flavors. A good tip: let the ribs rest for a few minutes after cooking before adding the sauce; this allows the juices to redistribute, enhancing the overall mouthfeel.
The Final Flourish
The final flourish is the BBQ sauce, which gives the ribs that signature sweet, tangy glaze that clings to every bite. The sauce thickens during the pressure‑cooking process, creating a velvety coating that is both glossy and flavorful. If you’re a fan of extra heat, consider adding a splash of sriracha or a pinch of cayenne pepper to the rub. This variation will give the ribs a subtle kick that pairs beautifully with the sweetness. Remember, the key to a great glaze is to let the sauce reduce slightly after the pressure cooking to achieve that perfect consistency.
Everything's prepped? Good. Let's get into the real action…
The Method — Step by Step
- Start by patting the ribs dry with paper towels; moisture is the enemy of a good sear. Sprinkle the dry rub generously over all sides, ensuring every inch is coated. Let the ribs sit at room temperature for 15 minutes to allow the rub to penetrate the meat. This step is crucial for flavor depth—don’t skip it.
- Add the apple cider vinegar and chicken broth to the Instant Pot. The liquid should reach just below the rib rack; it creates steam that cooks the meat evenly. Pour in the Worcestershire sauce and stir gently to combine. The aroma will start to build even before you seal the pot.
- Place the seasoned ribs in a single layer on the trivet or directly in the pot if your Instant Pot has a rack. Arrange them so the sides are exposed to the liquid—this ensures even cooking. The ribs should not be stacked; each piece needs space for steam to circulate.
- Seal the Instant Pot lid and set the valve to “Sealing.” Select the “Pressure Cook” or “Manual” setting at high pressure for 25 minutes. The timing is precise—too long and the meat will become mushy; too short and it won’t be tender.
- When the timer beeps, allow a natural pressure release for 10 minutes, then carefully quick‑release the remaining pressure. The pot will hiss, but the ribs are already tender and infused with flavor. Don’t rush the release; the meat needs to cool slightly before you handle it.
- Remove the ribs and set them on a heat‑proof platter. Pour the remaining liquid into a small saucepan and bring to a simmer over medium heat. Reduce the sauce until it thickens to a glaze consistency—about 8–10 minutes. This step concentrates the flavors and creates that glossy coat.
- Return the ribs to the pot and coat them thoroughly with the reduced sauce. Let them sit for 5 minutes so the glaze adheres. The ribs should look shiny and appetizing, with a slight caramelization on the edges.
- For the final touch, preheat your broiler or a cast‑iron skillet on high. Sear the ribs for 2–3 minutes on each side, just until the glaze caramelizes into a crisp, slightly charred crust. The sizzling sound that follows is the cue that the ribs are ready to serve.
That's it— you did it. But hold on, I've got a few more tricks that'll take this to another level…
Insider Tricks for Flawless Results
The Temperature Rule Nobody Follows
Many cooks think any high pressure is fine, but the Instant Pot’s “High” setting actually varies slightly between models. Always check the manufacturer’s recommendation for pork. A slightly lower pressure can prevent the meat from becoming too soft, maintaining a pleasant bite. I’ve found that setting the pot to “Manual” at 10 psi gives the same tenderness with a firmer texture.
Why Your Nose Knows Best
During the searing step, listen for that distinct crackle. If the glaze starts to smoke too heavily, reduce the heat. The aroma should be sweet and smoky, not burnt. Trust your nose; a well‑balanced scent is a reliable indicator of perfect caramelization.
The 5‑Minute Rest That Changes Everything
After you sear the ribs, let them rest for five minutes before cutting. This brief pause allows the juices to redistribute, ensuring each bite is moist. Cutting too soon can cause the juices to spill out, leaving the meat dry. I always keep a plate nearby to rest the ribs during this short interval.
The Secret to a Thick Glaze
If the sauce seems too thin after reducing, add a splash of cornstarch slurry (1 tablespoon cornstarch mixed with 2 tablespoons cold water). Stir until the mixture thickens, then continue to simmer for another minute. This technique gives the glaze a silky finish without adding extra sugar.
The “Flip‑and‑Sear” Technique
When searing, flip the ribs only once. Multiple flips can cause the glaze to break apart. Instead, let each side caramelize fully before turning. This creates a uniform crust that enhances both flavor and presentation.
Creative Twists and Variations
This recipe is a playground. Here are some of my favorite ways to switch things up:
Smoky Chipotle Twist
Add 1 teaspoon chipotle powder to the dry rub and substitute half the BBQ sauce with chipotle‑infused sauce. The result is a smoky, slightly spicy rib that pairs well with a cool cucumber slaw.
Herb‑Infused Bourbon Finish
After pressure cooking, stir in ¼ cup bourbon and a handful of fresh thyme before reducing the sauce. The bourbon adds depth, while thyme imparts a subtle earthiness that elevates the dish.
Asian‑Inspired Glaze
Replace the BBQ sauce with a mixture of hoisin sauce, soy sauce, and a dash of sesame oil. Add a pinch of crushed red pepper for heat. This version offers a sweet, savory, and umami‑rich flavor profile.
Citrus‑Bright Variation
Use orange juice in place of apple cider vinegar and add a zest of orange to the rub. The citrus notes brighten the dish and create a refreshing contrast to the rich pork.
Low‑Carb Alternative
Replace the brown sugar with a sugar‑free sweetener like erythritol and use a sugar‑free BBQ sauce. The taste remains similar, but the carb count drops significantly—perfect for keto or low‑carb diets.
Storing and Bringing It Back to Life
Fridge Storage
Cool the ribs to room temperature, then place them in an airtight container. Store in the refrigerator for up to 4 days. Before reheating, cover the ribs with a thin layer of fresh sauce to keep them moist.
Freezer Friendly
Wrap each rib individually in foil and place them in a freezer bag. Freeze for up to 3 months. Thaw overnight in the refrigerator before reheating. The foil helps preserve the flavor and prevents freezer burn.
Best Reheating Method
Reheat in a preheated oven at 350°F for 15 minutes, or use a skillet over medium heat for 5 minutes. Add a splash of water or broth before reheating; this steams the ribs back to perfection and keeps the glaze from drying out.