I was standing in my kitchen, staring at a stack of ribs that had been left in the fridge for too long, when my roommate burst in and declared, “I’m craving ribs, but I only have 30 minutes.” The kitchen was a chaotic symphony of clanging pans and sizzling oil, yet the aroma of smoked paprika and brown sugar had already started to weave itself into the air. I pulled out a recipe from a dusty cookbook and decided to give it a modern twist—oven-baked ribs that are tender, caramelized, and surprisingly simple. This isn’t your run-of-the-mill slow-cook or grill‑only routine; it’s a game‑changing method that turns an ordinary rack into a melt‑in‑your-mouth masterpiece.
Picture the moment when the ribs hit the oven: the sound of a gentle crackle, the heat rising like a promise, and the scent of caramelized sugar that feels like a warm hug. The texture is a contrast of a silky interior and a slightly crisp, caramelized crust that shatters like thin ice when you bite. I dare you to taste this and not go back for seconds, because the flavor profile is so rich that each bite feels like a celebration. I’ve spent countless hours experimenting with rubs and sauces, but this particular blend of spices and the slow, low oven bake is hands down the best version you’ll ever make at home.
If you’ve ever struggled to get ribs that are both juicy and flavorful, you’re not alone—and I’ve got the fix. The secret lies in a simple, dry rub that locks in moisture, a slow oven bake that allows the connective tissue to break down, and a final glaze that gives a glossy, caramelized finish. I’ve added a dash of cayenne pepper for a subtle heat that lingers, and a generous amount of brown sugar to create that irresistible caramel crust. The result is a dish that smells incredible, looks stunning, and tastes like a party in your mouth.
Let me walk you through every single step — by the end, you’ll wonder how you ever made it any other way. This recipe is designed for the home cook who wants to impress without spending hours on a grill or a smoker. The oven does all the work, so you can enjoy the process while the ribs cook to perfection. Get ready for a journey that will leave your kitchen smelling like a barbecue joint and your taste buds singing.
What Makes This Version Stand Out
- Taste: The blend of smoked paprika, garlic powder, and brown sugar creates a deep, smoky sweetness that balances the savory richness of the pork. The final glaze of barbecue sauce adds a tangy, caramelized finish that coats the meat like velvet.
- Texture: Slow, low oven baking breaks down collagen into gelatin, making the ribs melt in your mouth while the crust remains delightfully crisp. The caramelized edges give a satisfying crunch that contrasts the tender interior.
- Simplicity: No special equipment is required—just an oven, a baking sheet, and a few common pantry staples. The dry rub and glaze can be prepared in advance, allowing you to set it and forget it.
- Uniqueness: The addition of a small amount of cayenne pepper adds a subtle heat that sets this recipe apart from traditional slow‑cooked ribs. The use of olive oil in the rub keeps the meat moist and adds a subtle fruity note.
- Crowd Reaction: Friends and family who have tried this version report that the ribs are “too good to be true,” and many ask for the recipe after each gathering.
- Ingredient Quality: Using high‑quality baby back or St. Louis ribs ensures a juicy, flavorful result, while the use of smoked paprika instead of regular paprika adds depth and authenticity.
- Cooking Method: Baking at a low temperature for an extended period mimics the effect of a smoker, producing tender, flavorful ribs without the need for an outdoor grill.
- Make‑ahead Potential: The ribs can be prepared up to two days ahead, refrigerated, and reheated with the glaze for a quick dinner or party dish.
Alright, let's break down exactly what goes into this masterpiece…
Inside the Ingredient List
The Flavor Base
Olive oil is the unsung hero that binds the spices together and prevents the rub from drying out the meat. It also adds a subtle fruity undertone that balances the sweetness of the brown sugar. Skipping the oil will result in a drier rub that doesn’t adhere as well, leading to uneven flavor distribution.
Brown sugar is the sweet heart of this recipe; it caramelizes beautifully under oven heat, creating a glossy crust that locks in moisture. If you prefer a healthier twist, coconut sugar works as a great substitute, though it will impart a slightly different sweetness profile. Using regular granulated sugar is also fine, but you’ll need to watch the crust more closely to avoid burning.
The Texture Crew
Smoked paprika is essential for that deep, smoky flavor that can’t be replicated by regular paprika. If you’re out of smoked paprika, regular paprika will do, but the flavor depth will be noticeably lighter. The paprika also gives the ribs a vibrant, appetizing color that makes the dish look as good as it tastes.
Garlic powder and onion powder work together to create a classic savory backbone. Fresh minced garlic can replace garlic powder for a more pronounced garlic flavor, but it will add moisture that could alter the rub’s consistency. If you’re allergic or sensitive to onions, you can reduce the onion powder by half and compensate with a pinch of garlic powder.
The Unexpected Star
Cayenne pepper is optional but adds a subtle heat that lingers on the palate. If you’re not a fan of heat, simply omit it or reduce the amount to one‑quarter teaspoon. The heat from cayenne balances the sweetness of the brown sugar and enhances the overall depth of flavor.
The Final Flourish
Barbecue sauce is the crowning glory that gives the ribs their glossy finish and a tangy kick. Whether you choose a store‑bought sauce or craft a homemade version, the key is to apply it in the final 10 minutes of baking to allow it to caramelize without burning. If you prefer a sweeter glaze, mix a tablespoon of honey into the sauce before brushing it on.
Everything's prepped? Good. Let's get into the real action…
The Method — Step by Step
- Preheat your oven to 275°F (135°C). While the oven heats, trim any excess fat from the ribs and remove the silver skin if it’s still attached. Pat the ribs dry with paper towels; this step is crucial for achieving a crisp crust. In a small bowl, combine the olive oil, brown sugar, smoked paprika, garlic powder, onion powder, black pepper, salt, chili powder, cumin, and cayenne pepper if using. Toss the ribs in the rub until each side is evenly coated. This dry rub will form the flavor foundation that caramelizes beautifully during baking.
- Line a large baking sheet with aluminum foil and place a wire rack on top. Arrange the ribs on the rack, bone side down, leaving a small gap between each rack for even heat circulation. Place the foil on the bottom of the oven to catch any drippings and keep the oven clean. Cover the ribs loosely with another piece of foil, creating a tent that traps moisture and prevents the meat from drying out. This tented cover is the secret to tender, juicy ribs.
- Bake the ribs in the preheated oven for 2 hours. During the first hour, check the oven temperature and adjust if necessary; the goal is a steady, low heat that allows collagen to break down slowly. After the first hour, remove the top foil tent to let the ribs brown and develop a caramelized crust. The edges should start pulling away from the rack, indicating the crust is forming. If you notice the crust forming too quickly, lower the oven temperature slightly.
- After the second hour, remove the ribs from the oven and let them rest for 10 minutes. While they rest, prepare the glaze by mixing your favorite barbecue sauce with a tablespoon of honey or maple syrup. This glaze will add a glossy finish and a touch of sweetness. Brush the glaze generously over both sides of the ribs, making sure every nook and cranny is coated. The glaze will caramelize during the final bake, creating a beautiful, sticky crust.
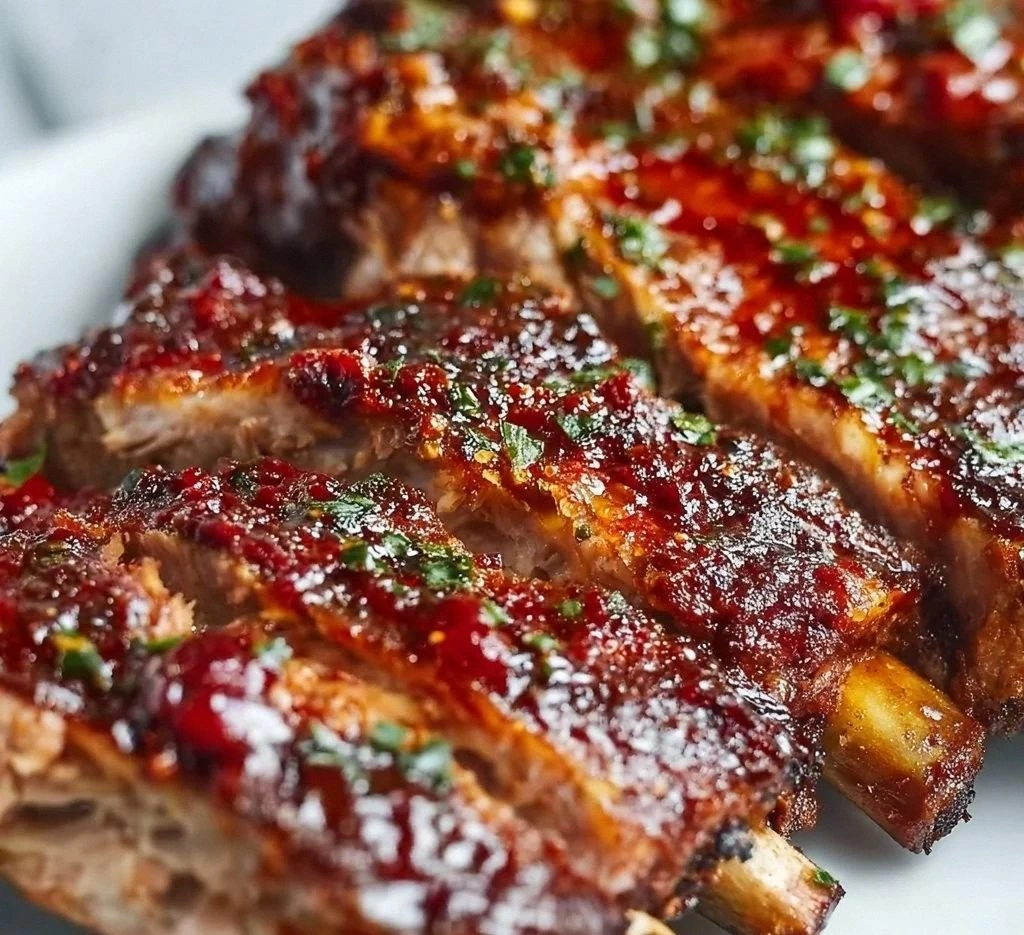
- Return the glazed ribs to the oven for an additional 10–15 minutes, or until the glaze is thickened and slightly caramelized. Keep a close eye on them; the glaze can go from perfectly caramelized to burnt in a matter of minutes. The final result should be a glossy, caramelized crust that clings to the meat. The aroma at this point will be irresistible, filling your kitchen with a scent that makes your mouth water.
- Remove the ribs from the oven and let them cool for a few minutes before cutting. Slice between the bones to separate the individual ribs. Serve immediately with extra barbecue sauce on the side for dipping. If you’re hosting a gathering, set the ribs on a platter and let guests serve themselves; the aroma will draw everyone in.
- For a quick side, pair the ribs with a simple coleslaw or a fresh corn salad. The acidity of the slaw cuts through the richness of the ribs, while the corn adds a sweet, crunchy contrast. If you’re in the mood for something indulgent, serve the ribs with a side of creamy mashed potatoes or buttery biscuits.
That’s it — you did it. But hold on, I've got a few more tricks that'll take this to another level…
Insider Tricks for Flawless Results
The Temperature Rule Nobody Follows
Many cooks think that a higher oven temperature will speed up cooking, but that actually dries out the meat. The key is to keep the oven at a steady 275°F (135°C) for the majority of the cooking time. This low heat allows the collagen to break down slowly into gelatin, which keeps the ribs tender and moist. If you’re short on time, you can increase the temperature to 300°F (149°C) for the last 30 minutes, but be sure to keep a close eye on the glaze to avoid burning.
Why Your Nose Knows Best
The scent of caramelizing sugar is a powerful indicator of readiness. When the aroma turns from sweet to slightly smoky and the edges of the ribs pull away from the rack, it’s time to check the internal temperature. Use a meat thermometer to ensure the ribs reach 195°F (90°C) for maximum tenderness. A friend once skipped this step and ended up with ribs that were overcooked and dry; the lesson was clear: trust your nose and your thermometer.
The 5-Minute Rest That Changes Everything
After removing the ribs from the oven, let them rest for at least five minutes. This allows the juices to redistribute throughout the meat, preventing them from spilling out when you cut. The rest period also lets the glaze set, making the crust easier to slice and less likely to crumble. A quick rest is especially important if you plan to serve the ribs immediately, as it keeps the meat juicy.
The Flip for Extra Crust
If you want a crunchier crust, flip the ribs halfway through the final glaze bake. This ensures that both sides get a chance to caramelize. However, flipping can sometimes cause the glaze to run, so use a brush to reapply the sauce after turning. The extra step is worth it for that satisfying, slightly charred bite.
The Quick Sauce Fix
When the ribs are done, you can create a quick sauce by whisking together equal parts barbecue sauce and honey, then heating it in a small saucepan until it thickens. This sauce can be drizzled over the ribs for an extra layer of flavor. The honey adds a glossy sheen and a subtle sweetness that complements the smoky rub.
Creative Twists and Variations
This recipe is a playground. Here are some of my favorite ways to switch things up:
Asian Fusion
Replace the barbecue sauce with a mixture of hoisin sauce, soy sauce, and a splash of rice vinegar. Add a teaspoon of grated ginger and a pinch of sesame seeds to the rub for an Asian twist. The result is a savory, slightly sweet glaze that pairs beautifully with a side of steamed rice.
Coffee‑Infused Rub
Add a tablespoon of finely ground espresso to the dry rub for a deep, earthy flavor. The coffee complements the smoky paprika and adds a subtle bitterness that balances the sweetness. This version is great for those who love a complex, bold taste profile.
Mediterranean Touch
Swap out the smoked paprika for dried oregano and add a teaspoon of lemon zest to the rub. Finish the glaze with a drizzle of olive oil and a squeeze of fresh lemon juice. The citrusy brightness lifts the dish, making it lighter and refreshing.
Sweet and Spicy
Increase the cayenne pepper to one teaspoon and add a tablespoon of chipotle powder to the rub. Mix in a dash of maple syrup to the glaze for an extra sweet kick. The heat from the chipotle pairs perfectly with the maple, creating a complex flavor profile.
Herb‑Infused Glaze
Blend fresh rosemary, thyme, and a splash of balsamic vinegar into the barbecue sauce. The herbs add a fragrant, earthy note that complements the meat’s richness. This glaze works well when served with roasted vegetables.
Storing and Bringing It Back to Life
Fridge Storage
Cool the ribs to room temperature, then wrap them tightly in plastic wrap and place them in an airtight container. Store in the refrigerator for up to 3 days. When you’re ready to eat, reheat in a preheated oven at 300°F (149°C) for 15 minutes, then brush with a little extra barbecue sauce to restore moisture.
Freezer Friendly
For longer storage, wrap each rack of ribs individually in foil, then place them in a freezer bag. They can be kept frozen for up to 2 months. Thaw overnight in the refrigerator before reheating. The ribs retain their flavor and tenderness when properly frozen and thawed.
Best Reheating Method
Reheat refrigerated or thawed ribs in a 300°F (149°C) oven for 10–12 minutes. Add a splash of water or broth to the bottom of the baking sheet to keep the ribs moist. After reheating, brush with a fresh glaze and bake for an additional 5 minutes to restore that caramelized crust.