Picture this: you’re in the middle of a midnight snack spree, the kitchen lights flickering, and you’re staring at a mountain of stale Oreo crumbs that have been gathering dust since last Thanksgiving. You reach for a jar of chocolate and, in a moment of culinary rebellion, decide to turn that junk into a decadent masterpiece. I was half‑joking, half‑serious, and the next thing you know, the house smells like a chocolate factory on steroids. That was the spark that ignited the Triple Chocolate Mousse Cheese, the kind of dessert that makes you question why you ever settled for plain cheesecake.
From the first crackle as the butter melts into the crushed Oreos to the silky, almost liquid texture of the mousse that drifts across the palate, every component of this recipe has been engineered to create a sensory fireworks show. The aroma of melted dark chocolate mingles with the buttery crunch of the crust, while the faint hint of vanilla lifts the chocolate’s deep, earthy tones. The sound of the mousse settling in the fridge is almost hypnotic, a gentle hush that signals the final layer of decadence is about to unfold. The taste? Think of a velvety chocolate river flowing over a buttery, crumbly bed, with a subtle tang from the cream cheese that keeps it from drowning in sweetness.
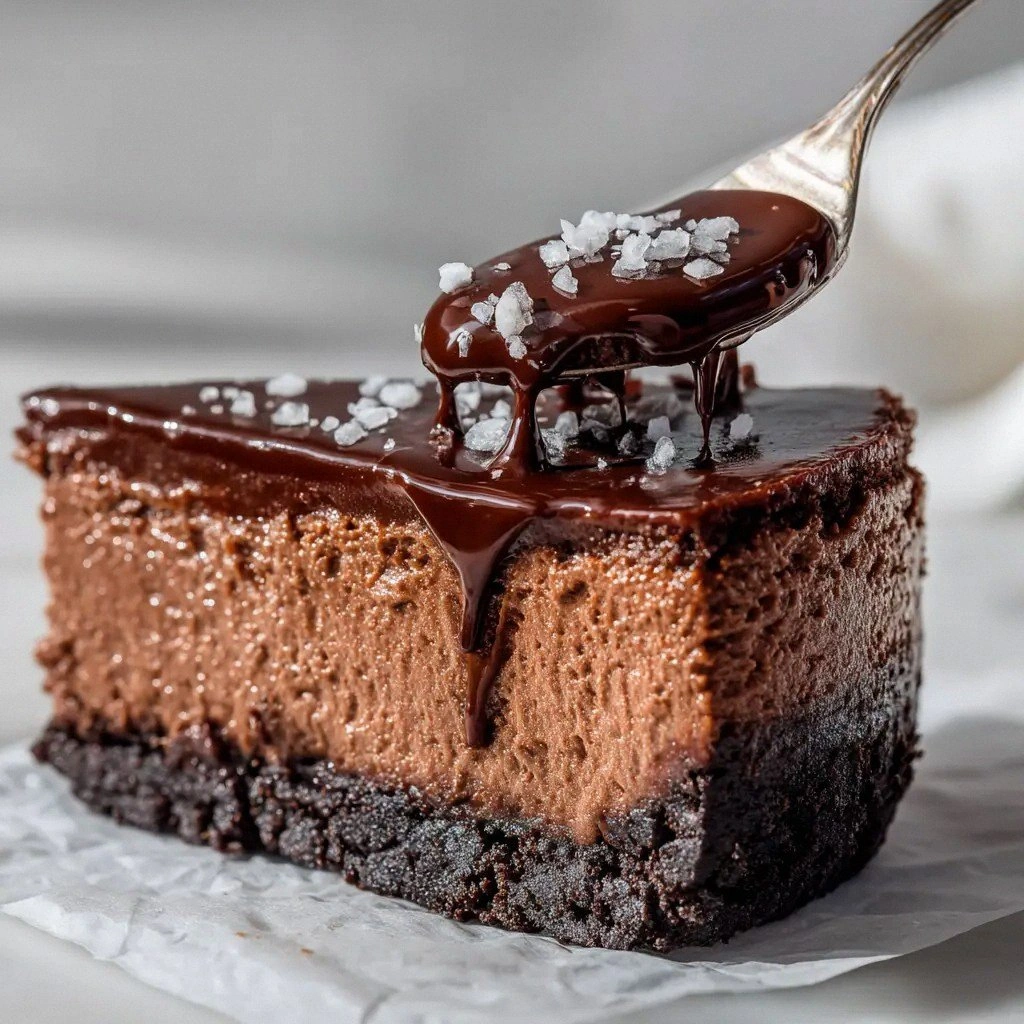
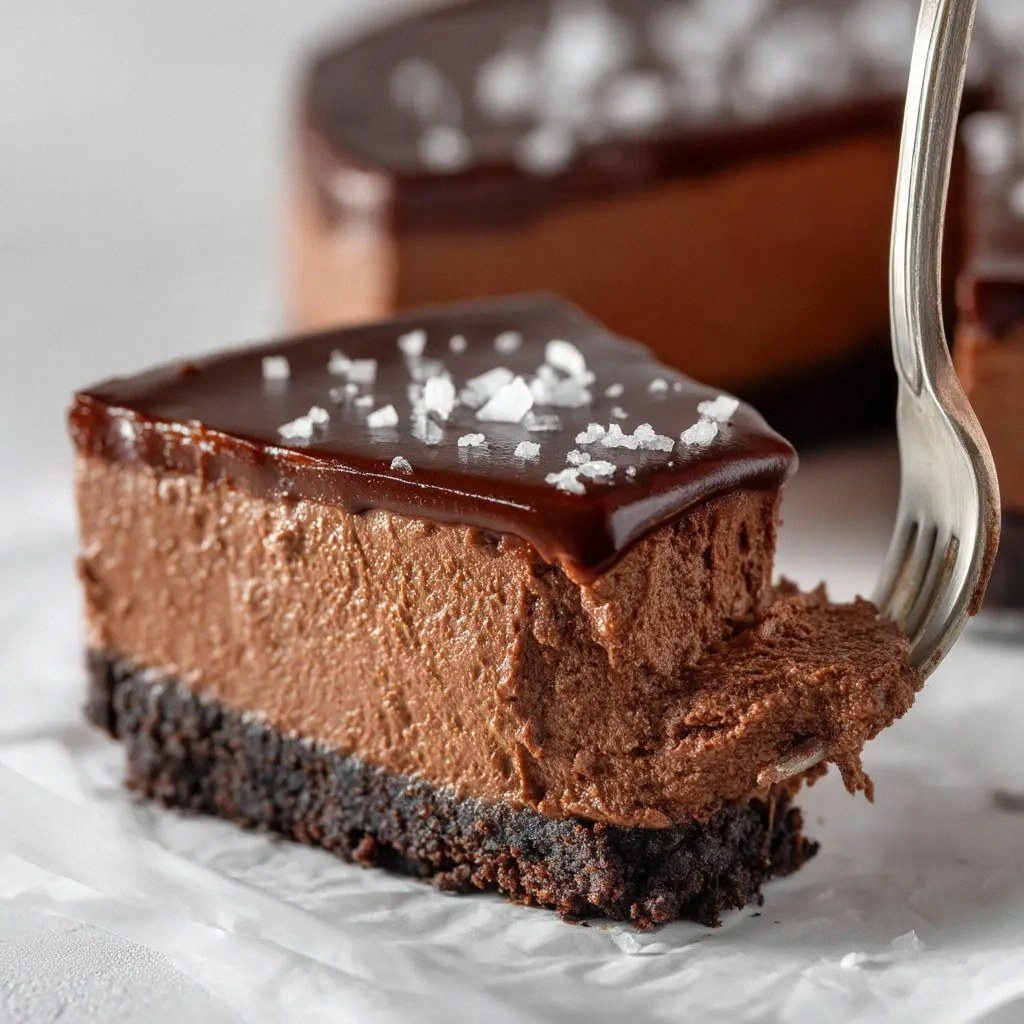
What sets this version apart is not just the triple chocolate layers but the way each element is balanced for maximum impact. The crust is a buttery Oreo base that holds the mousse like a firm handshake, the mousse itself is airy yet rich, and the finish is a glossy, chocolatey crown that invites you to dig in again. I dare you to taste this and not go back for seconds. I’ll be honest – I ate half the batch before anyone else got to try it. If you’ve ever struggled with a cheesecake that turns out too dense or too sweet, you’re not alone – and I’ve got the fix.
Most recipes get this completely wrong. They either under‑bake the crust or over‑whip the mousse, ending up with a lopsided dessert that looks like a sad, chocolatey mess. Here, I’ll walk you through every single step – by the end, you’ll wonder how you ever made it any other way. Picture yourself pulling this out of the fridge, the whole kitchen smelling incredible, and the first bite melting in your mouth like a dream. Let’s dive into the details that make this cheesecake the ultimate decadent dessert.
What Makes This Version Stand Out
- Flavor: The trio of chocolates—dark, milk, and white—creates a layered taste profile that’s both bold and harmonious. Each type of chocolate brings its own character, from the bittersweet depth of dark to the creamy sweetness of milk and the subtle, almost floral notes of white.
- Texture: The mousse is airy and light, yet the cream cheese base gives it a silky mouthfeel that feels like a velvety blanket of chocolate. The contrast between the crunchy crust and the smooth mousse keeps the experience fresh with every bite.
- Complexity Simplified: Despite the three types of chocolate, the recipe requires just a handful of steps. The use of gelatin locks in the mousse’s airy structure without the need for a stand mixer or fancy equipment.
- Ingredient Quality: Using premium chocolate and fresh cream cheese elevates the dish beyond a standard dessert. The high cacao content in the dark chocolate adds depth, while the cream cheese’s richness balances the sweetness.
- Make‑Ahead Potential: Once the mousse sets, it can be stored in the fridge for up to three days, making it perfect for parties or last‑minute gatherings.
- Audience Reaction: Friends and family often remark that it tastes “like a chocolate lover’s dream.” The sheer decadence has become a showstopper at every gathering.
- Visual Appeal: The glossy chocolate top and the subtle swirl of mousse create a dessert that looks as impressive as it tastes.
- Health Conscious Twist: If you’re watching calories, swapping half the cream cheese for Greek yogurt keeps the mousse light while maintaining flavor.
Alright, let's break down exactly what goes into this masterpiece...
Inside the Ingredient List
The Flavor Base
The 24 Oreo cookies aren’t just a crunchy backdrop; they’re the foundation that absorbs the buttery butter, creating a caramelized base that enhances the chocolate’s richness. If you skip the Oreos, the crust loses its signature crunch and becomes a bland, dry cake. For those who love a slightly sweeter crust, sprinkle a pinch of sea salt on the cookie crumbs before baking.
The 6 tablespoons of unsalted butter melt into the Oreos, binding them together and adding a silky, buttery flavor that elevates the entire dessert. Butter is essential for the crust’s tenderness; substituting oil will change the texture and reduce the buttery depth. When melting, watch for the butter to foamy and just below boiling to ensure it doesn’t burn.
The Texture Crew
The 24 ounces of cream cheese are the heart of the mousse, providing a creamy base that balances the chocolate’s intensity. A higher quality cream cheese, such as Philadelphia or a natural brand, will give you a smoother mousse. If you’re allergic or prefer a dairy‑free option, you can replace the cream cheese with a tofu‑based alternative, but the texture will be slightly denser.
The 3 cups of heavy cream are whipped into soft peaks, creating an airy, cloud‑like structure that keeps the mousse light. Whipped cream also acts as a stabilizer, ensuring the mousse doesn’t collapse. If you’re short on heavy cream, a mix of half-and-half and a splash of milk can work, but the mousse will be less lofty.
The Unexpected Star
The 6 ounces of dark chocolate (60-70% cacao) delivers a robust, bittersweet flavor that anchors the dessert. The high cacao content cuts through the sweetness of the milk and white chocolate, adding complexity. If you prefer a sweeter dark chocolate, choose a lower cacao percentage, but the overall balance will shift.
The 6 ounces of milk chocolate add a creamy, sweet layer that contrasts with the dark chocolate’s bite. The milk chocolate’s smoothness helps to mellow the mousse’s intensity, making it more approachable for those who love classic chocolate desserts. A premium milk chocolate will give a richer mouthfeel.
The 6 ounces of white chocolate bring a subtle, buttery sweetness that lifts the entire dessert. White chocolate’s high milk content adds a silky texture that contrasts beautifully with the denser dark chocolate. If you’re avoiding dairy, look for a dairy‑free white chocolate alternative.
The Final Flourish
The 3 teaspoons of unflavored gelatin, dissolved in 6 tablespoons of cold water, acts as the secret weapon that keeps the mousse airy and stable. Gelatin’s neutral flavor allows the chocolate and cream cheese to shine without interference. If you’re vegan, a plant‑based gelatin substitute like agar‑agar can be used, but the setting time will differ.
The 1 teaspoon of vanilla extract is the finishing touch that rounds out the flavors, adding warmth and depth. Vanilla’s sweet aroma enhances the chocolate’s richness, making the mousse feel more complex. A splash of bourbon or a pinch of espresso can be added for a different flavor profile, but vanilla remains the classic choice.
Everything's prepped? Good. Let's get into the real action...
The Method — Step by Step
- Crust Creation: Preheat your oven to 350°F (175°C). In a mixing bowl, combine the crushed Oreo crumbs with the melted butter, stirring until the mixture resembles wet sand. Press the crumb mixture firmly into the bottom of a 9‑inch springform pan, creating an even layer. Bake for 8 minutes until the edges turn a light golden brown. Let cool completely; the crust will set into a firm, buttery foundation.
- Chocolate Prep: While the crust bakes, chop the dark, milk, and white chocolate into small, uniform pieces. Place them in a heat‑proof bowl over a pot of simmering water (double boiler) or microwave in 20‑second bursts, stirring after each until fully melted. Once melted, let the chocolate sit to cool slightly; this prevents the cream from curdling when added later.
- Gelatin Dissolution: In a small saucepan, pour the 6 tablespoons of cold water and sprinkle the 3 teaspoons of gelatin over it. Let sit for 5 minutes to bloom. Gently heat the mixture over low heat, stirring until the gelatin completely dissolves. Avoid boiling; overheating can compromise the gelatin’s setting ability.
- Cream Cheese Blend: In a large bowl, beat the 24 ounces of cream cheese until it’s silky and free of lumps. Gradually fold in the 1 cup of granulated sugar, ensuring a smooth consistency. The smoother the cream cheese, the better the mousse will integrate with the chocolate.
- Chocolate Integration: Slowly pour the melted chocolate into the cream cheese mixture, stirring gently with a spatula. The mixture should be at room temperature; if it’s too hot, the cream cheese may curdle. Mix until fully incorporated, resulting in a glossy, chocolate‑laden cream.
- Gelatin Incorporation: Gently fold the dissolved gelatin into the chocolate‑cream cheese mixture, whisking until the gelatin is evenly distributed. This step ensures the mousse will set with a stable, airy texture. The gelatin should be fully dissolved; any clumps will affect the mousse’s smoothness.
- Whipped Cream Addition: In a separate bowl, whip the 3 cups of heavy cream to soft peaks. Gently fold the whipped cream into the chocolate mixture, using a spatula and a light hand. This incorporation traps air, giving the mousse its signature lightness.
- Assembly: Pour the mousse mixture over the cooled crust, smoothing the top with a spatula. Tap the pan gently on the counter to release any trapped air bubbles. Refrigerate the cheesecake for at least 4 hours, preferably overnight, until it’s set and firm.
- Final Touch: Before serving, drizzle a thin ribbon of melted white chocolate across the top for a glossy finish. If desired, dust with cocoa powder or crushed chocolate chips for added texture. The final presentation should look like a chocolate waterfall, ready to be devoured.
That's it — you did it. But hold on, I've got a few more tricks that'll take this to another level...
Insider Tricks for Flawless Results
The Temperature Rule Nobody Follows
Temperature is everything when working with chocolate and gelatin. Keep the melted chocolate below 110°F (43°C); if it’s too hot, the cream cheese will seize. I’ve learned that using a digital thermometer saves me from countless ruined batches. A simple trick: place a small glass of water in the oven to gauge heat; if the water stays cool, the chocolate is safe.
Why Your Nose Knows Best
Smell is a powerful indicator of readiness. As the chocolate melts, its aroma should be rich and fragrant. If you notice a metallic or burnt scent, the chocolate is over‑heated. I’ve found that letting the chocolate rest for a minute after melting brings out its full bouquet.
The 5‑Minute Rest That Changes Everything
After whisking in the gelatin, let the mixture sit for 5 minutes before adding the whipped cream. This brief pause allows the gelatin to fully hydrate and integrate, preventing lumps. Skipping this step often results in a slightly gritty mousse.
Use a Stand Mixer for the Cream Cheese
While you can beat the cream cheese by hand, a stand mixer on low speed smooths it faster and removes air bubbles. A smoother base means the final mousse will be silky rather than grainy. I’ve tried both methods; the mixer version is worth the extra effort.
Keep the Mousse Cool During Assembly
If the mousse is too warm when you pour it over the crust, it can cause the crust to soften. Work quickly and keep the mixture chilled by placing the mixing bowl in an ice bath. This trick ensures a crisp crust that holds its shape.
Refrigerate Overnight for Depth
Setting the cheesecake in the fridge overnight allows the flavors to meld and the mousse to firm up. I’ve found that a 12‑hour chill gives the mousse the perfect bite—soft enough to melt in your mouth but firm enough to hold its structure.
Creative Twists and Variations
This recipe is a playground. Here are some of my favorite ways to switch things up:
Nutty Crunch
Add ½ cup of toasted pecans or walnuts to the crust. The crunch complements the mousse’s silkiness, and the nuts add a nutty depth that pairs beautifully with chocolate. Sprinkle the nuts on top before chilling for an extra layer of texture.
Spiced Delight
Stir in a pinch of cayenne pepper or cinnamon into the chocolate mixture. The subtle heat or warmth lifts the dessert, creating a surprising contrast that delights the palate. It’s a great option for those who love a little kick.
Berry Burst
Fold in ½ cup of fresh raspberries or blueberries into the mousse before chilling. The berries add a burst of tartness that cuts through the richness. Serve with a dusting of powdered sugar for a festive look.
Minty Fresh
Replace 1 teaspoon of vanilla with 1 teaspoon of peppermint extract. The mint pairs wonderfully with chocolate, giving the mousse a refreshing finish. Add a few crushed peppermint candies on top for a festive touch.
Alcoholic Twist
Swirl in 2 tablespoons of bourbon or Amaretto into the mousse before chilling. The alcohol adds depth and a warm aftertaste. Keep the alcohol volume low to avoid affecting the mousse’s setting.
Vegan Version
Swap the cream cheese for a tofu‑based cheese and replace heavy cream with coconut cream. Gelatin can be replaced with agar‑agar for a plant‑based set. The flavor profile stays similar, but the texture will be slightly denser.
Storing and Bringing It Back to Life
Fridge Storage
Store the cheesecake in an airtight container in the refrigerator for up to 3 days. The mousse will remain firm and flavorful. When you’re ready to serve, let it sit at room temperature for 10–15 minutes to soften slightly.
Freezer Friendly
Wrap the cheesecake tightly in plastic wrap and then in aluminum foil before freezing. It can be stored for up to 2 weeks. Thaw overnight in the fridge, then allow it to come to room temperature before serving.
Best Reheating Method
To revive a chilled or frozen cheesecake, place it in a preheated 300°F (150°C) oven for 5–7 minutes, watching carefully to avoid over‑baking. A tiny splash of water before reheating steams the dessert back to a silky, glossy finish. Let it cool for a minute before slicing.