I still remember the first time I tried to make frozen tater tots in the oven. It was a disaster of epic proportions—the bottoms were soggy, the tops were burnt, and the middle tasted like cardboard. I stood there in my tiny apartment kitchen, staring at the sad, limp tots mocking me from the baking sheet, wondering how something so simple could go so wrong. Fast forward through countless experiments, several air fryer purchases, and more taste tests than my waistline cares to admit, and I've finally cracked the code to achieving tater tot perfection that would make even the pickiest teenager weep with joy.
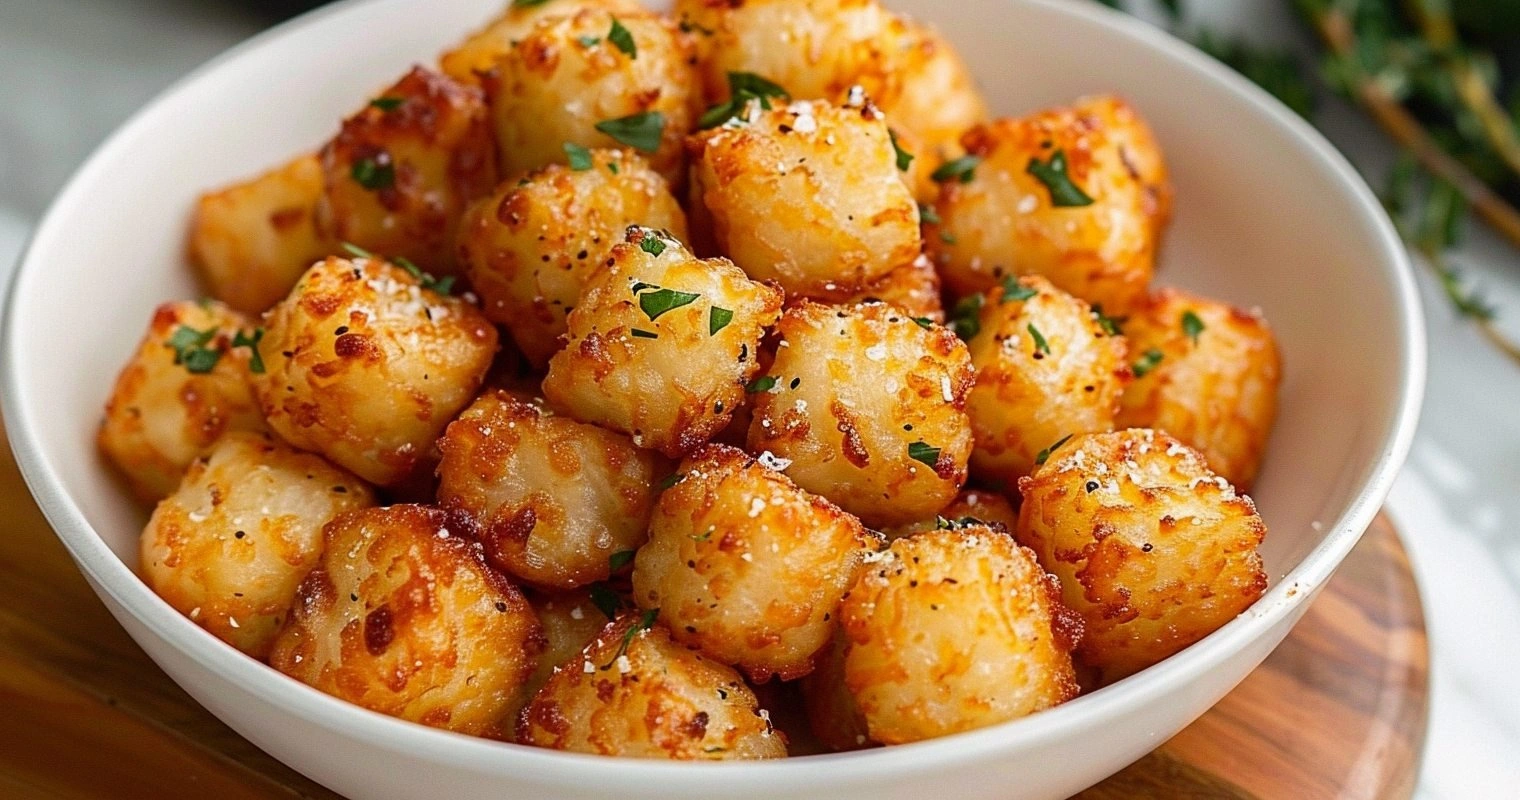
Picture this: it's 11:47 PM on a Tuesday, you're wearing your favorite ratty T-shirt, and the craving hits like a freight train. Those perfectly golden, crispy potato nuggets that shatter between your teeth like autumn leaves underfoot, revealing a fluffy interior that practically melts on your tongue. The smell alone should come with a warning label—it wafts through your kitchen like a siren song, drawing family members from their rooms like moths to a flame. That first bite? Pure, unadulterated comfort that transports you straight back to childhood cafeteria lunches and after-school snacks.
Here's where most recipes get it completely wrong. They treat frozen tater tots like they're some kind of indestructible food that can handle any temperature or timing. Wrong! These delicate potato treasures need finesse, respect, and most importantly, the magic of circulating hot air that only an air fryer can provide. Traditional oven methods leave you with either hockey pucks or mushy disappointment, but the air fryer? It's like giving each tot its own personal spa treatment, wrapping them in a tornado of heat that transforms them into golden nuggets of pure joy.
What I'm about to share isn't just another recipe—it's the culmination of three years of obsessive testing, hundreds of bags of tots, and enough trial and error to fill a small cookbook. The technique I'm revealing today will give you restaurant-quality results in half the time, with zero preheating required and cleanup so easy you'll feel like you're cheating at life. Let me walk you through every single step—by the end, you'll wonder how you ever made it any other way.
What Makes This Version Stand Out
Lightning Fast: While your neighbors are still waiting for their ovens to preheat, you'll be pulling out perfectly crisp tots in under 12 minutes flat. The air fryer's rapid circulation means no more standing around hungry, watching the clock tick by while your stomach performs interpretive dance moves.
Even Steven: Every single tot emerges with the same golden-brown perfection, no more playing favorites with the ones that happened to land in the oven's sweet spot. The circulating air ensures each piece gets equal treatment, creating a batch so uniform it could win beauty pageants.
Zero Oil Necessary: Despite what the bag suggests, you don't need to drown these babies in oil. The air fryer's magic creates that deep-fried crunch without the greasy aftermath, meaning you can eat twice as many with half the guilt (that's how math works, right?).
Texture Paradise: We're talking about shells so crispy they practically shatter like thin ice, revealing interiors that stay fluffy and light. It's the contrast that makes food memorable, and this method nails it every single time.
Scale It Up: Whether you're feeding just yourself or a whole squad of hangry teenagers, this technique scales perfectly. No more rotating pans or playing musical chairs with oven racks.
Foolproof Timing: Once you learn the visual cues—the slight puff, the golden edges pulling away—you'll never need a timer again. Your nose becomes your guide, and trust me, it knows exactly when these are done.
Kitchen Confidence: Even if you burn water, this recipe will make you feel like a culinary rockstar. It's practically impossible to mess up, which means you can focus on the important things, like deciding what dipping sauce deserves the honor.
Alright, let's break down exactly what goes into this masterpiece...
Inside the Ingredient List
The Star Players
The beauty of this recipe lies in its simplicity—you need exactly one ingredient: frozen tater tots. But here's where it gets interesting. Not all tots are created equal, and understanding what you're working with makes all the difference between mediocre and mind-blowing results. Look for tots with visible potato texture on the outside, not those suspiciously smooth ones that look like they were extruded from a machine (spoiler alert: they were).
The size matters more than you think. Standard tots work best in most air fryers, but if you've got one of those massive basket models, you can go for the jumbo size. Just know that timing will need adjustment—these aren't one-size-fits-all. And if you stumble across those artisanal, hand-cut looking tots at Whole Foods? Grab them. They're the filet mignon of frozen potatoes, with ridges and valleys that crisp up like nobody's business.
Brand loyalty runs deep in the tot community, and I'm here to tell you that Ore-Ida Original is the gold standard for a reason. They've been perfecting their potato-to-crunch ratio since your parents were in bell bottoms. That said, I've had surprisingly good results with store brands too, as long as they pass the visual test of looking like actual potato pieces rather than reconstituted mystery mash.
The Supporting Cast
While the tots themselves need no embellishment, having the right accessories elevates the experience from snack to event. A good coarse sea salt is essential—the kind with big flakes that you can crush between your fingers. Regular table salt dissolves too quickly and disappears into the potato, but those chunky crystals provide little pockets of salinity that make each bite interesting.
Fresh cracked black pepper might seem fancy for something that comes from a freezer bag, but hear me out. The heat of the air fryer blooms the pepper's essential oils, creating aromatic compounds that make your kitchen smell like you've been slaving over a hot stove all day. It's the difference between a snack and an experience.
And then there's the oil spray—completely optional, but worth discussing. A light misting of avocado oil spray on the basket prevents sticking and helps achieve that deep golden color we're after. Just go easy on it; we're air frying, not deep frying. Think of it as hairspray for your tots—a light mist to hold everything in place, not a dousing that leaves them greasy.
The Equipment Essentials
Your air fryer is obviously the MVP here, but not all models are created equal. The basket-style fryers work better than the toaster-oven style for this particular application. You want that concentrated heat from all sides, creating a mini convection oven effect that transforms frozen potato nuggets into golden perfection.
Size matters depending on your lifestyle. A 5-quart basket handles about half a standard bag of tots—perfect for 2-3 people. If you're regularly feeding a crowd, spring for the 7-quart or be prepared to work in batches. Trust me, the five extra minutes of cooking a second batch beats the disappointment of soggy tots every single time.
The basket material makes a difference too. Non-stick coatings are great for cleanup but can degrade over time with high heat. If yours is starting to look worse for wear, a quick spritz of oil or a parchment paper liner (with holes poked for airflow) keeps everything releasing cleanly without sacrificing that crucial crisp factor.
Everything's prepped? Good. Let's get into the real action...
The Method — Step by Step
- Start by removing your frozen tater tots from the freezer exactly 5 minutes before cooking. This isn't thawing time—it's just taking the arctic edge off so they cook more evenly. Spread them out on a plate while you prep everything else. If they've been sitting in the back of your freezer for six months getting freezer-burnt, toss them. Life's too short for subpar tots, and freezer burn creates weird textures that even the air fryer can't fix.
- Set your air fryer to 400°F (204°C) and let it run empty for exactly 2 minutes. This preheats the basket and creates an instant heat seal when the tots hit the surface. You know how restaurants have those screaming-hot griddles that create perfect sear marks? Same principle here. The hot basket immediately starts crisping the bottom while the circulating air works on the sides and top—it's like giving each tot its own personal heat hug.
- Quick math check: for a 5-quart basket, you'll want about 30-35 standard tots. For a 7-quart, you can push it to 45-50. Don't get greedy and overfill—these babies need their personal space. Think of it like a crowded elevator; everyone gets where they're going faster when there's room to breathe. If you're cooking for a crowd, embrace the batch life. Your patience will be rewarded with superior texture.
- Arrange the tots in a single layer with space between each one. This is where most people mess up—they dump them in like they're filling a bean bag. Each tot needs to feel the love from all sides. If they touch, they'll steam instead of crisp, and you'll end up with soggy spots that taste like disappointment. Take the extra 30 seconds to do it right; your future self will thank you.
- Spray the basket lightly with oil if your model tends to stick, but hold the can about 10 inches away. You're going for a gentle mist, not a power wash. Think of it like applying perfume—too much and everyone knows you're trying too hard. Just enough to prevent sticking without creating an oil slick that defeats the whole air-frying purpose.
- Cook at 400°F for exactly 8 minutes, then pull the basket out and give it a good shake. Not a gentle wiggle—a proper shake like you're trying to wake someone from a deep sleep. This redistributes everything so the tots that were on the bottom get their moment in the hot air spotlight. It's democracy in action, potato style.
- Slide the basket back in and cook for another 4-6 minutes, but here's the key: start checking at 3 minutes. You're looking for that magical moment when the edges start pulling away from the center, creating tiny golden canyons. The surface should look like it's been kissed by the sun, not dragged through a desert. This visual cue is your new best friend.
- Remove a test tot and let it cool for exactly 30 seconds (any less and you'll burn your tongue, ruining the whole experience). Break it open—it should shatter like thin ice, revealing a fluffy interior that steams gently. If it's still pale and soft, give it another 2 minutes. If it's golden outside but cold inside, your air fryer runs hot—drop the temp to 380°F next time.
- Immediately season while they're still hot. The residual heat helps the salt stick, creating little flavor crystals that make each bite interesting. Toss them gently in the basket to distribute, then transfer to a serving bowl. Don't use a plate—they'll steam themselves soggy. A bowl lets air circulate and keeps them crisp while you decide whether to share or hoard them all.
That's it—you did it. But hold on, I've got a few more tricks that'll take this to another level...
Insider Tricks for Flawless Results
The Temperature Sweet Spot
Here's what nobody tells you: air fryers vary wildly in their actual temperatures. That 400°F setting might be 425°F in reality, or it could be running cool at 375°F. The first time you make these, set a timer for 6 minutes and check. If they're browning too fast, drop to 380°F next time. Too slow? Bump it up to 410°F. Once you find your machine's sweet spot, write it on a piece of tape and stick it to the side. Future you will remember this wisdom when it's 2 AM and you're hunting for snacks.
I learned this the hard way after burning through three bags of tots trying to figure out why they kept going from pale to charcoal in the blink of an eye. My particular air fryer runs hot, so I've adjusted all my timing accordingly. Your mileage will definitely vary, but that's the beauty of cooking—once you know your equipment, you become unstoppable.
The Seasoning Window
There's a magical 90-second window right after cooking when seasonings stick perfectly. Too early and the steam prevents adhesion, too late and the surface has cooled, creating a barrier. I keep my salt grinder and pepper mill right next to the air fryer, ready to pounce the moment the basket comes out. This is when you can get creative—everything bagel seasoning, smoked paprika, even a whisper of cinnamon sugar if you're feeling adventurous.
A friend tried skipping this step once—let's just say it didn't end well. She served plain, unseasoned tots at a party, and I watched grown adults eat one bite and quietly set their plates down. Seasoning is what transforms good tots into unforgettable ones. Don't be that person who serves bland potatoes.
The Rest That Changes Everything
This might sound counterintuitive, but letting the tots rest for exactly 2 minutes after cooking actually makes them crispier. The steam trapped inside redistributes, and the exterior firms up even more. It's like letting a steak rest, but way faster and with less risk of eating cold food. Place them in a bowl lined with a paper towel to absorb any excess moisture, then serve. Your patience will be rewarded with texture that stays crisp longer.
The Batch Blessing
If you're making multiple batches, here's the pro move: the second and subsequent batches cook faster because the air fryer is already hot. Knock 1-2 minutes off the total time, but still check at the halfway mark. I've seen too many people walk away and come back to a basket of potato charcoal because they treated every batch the same. Your air fryer is like a relationship—it needs attention and adjustment as conditions change.
Creative Twists and Variations
This recipe is a playground. Here are some of my favorite ways to switch things up:
The Loaded Tot
After cooking, top with shredded sharp cheddar, crumbled bacon, and sliced green onions. Pop back in the air fryer for 90 seconds to melt the cheese. Finish with a dollop of sour cream and a drizzle of hot sauce. It's like nachos but with the structural integrity to actually reach your mouth without collapsing into a sad pile.
The Breakfast Champion
Toss hot tots with everything bagel seasoning, then top with a fried egg and a sprinkle of everything seasoning. The runny yolk creates a sauce that mingles with the crispy tots in ways that'll make you question why you ever ate hash browns. Add some smoked salmon if you're feeling fancy, or keep it simple for those mornings when you need comfort more than complexity.
The Sweet Potato Plot Twist
Use sweet potato tots instead and finish with a dusting of cinnamon sugar and a drizzle of maple syrup. The sweet-savory combo works surprisingly well, especially if you add a pinch of cayenne for heat. It's like dessert and dinner had a beautiful baby, and that baby is perfectly acceptable to eat for breakfast without judgment.
The Mediterranean Escape
Season with garlic powder, oregano, and lemon zest immediately after cooking. Finish with crumbled feta and chopped fresh dill. Serve with tzatziki on the side for dipping. It transforms humble frozen potatoes into something that feels like vacation on a plate, even when you're eating them in your pajamas on a Tuesday night.
The Spicy Korean Fusion
Mix gochujang with a touch of honey and rice vinegar. Toss hot tots in this glaze, then sprinkle with sesame seeds and sliced scallions. The result is sticky, spicy, sweet, and absolutely addictive. Fair warning: this version has ruined regular tots for me forever. Once you go Korean-style, there's no going back to plain.
The Truffle Shuffle
For those times when you want to feel fancy while eating frozen food, finish with a light mist of truffle oil and a shower of grated Parmesan. Add some fresh cracked pepper and suddenly you're not eating lazy food—you're having an "elevated snacking experience." Your secret's safe with me.
Storing and Bringing It Back to Life
Fridge Storage
Leftover cooked tots can be stored in an airtight container in the refrigerator for up to 3 days, but let's be honest—when has anyone ever had leftover tots? If you somehow manage this feat, line the container with paper towels to absorb moisture and keep them from getting soggy. Don't seal them while they're still hot; let them cool completely first to prevent steam from creating a sad, damp environment.
Freezer Friendly
Cooked tots can be frozen, though honestly, they're never quite the same. If you must, freeze them in a single layer on a baking sheet first, then transfer to a freezer bag. This prevents them from becoming one giant tot brick. When reheating, go straight from freezer to air fryer at 380°F for 4-5 minutes. They won't be quite as good as fresh, but they're still miles ahead of microwaved sadness.
The Revival Method
To bring refrigerated tots back to their former glory, mist them lightly with water first—this creates steam that rehydrates the interior. Then air fry at 380°F for 3-4 minutes until hot and crisp. The water trick is game-changing; without it, you're just making potato-flavored cardboard. Add a tiny splash of water before reheating—it steams back to perfection and fools everyone into thinking you made fresh ones.