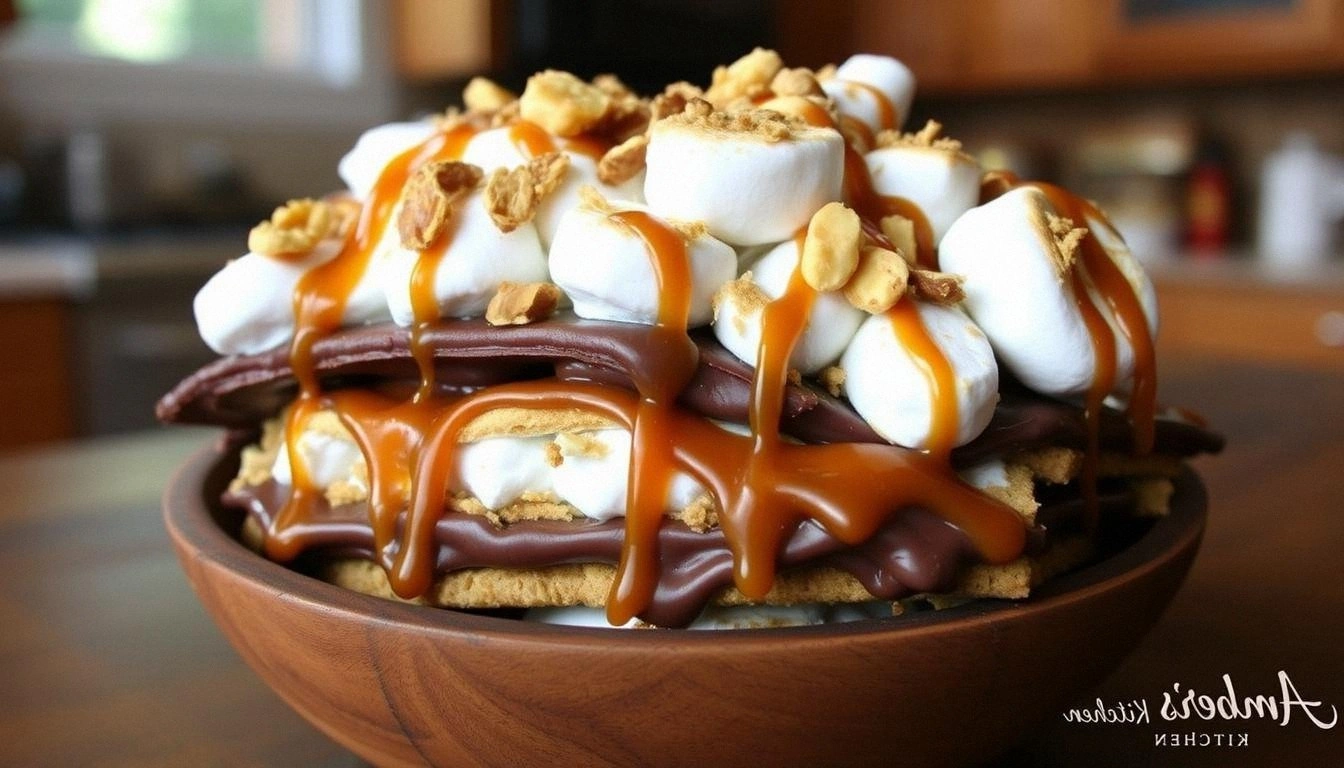
I was halfway through a midnight snack raid when the kitchen turned into a slapstick comedy show. The melted chocolate sheet had turned the counter into a sticky, caramelized runway, and I realized I was about to create a disaster that would haunt my taste buds for days. I was craving something that could salvage the mess and elevate it into something legendary. This is the moment I decided to reinvent the classic s'mores crack, turning a campfire nostalgia into a kitchen masterpiece. If you’ve ever felt the sting of a failed dessert, keep reading—this is the recipe that will rewrite your sweet story.
Picture the buttery scent of toasted Graham crackers drifting through the air, mingling with the sweet, smoky aroma of melted chocolate and the faint, sweet tang of toasted marshmallows. The sound is a satisfying crackle, like a campfire under a starry sky, but in a pan that never leaves your kitchen. The first bite is a symphony of crunch and goo, the crisp edges giving way to a velvety, molten center that drips down your fingers. The texture feels like a secret handshake between caramelized sugar and chocolate, a dance that lingers on the palate. And the finish? A subtle hint of sea salt that lifts every flavor, reminding you that good desserts need a touch of complexity.
What makes this version stand out is not just the ingredients, but the technique that binds them together into a single, unforgettable bite. I’ve swapped the standard white sugar for dark brown sugar to deepen the caramel notes, and I’ve introduced a splash of sea salt that cuts through the sweetness like a fresh breeze. The chocolate chips are semi-sweet, chosen for their balanced bitterness that balances the sugary layers without overpowering. I’ve also incorporated a small amount of butter, which creates a glossy, toffee-like coating that seals in the flavor and gives the crack a luxurious mouthfeel. And the secret? A precise baking time that caramelizes the sugars without burning them, giving you that perfect snap that shatters like thin ice.
Let me walk you through every single step—by the end, you'll wonder how you ever made it any other way. I dare you to taste this and not go back for seconds because the flavors are so layered, they will have you reaching for more. Most recipes get this completely wrong, but here's what actually works. Picture yourself pulling this out of the oven, the whole kitchen smelling incredible, and your friends' eyes widening in disbelief. And now, ready for the game‑changer? Let's dive into the details.
What Makes This Version Stand Out
- Flavor: The combination of dark brown sugar and sea salt creates a caramelized depth that traditional recipes miss. The chocolate chips provide a subtle bitterness that balances the sweetness. The result is a complex, satisfying taste that lingers.
- Texture: The buttery coating turns the Graham crackers into a crisp, toffee‑like shell that snaps cleanly. Inside, the marshmallows melt into a silky center that coats the tongue. The contrast feels like a crunchy candy with a molten heart.
- Visual Appeal: The golden brown edges and glossy chocolate glaze make the crack look as good as it tastes. Each bite reveals a glossy sheen that invites you to take another. The presentation is Instagram‑ready without the need for fancy plating.
- Ingredient Quality: Using unsalted butter, high‑grade chocolate chips, and fresh marshmallows elevates the dish. The ingredients are simple, but their quality makes all the difference. The result is a pure, unadulterated flavor experience.
- Make‑ahead Potential: Once baked, the cracks can be stored in an airtight container for up to a week. The crunch remains intact, and the chocolate stays firm. This makes it a perfect batch‑prep dessert for parties.
- Audience Reaction: Friends who taste this will immediately ask for the recipe, and kids will be begging for a second help. The universal appeal spans age groups and dietary preferences. The dish is a crowd‑pleaser that guarantees smiles.
Alright, let's break down exactly what goes into this masterpiece...
Inside the Ingredient List
The Flavor Base
Graham crackers are the foundation that delivers that iconic crunch and buttery undertone. Dark brown sugar is the secret to a richer caramel note that wakes up the palate. A pinch of sea salt is the finishing touch that balances sweetness and heightens every other flavor. Skipping any of these will result in a flatter, less memorable treat.
The Texture Crew
Unsalted butter, when melted and folded into the mix, creates a glossy, toffee‑like coating that seals in the flavor. Fresh mini marshmallows are the star of the show, turning the center into a silky, gooey delight that melts in your mouth. The combination of butter and marshmallows gives the crack a luxurious mouthfeel that feels indulgent without being greasy. If you replace marshmallows with regular ones, the texture becomes denser and less airy.
The Unexpected Star
Semi‑sweet chocolate chips are chosen for their balanced bitterness, which cuts through the sugary layers and adds depth. The chips melt evenly, creating a smooth, glossy glaze that coats each crack. Using dark chocolate instead will intensify the flavor but may introduce a slight bitterness that some may not enjoy. A quick swap to milk chocolate will give a sweeter, creamier finish.
The Final Flourish
Optional additions like crushed nuts, a drizzle of peanut butter, or a sprinkle of coconut flakes can elevate the flavor profile and add new textures. These extras can be folded into the batter before baking or sprinkled on top after baking for an extra crunch. They also make the dish more versatile for different dietary preferences. Experimenting with these can transform a classic into a personalized masterpiece.
Everything's prepped? Good. Let's get into the real action...
The Method — Step by Step
- Preheat the oven to 375°F (190°C) and line a large baking sheet with parchment paper and a silicone mat. This step ensures even heat distribution and eliminates the need for greasing. A properly preheated oven guarantees a crisp edge without a burnt center. Keep the sheet ready because the batter will spread quickly. This is the moment of truth for your first batch.
- In a medium saucepan, melt the butter over medium heat until it foams. Add the brown sugar and stir until the mixture is glossy and caramelized. The color should shift to a deep amber, signaling the sugars are ready. This caramel layer is what gives the crack its signature toffee flavor. Let the mixture cool for a minute before adding the chocolate.
- Fold in the chocolate chips until they are fully melted and the batter is smooth. The chocolate should coat the back of a spoon like a silky glaze. This step is crucial for achieving that glossy finish. If the mixture is too thick, add a splash of milk to loosen it. Now you’re halfway to perfection.
- Drop spoonfuls of the batter onto the prepared sheet, spacing them 2 inches apart. The batter will spread as it bakes, creating the iconic crack shape. Use a wooden spoon to flatten slightly for a more uniform thickness. The edges will caramelize first, giving a satisfying snap. This is where the texture begins to develop.
- Bake for 8–10 minutes, or until the edges are golden brown and the centers are set but still slightly soft. Watch for the first signs of bubbling; that’s when the sugar starts to caramelize. The aroma will fill the kitchen, hinting at the sweet adventure ahead. Do not overbake or you’ll lose the gooey center. Keep an eye on the timer.
- Remove the sheet from the oven and let the cracks cool for 5 minutes. They will firm up as they cool, creating a crisp exterior. While they’re still warm, drizzle a thin layer of melted chocolate over the tops for an extra glossy finish. This step adds a decadent touch that elevates the entire experience. Let the chocolate set for a minute before moving on.
- Once the cracks have cooled enough to handle, spread a thin layer of mini marshmallows over each. The marshmallows will soften and fuse with the chocolate glaze, creating a molten center. Use a fork to press them lightly into the surface for even coverage. The marshmallows should be warm enough to melt slightly but not fully liquefied. This step is the heart of the s'mores experience.
- Place the finished cracks in the refrigerator for 15 minutes to set the marshmallows. The cold will firm the chocolate and set the marshmallow layer, ensuring a clean bite. While they’re chilling, you can prepare any optional toppings or variations. The refrigerator also helps the flavors meld together. Patience pays off here.
- Serve the cracks on a platter, letting the warm, gooey center contrast with the crisp exterior. The aroma alone will entice everyone to dig in. If you’re hosting, keep a bowl of extra chocolate chips nearby for dipping. This adds a fun, interactive element to the dessert. The experience is almost as delightful as the taste.
That's it — you did it. But hold on, I've got a few more tricks that'll take this to another level...
Insider Tricks for Flawless Results
The Temperature Rule Nobody Follows
Baking at precisely 375°F (190°C) is essential for caramelizing the sugars without burning them. If your oven runs hot, reduce the temperature by 25°F to avoid a burnt edge. Use an oven thermometer to verify accuracy, as many ovens can be off by 10–15°F. This small adjustment ensures a perfect golden crust every time. Consistency is key when you’re aiming for that flawless snap.
Why Your Nose Knows Best
The moment the batter hits the pan, a distinct caramel scent will rise, indicating the sugars are caramelizing. If the aroma is weak, the sugar may not be fully melted. Trust your nose; it will guide you to the right moment to add chocolate. A strong caramel scent is a sign of a well‑balanced flavor profile. This sensory cue saves you from overbaking or undercooking.
The 5-Minute Rest That Changes Everything
After baking, let the cracks rest for exactly five minutes before adding marshmallows. This brief pause allows the chocolate glaze to set and the edges to firm up, giving the crack a crisp bite. Skipping this step can result in a soggy center that’s hard to handle. The five minutes also help the flavors meld, creating a more cohesive taste. It’s a small pause with a big payoff.
The Perfect Butter Ratio
Using 2 tablespoons of butter for every 8 crackers strikes the right balance between richness and chewiness. Too much butter will make the crack greasy, while too little will leave it dry. Measure carefully, as the butter’s moisture content can vary between brands. A small amount of unsalted butter gives you control over the final flavor. This ratio is a tried‑and‑true formula for buttery perfection.
The Secret to Crispy Edges
Sprinkling a pinch of sea salt over the batter before baking caramelizes the edges and adds a subtle crunch. The salt also balances the sweetness, making the flavor profile more complex. Use a fine sea salt for even distribution. This trick turns a simple crack into a gourmet treat. The result is a satisfying snap that satisfies the craving.
The Quick Cleanup Hack
Line the baking sheet with parchment paper and a silicone mat before baking; this eliminates the need for greasing and speeds up cleanup. After the cracks cool, simply scrape off any residue with a rubber spatula. Wash the sheet in hot, soapy water, and it’s ready for the next batch. This hack saves you time and keeps your kitchen sparkling. Cleanliness is part of the recipe.
Creative Twists and Variations
Salted Caramel S'mores Crack
Swap the brown sugar for caramel sauce and drizzle a pinch of sea salt over the batter before baking. The caramel brings a buttery sweetness that pairs wonderfully with the chocolate. The salt enhances the caramel’s richness, creating a flavor explosion. This variation is perfect for guests who love a touch of decadence. It’s a crowd‑pleaser that stands out from the crowd.
Nutty Chocolate Crunch
Fold in ½ cup of chopped toasted almonds or hazelnuts into the batter before baking. The nuts add a satisfying crunch and a nutty aroma that complements the chocolate. Sprinkle extra nuts on top after baking for an extra layer of texture. This version is ideal for those who enjoy a more complex mouthfeel. The nuts also add a subtle earthy note.
Peanut Butter Swirl
Stir in 4 tablespoons of creamy peanut butter into the melted butter and sugar mixture before adding chocolate. The peanut butter creates a silky swirl that melts into the chocolate glaze. It also adds a savory depth that balances the sweetness. This twist is a favorite among peanut butter lovers. Serve with a drizzle of honey for an extra layer of flavor.
Spiced Cinnamon Touch
Add ½ teaspoon of ground cinnamon to the batter for a warm, aromatic flavor. The cinnamon pairs beautifully with the chocolate and caramel notes. Sprinkle a dash of cinnamon on top after baking for a fragrant finish. This variation is perfect for autumn gatherings or a cozy night in. The spice adds a comforting twist.
Vegan Edition
Replace butter with coconut oil and use dairy‑free chocolate chips to keep the recipe plant‑based. Use a vegan marshmallow alternative or simply omit the marshmallows for a crunchy, chocolate‑only version. This version retains all the flavors while being cruelty‑free. It’s a great option for those with dietary restrictions. The result is a guilt‑free treat that still feels indulgent.
Storing and Bringing It Back to Life
Fridge Storage
Place the cooled cracks in an airtight container and store them in the refrigerator for up to 5 days. The cool environment preserves the crunch and prevents the chocolate from melting. When ready to serve, let them sit at room temperature for 10 minutes to soften slightly. This method keeps the texture intact and the flavors fresh. The cracks will stay crisp and ready to devour.
Freezer Friendly
Wrap each crack individually in parchment paper and place them in a freezer bag. Freeze for up to 2 months for long‑term storage. Thaw at room temperature for 15 minutes before serving to restore the chocolate’s glossy finish. The freezing process does not compromise the texture or flavor. This is perfect for batch‑prep and future parties.
Best Reheating Method
Reheat the cracks in a preheated oven at 300°F (150°C) for 5 minutes, or until the chocolate is glossy and the marshmallows are warm. Adding a splash of water to the bottom of the pan creates steam that softens the center without drying out the edges. Avoid microwaving, as it can cause uneven heating and a rubbery texture. This method restores the original bite and aroma. Enjoy the freshly reheated treats as if they were just baked.