It all started on a rainy October night when my roommate dared me to turn a boring batch of store‑bought brownies into something that would make even the most stoic Halloween party guest squeal with delight. I was half‑asleep, the kitchen lights flickering like a haunted house, and the only thing louder than the thunder outside was the growl in my stomach demanding something chocolatey, gooey, and just a little bit wicked. I grabbed a half‑empty bag of cocoa, a tub of butter that had been melting on the counter, and a handful of gummy “monster eyes” I’d bought for a costume party months ago. The result? A batch of brownies so decadently rich they practically glowed in the dark, and a recipe that I swear is the missing link between ordinary dessert and culinary sorcery.
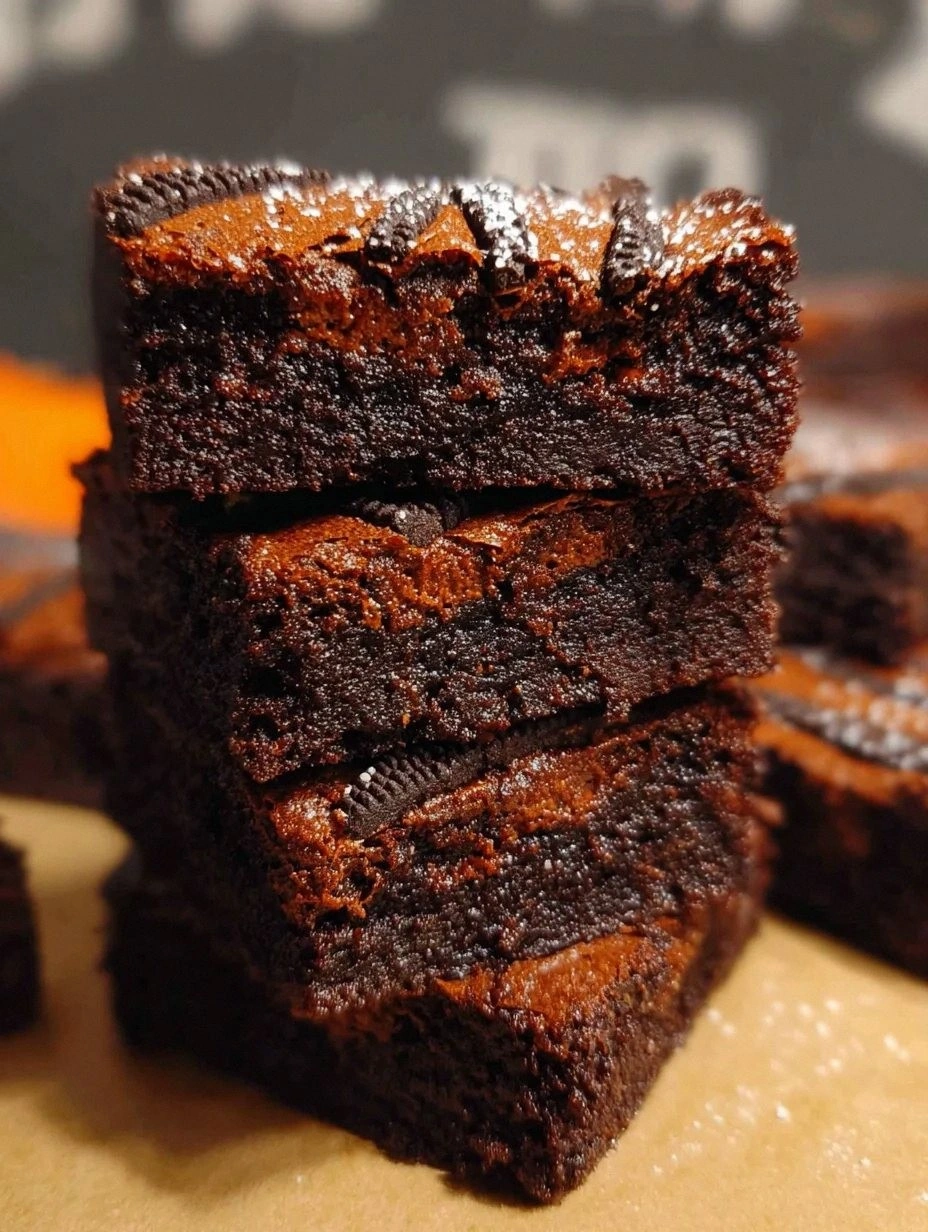
The moment I pulled the pan from the oven, the kitchen filled with an aroma that was part smoky campfire, part fresh‑baked chocolate cake, and part nostalgic childhood memory of Halloween candy. The scent curled around my nose like a mischievous spirit, whispering promises of fudgy depth and a crackly crust that would shatter like thin ice under a spoon. I could hear the faint crackle of the top as it cooled, feel the heat radiating from the pan, and see the swirls of green food coloring—just enough to give the brownies a monster‑mash vibe without turning them into a neon disaster. My first bite was a revelation: a silky interior that melted on the tongue, punctuated by pockets of molten chocolate and a surprise snap of toasted nuts that sang with every chew.
Most brownie recipes out there either end up dry as a desert or soggy enough to drown a small child. Most get the balance of cocoa and sugar wrong, and most forget that a little bit of science—like the right amount of baking powder and the perfect melt of butter—can turn a simple treat into a show‑stopping centerpiece. This version stands out because it embraces that science while keeping the process so straightforward that even a kitchen rookie can pull it off without setting off the smoke alarm. I’m talking about a recipe that uses a secret technique of chilling the batter for just the right amount of time, and an unexpected dash of espresso powder that amplifies the chocolate flavor like a spotlight on a stage.
And now the fun part: I’m going to walk you through every single step—down to the exact moment you should hear that satisfying sizzle when the batter hits the pan. By the end, you’ll wonder how you ever made brownies any other way, and I dare you to taste this and not go back for seconds. Okay, ready for the game‑changer? Let me walk you through every single step — by the end, you'll wonder how you ever made it any other way.
What Makes This Version Stand Out
- Flavor Explosion: The addition of espresso powder and a pinch of sea salt creates a depth that makes the chocolate sing like a choir of ghouls.
- Texture Tango: A crisp, caramelized crust meets a fudgy, melt‑in‑your‑mouth center, delivering a contrast that’s as thrilling as a roller‑coaster drop.
- Simplicity Mastered: Only ten core ingredients, all pantry staples, mean you won’t need a trip to the specialty store.
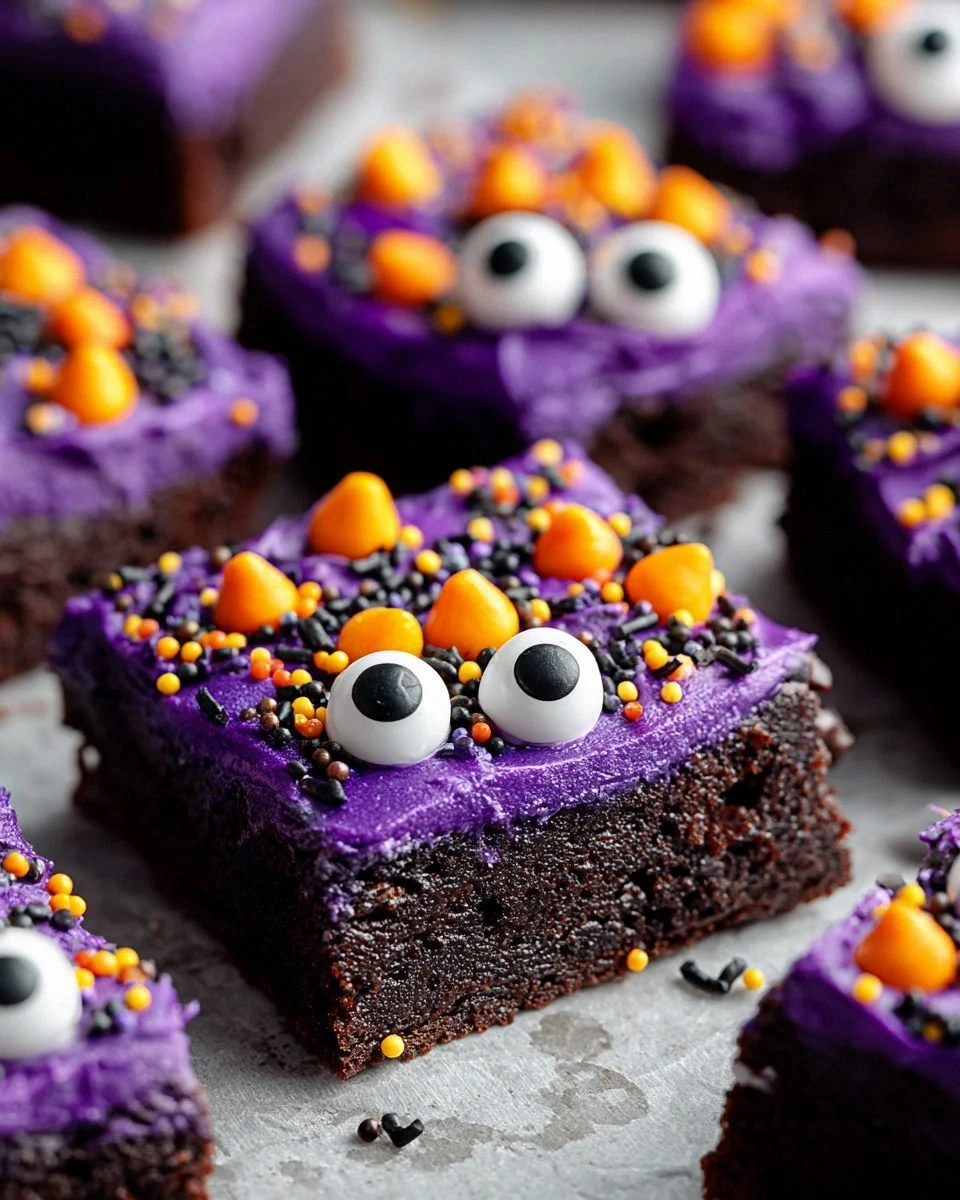
- Visual Wow Factor: A swirl of green food coloring and candy eyes turn each square into a mini monster ready to haunt your taste buds.
- Crowd Magnet: Guests admit they’re terrified of the “monster” look, then devour every piece—perfect for parties, potlucks, or a spooky night in.
- Ingredient Quality: Using high‑quality cocoa and real butter gives a richness that cheap mixes simply can’t mimic.
- Cooking Method: A brief chill of the batter before baking locks in moisture, while a high‑heat start creates that coveted crackly top.
- Make‑Ahead Magic: These brownies keep their texture for up to three days, and they even taste better after a night of “resting” in the fridge.
Inside the Ingredient List
The Flavor Base
Unsweetened cocoa powder (¾ cup): This is the heart of the brownie’s chocolate intensity. It provides a deep, earthy flavor that sugar alone can’t achieve. If you skip it, you’ll end up with a bland, cake‑like texture. For an extra punch, try a blend of Dutch‑process and natural cocoa.
Granulated sugar (1½ cups): Sugar not only sweetens but also helps create that glossy crust. Using too little will make the brownies dry; too much will make them overly crisp. A good swap is coconut sugar for a caramel note, but keep the volume the same.
Espresso powder (1 tsp): This secret weapon amplifies chocolate without adding a coffee flavor. It’s the culinary equivalent of a spotlight on a stage—subtle but powerful. If you’re caffeine‑sensitive, use instant coffee granules instead.
The Texture Crew
All‑purpose flour (2 cups): Flour gives structure; the amount is crucial for that fudgy‑yet‑chewy balance. Using cake flour will make them too soft, while bread flour will make them tough. Sift it with the cocoa for an even distribution.
Unsalted butter, melted (1 cup): Butter adds richness and a tender crumb. Melt it gently to avoid browning, which could introduce a bitter note. If you prefer a slightly nutty flavor, use browned butter—but watch the color.
Large eggs (2): Eggs bind the batter and introduce a little lift. Over‑beating will incorporate too much air, leading to a cakey result. Beat just until combined; think of it as whispering to the batter, not shouting.
The Unexpected Star
Green food coloring (a few drops, optional): This isn’t just for looks; a tiny amount can actually help the batter set a little faster, giving you that crisp top. Use gel color for a more vibrant hue without adding extra liquid.
Candy eyes (optional, for decoration): They’re the visual punch that turns a simple brownie into a “monster mash.” Place them just before baking so they melt slightly and adhere without falling off.
Sea salt flakes (½ tsp, optional): A sprinkle on top before baking adds a pop of flavor that makes the chocolate sing. It’s the culinary equivalent of a surprise jump scare—delightful and memorable.
The Final Flourish
Semi‑sweet chocolate chips (1 cup): They melt into pockets of gooey bliss that contrast beautifully with the fudgy base. If you prefer a darker profile, swap half for dark chocolate chunks.
Chopped walnuts or pecans (½ cup, optional): Nuts add a crunchy texture and a buttery flavor that complements the chocolate. Toast them lightly for extra depth, but watch them—they can burn fast.
Vanilla extract (1 tsp): A splash of vanilla rounds out the flavor, smoothing the edges of the cocoa’s bitterness. Use pure extract, not imitation, for the best aromatic profile.
Everything's prepped? Good. Let's get into the real action...
The Method — Step by Step
Preheat your oven to 350°F (175°C) and line a 9×13 inch baking pan with parchment paper, leaving an overhang for easy removal. While the oven warms, melt the butter in a saucepan over low heat, stirring until it’s a glossy amber—no bubbles, just a gentle shimmer. Once melted, set it aside to cool slightly; this is the moment you’ll hear the faint sizzle when the batter meets the pan later, a sound that signals pure magic.
In a large mixing bowl, whisk together the flour, cocoa powder, baking powder, and salt. This dry blend should be aerated and free of lumps, resembling a dark, velvety snow. If you feel daring, sift the mixture twice—this extra step guarantees a uniform texture that prevents any gritty surprises.
In a separate bowl, combine the sugar, melted butter, and vanilla extract. Beat with a wooden spoon until the mixture looks glossy and starts to thicken, about 2 minutes. Watch Out: Over‑mixing can incorporate too much air, turning your brownies into a cake. Stop as soon as the sugar is dissolved and the mixture looks cohesive.
Crack the eggs into the butter‑sugar mixture, adding them one at a time, whisking gently after each. Then stir in the espresso powder and green food coloring, if using. The batter should turn a deep, almost midnight hue with a faint green undertone—like a monster emerging from the shadows.
Gradually fold the dry ingredients into the wet mixture using a rubber spatula. Scrape the bowl sides, turn the spatula, and watch the batter transform into a thick, glossy paste. At this point, you’ll notice the batter pulling away from the sides of the bowl—an essential cue that the structure is forming correctly.
Stir in the chocolate chips and nuts (if using). These add pockets of molten chocolate and crunchy surprise that will burst open as the brownies bake. Sprinkle the candy eyes on top, spacing them evenly; they’ll settle into the batter and give each square a playful stare.
Transfer the batter to the prepared pan, spreading it evenly with the spatula. Tap the pan gently on the counter three times to release any large air pockets—this is the moment where you hear a faint thud, a sign that the batter is settling into its final shape.
Slide the pan into the preheated oven and bake for 25‑30 minutes. The edges should start pulling away from the sides of the pan, and a toothpick inserted into the center should come out with a few moist crumbs but not wet batter. The top will develop a crackly crust that smells like toasted marshmallows—if you can smell that, you’re on the right track.
Remove the pan and let the brownies cool in the pan for 10 minutes, then lift them using the parchment overhang and transfer to a wire rack. This cooling period lets the interior set, preventing the brownies from crumbling when you cut them. While they cool, the scent will intensify, filling the kitchen with a chocolatey perfume that could coax even the most disciplined dieter to indulge.
That's it — you did it. But hold on, I've got a few more tricks that'll take this to another level...
Insider Tricks for Flawless Results
The Temperature Rule Nobody Follows
Always let the butter cool to about 110°F before mixing it with sugar. If the butter is too hot, it will melt the sugar and create a gummy texture; too cold, and the batter will be lumpy. I once tried to skip this step, and the brownies turned out dense enough to be used as a doorstop. A quick test: dip a finger into the melted butter—if it feels warm but not hot, you’re golden.
Why Your Nose Knows Best
The moment the brownies are done, the kitchen will be filled with a sweet, roasted aroma that’s unmistakable. Trust your nose more than the timer—if the scent is strong and the edges are pulling away, they’re ready. I’ve seen timers lie; the smell never does. This sensory cue is especially helpful if your oven runs hot or cool.
The 5‑Minute Rest That Changes Everything
After removing the brownies from the oven, let them sit untouched for exactly five minutes before cutting. This short rest allows the steam to redistribute, preventing a dry crumb. Skipping this step is like cutting a cake before the frosting sets—messy and disappointing. The result? Clean squares that hold together beautifully.
Double‑Layer Chocolate Swirl
If you crave extra decadence, melt an additional ¼ cup of chocolate and drizzle it over the batter right before baking. The swirl creates pockets of liquid chocolate that become glossy ribbons after baking. Just be careful not to over‑drizzle; too much can cause the brownies to become soggy.
Freeze‑Proofing the Batch
For make‑ahead parties, wrap the cooled brownies tightly in foil, then place them in a zip‑top bag before freezing. When you’re ready to serve, thaw at room temperature and warm for 10 minutes at 300°F—the result is a brownie that tastes as fresh as day one. I’ve done this for a Halloween potluck, and the brownies were the star of the night.
Creative Twists and Variations
This recipe is a playground. Here are some of my favorite ways to switch things up:
Spooky Peppermint Crunch
Swap half the chocolate chips for white chocolate chips and add a teaspoon of crushed peppermint candy. The mint adds a fresh bite that cuts through the richness, perfect for a winter holiday twist.
Caramel Swirl Monster
Drizzle caramel sauce over the batter before baking and use a knife to create a marble effect. The caramel pockets melt into gooey ribbons, making each bite a surprise of sweet and salty.
Nut‑Free Coconut Delight
Replace the walnuts with toasted coconut flakes and use coconut oil instead of butter. This gives a subtle tropical flavor while keeping the brownies dairy‑free for guests with allergies.
Double‑Dark Chocolate
Use 100% cacao cocoa powder and add a handful of cacao nibs for a bitter‑sweet contrast that will satisfy the most ardent chocolate lovers. Pair with a glass of red wine for an adult‑only treat.
Ghostly White Chocolate
Fold in white chocolate chips and a pinch of vanilla bean paste. The pale specks look like ghostly apparitions against the dark brownie base, perfect for a Halloween “haunted house” theme.
Storing and Bringing It Back to Life
Fridge Storage
Place the cooled brownies in an airtight container and store them in the refrigerator for up to three days. The cool environment keeps the crumb moist and the chocolate chips firm. Before serving, let them sit at room temperature for 15 minutes to regain that soft, fudgy texture.
Freezer Friendly
Wrap each brownie individually in parchment paper, then place them in a zip‑top freezer bag. They’ll keep for up to two months. When you’re ready to eat, thaw overnight in the fridge, then warm for 5‑7 minutes at 300°F. A tiny splash of water on the pan before reheating creates steam that revives the crust.
Best Reheating Method
The optimal way to reheat is on a baking sheet in a preheated 300°F oven for 8‑10 minutes. This method restores the crackly top while keeping the interior gooey. Microwaving is a quick fix, but it can make the edges rubbery—avoid it unless you’re in a hurry.