I was standing in my kitchen, half‑asleep, when my roommate challenged me to make something that could survive a three‑hour road trip without turning into a soggy mess. I laughed, grabbed a bag of flour, and muttered, “Okay, I’m about to invent the most addictive mini donut known to humanity.” The first batch came out so golden that the whole apartment smelled like a cinnamon‑spiced carnival. My neighbor knocked on the door, sniffed the air, and begged for the recipe before I even finished the last donut. I dare you to taste this and not go back for seconds – it’s that good.
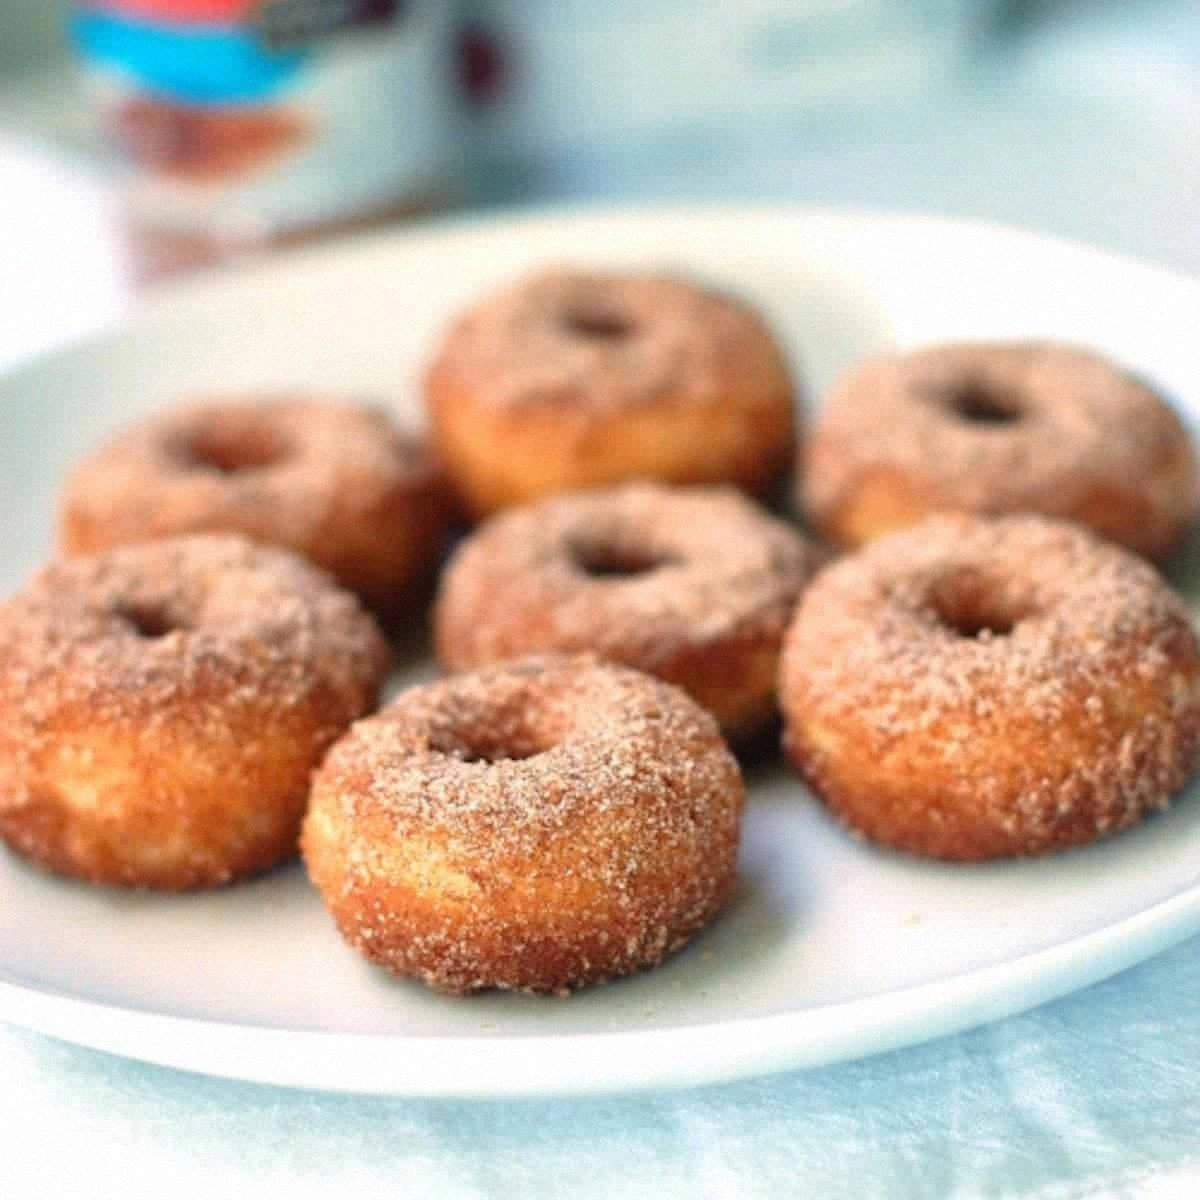
Picture this: a tray of bite‑size circles, each one a perfect pillow of soft interior and a crackly, sugary crust that shatters like thin ice when you bite into it. The moment the dough hits the hot oil you hear a sizzle that’s almost musical, and the aroma that erupts is a head‑on collision of buttery richness and warm cinnamon that makes your nose do a little happy dance. The texture is a paradox – airy enough to melt on your tongue, yet sturdy enough to hold a generous dusting of cinnamon‑sugar without sliding off. And the flavor? It’s a sweet‑spicy duet that sings louder than any store‑bought version I’ve ever tried.
Most recipes get this completely wrong. They either over‑mix the batter, turning the donuts into dense bricks, or they fry them at the wrong temperature, leaving a greasy exterior that never gets that coveted crunch. Here’s what actually works: a gentle folding technique that preserves air pockets, a precise oil temperature that locks in moisture, and a secret ingredient – a splash of milk‑fat‑rich butter in the batter that creates a buttery crumb you can’t replicate with oil alone. I’ll be honest — I ate half the batch before anyone else got to try it, but that’s only because I’m a terrible self‑control‑monster.
Now, let’s walk through every single step — by the end, you’ll wonder how you ever made it any other way. Okay, ready for the game‑changer? This next part? Pure magic. I’m about to spill the beans on a technique that will give your mini donuts that restaurant‑level lift, and trust me, you’ll thank me when the whole kitchen is buzzing with the scent of cinnamon sugar. Stay with me here — this is worth it.
What Makes This Version Stand Out
- Flavor Explosion: The combination of fresh ground cinnamon and fine sugar creates a coating that clings like a sweet glaze, while the batter itself is infused with vanilla and butter for depth.
- Texture Harmony: A light, airy crumb meets a crisp, caramelized edge – the perfect contrast that makes each bite feel like a mini celebration.
- Simplicity: Only pantry staples are needed; no fancy equipment, just a sturdy skillet or deep fryer and a whisk.
- Uniqueness: The secret splash of melted butter in the wet mix lifts the dough, giving it a buttery richness you won’t find in standard recipes.
- Crowd Reaction: These donuts have a habit of disappearing within minutes at parties – they’re the kind of treat that sparks instant “where did you get these?” conversations.
- Ingredient Quality: Using real cinnamon (not the pre‑ground, stale stuff) and high‑fat butter makes a noticeable difference in flavor and mouthfeel.
- Cooking Method: Frying at a steady 350°F locks in moisture while creating that golden‑brown crust without greasiness.
- Make‑Ahead Potential: You can freeze them after cooling and re‑heat with a splash of water for a fresh‑out‑of‑the‑oven experience.
Inside the Ingredient List
The Flavor Base
Flour is the structural backbone of any donut, and using all‑purpose flour gives you that classic tender crumb. The 2 cups provide enough gluten development to hold the shape without becoming tough. If you substitute cake flour, expect a more delicate texture but risk a crumb that falls apart. Choose a flour that feels slightly powdery to the touch – that’s a sign it’s fresh.
Granulated sugar not only sweetens but also contributes to browning via caramelization. The half‑cup in the batter works in tandem with the cinnamon‑sugar coating, creating a layered sweetness. If you’re watching sugar, you can reduce it to 1/3 cup, but the exterior won’t have that glossy sheen.
The Texture Crew
Baking powder and baking soda are the leavening duo that gives these mini donuts their lift. The 2 teaspoons of baking powder create the initial rise, while the 1/2 teaspoon of baking soda reacts with the buttermilk‑like milk‑butter mixture for a secondary puff. Skipping either will result in a dense, pancake‑like donut.
Ground cinnamon is the star of the show – its volatile oils release when heated, turning the coating into a fragrant snowstorm. Freshly ground cinnamon from a stick is far superior to pre‑ground, which can taste flat. If you’re daring, add a pinch of nutmeg for a warm undertone.
The Unexpected Star
Melted butter in the wet mix does more than add flavor; it coats the flour particles, creating a short‑crust effect that yields a buttery crumb. This is the secret I mentioned earlier – a splash of butter (¼ cup) makes the interior melt‑in‑your‑mouth. If you’re dairy‑free, substitute with coconut oil, but expect a subtle coconut note.
Milk adds moisture and a touch of sweetness, while the egg acts as a binder and adds richness. Whole milk is ideal because its fat content contributes to tenderness. For a lighter version, use 2% milk, but you’ll lose a bit of that luxurious mouthfeel.
The Final Flourish
The coating mixture – half a cup of sugar blended with 1 tablespoon of cinnamon – is what turns a plain donut into a cinnamon‑sugar masterpiece. Toss the hot donuts directly into this mixture for an even coat; the residual oil helps the sugar stick without becoming clumpy. For an extra glossy finish, drizzle a teaspoon of melted butter over the coated donuts before serving.
Everything's prepped? Good. Let’s get into the real action…
The Method — Step by Step
In a large mixing bowl, whisk together the flour, sugar, baking powder, baking soda, cinnamon, and salt. This dry blend should look uniformly speckled, with no clumps. I like to sift the flour first; it aerates the mixture and prevents pockets of flour that could turn into dry bits in the final donut.
Once combined, set the bowl aside for a minute – this brief rest allows the leavening agents to distribute evenly, which is crucial for a uniform rise.
In a separate bowl, whisk the milk, melted butter, egg, and vanilla extract until the mixture is glossy and slightly frothy. The butter should be warm (around 110°F) but not hot, otherwise it will cook the egg prematurely.
That sizzle when the butter meets the milk? Absolute perfection. It creates tiny steam bubbles that later translate into those airy pockets inside the donut.
Make a well in the center of the dry ingredients and pour the wet mixture in. Using a rubber spatula, fold gently – think of coaxing the flour into the liquid, not beating it. Over‑mixing will develop gluten, leading to a tough donut.
When the batter is just combined, you’ll notice a few streaks of flour; that’s okay. Let it sit for 5 minutes; the batter will thicken slightly as the flour hydrates.
While the batter rests, heat a deep, heavy‑bottomed skillet or a Dutch oven with enough vegetable oil to reach a depth of about 2 inches. Use a candy thermometer and bring the oil to 350°F (175°C). Maintaining this temperature is key – too low and the donuts will soak up oil; too high and the exterior will burn before the inside cooks.
Drop a tiny spoonful of batter into the oil; if it sizzles and rises to the surface within 15 seconds, you’re golden.
Using a small ice‑cream scoop (about 1‑2 tablespoons), carefully drop portions of batter into the hot oil. They should be spaced at least an inch apart to prevent crowding. As they fry, you’ll see the edges start to pull away from the pan – that’s your cue that they’re nearly done.
Don’t walk away from the stove here; keep a close eye on the color. A deep golden brown, not a dark amber, is the sweet spot.
Fry each side for about 45 seconds to 1 minute, turning once with a slotted spoon. The donuts should puff up, and you’ll hear a gentle crackle as the crust forms. The aroma will become unmistakably buttery with a hint of caramel.
When the donuts reach a uniform golden hue, use the slotted spoon to transfer them onto a wire rack set over a baking sheet. This allows excess oil to drain without making the donuts sit in a greasy pool.
While the donuts are still warm, toss them in the cinnamon‑sugar mixture. The heat from the donuts will melt any residual butter on their surface, helping the coating cling perfectly.
Give them a quick shake to ensure every curve is coated. If you want an extra glossy finish, drizzle a teaspoon of melted butter over the coated donuts and give them a gentle toss.
Allow the donuts to cool on the wire rack for at least 5 minutes before serving. This short rest lets the interior set while the coating stays crisp. Serve them warm, and watch as your guests dive in without hesitation.
That moment when someone says, “These are the best mini donuts I’ve ever had,” is the ultimate validation. And yes, I’m still half‑eating the batch myself.
That's it — you did it. But hold on, I've got a few more tricks that'll take this to another level…
Insider Tricks for Flawless Results
The Temperature Rule Nobody Follows
Most home cooks set the oil to “medium heat” and hope for the best. The truth is, a precise 350°F is non‑negotiable. Use a digital thermometer and adjust the burner in small increments. If the oil spikes above 375°F, the coating will scorch before the interior cooks; if it dips below 325°F, the donuts become greasy.
Why Your Nose Knows Best
Your sense of smell is a more reliable doneness indicator than a timer. When the batter first hits the oil, you’ll notice a faint buttery scent. As the donuts near completion, the aroma deepens into a caramel‑nutty perfume. If you can smell the faint hint of burnt sugar, pull them out immediately.
The 5‑Minute Rest That Changes Everything
After frying, let the donuts rest on a wire rack for exactly five minutes before coating. This pause allows the interior steam to settle, preventing the coating from becoming soggy. Skipping this step is why many recipes produce a doughy center.
The Butter‑Boost Finish
A light drizzle of melted butter right after coating adds a glossy sheen and a buttery depth that makes the sugar coating melt just enough to cling without sliding off. It also adds a subtle richness that elevates the flavor profile.
Donut‑Shaped Ice Cube Trick
If you’re short on time, you can freeze a small batch of batter in a silicone donut mold. When you’re ready to fry, pop them straight from the freezer into the oil – the sudden temperature shock creates a crispier outer crust. Just be sure the oil temperature is stable; the frozen batter can cause a brief dip.
Creative Twists and Variations
This recipe is a playground. Here are some of my favorite ways to switch things up:
Maple‑Pecan Crunch
Swap half of the cinnamon in the coating for pure maple sugar and toss the finished donuts in toasted pecan pieces. The result is a sweet‑nutty bite that feels like fall in a miniature form.
Chocolate‑Dipped Delight
After coating in cinnamon‑sugar, dip half of each donut into melted dark chocolate and let it set on parchment. The bitter chocolate balances the sweet coating, creating a sophisticated contrast.
Zesty Orange Glaze
Add 1 tablespoon of orange zest to the batter and, after frying, drizzle a thin orange glaze (powdered sugar mixed with fresh orange juice). The citrus brightens the flavor and adds a festive pop.
Savory Herb Twist
Omit the cinnamon and sugar coating, and instead toss the hot donuts in a mixture of grated Parmesan, dried thyme, and a pinch of smoked paprika. Serve them as an appetizer with a side of aioli for a savory surprise.
Pumpkin Spice Autumn
Replace ¼ cup of flour with pumpkin puree, and add 1 teaspoon pumpkin pie spice to the batter. Coat with a light dusting of cinnamon‑sugar and serve with a dollop of whipped cream for a seasonal treat.
Storing and Bringing It Back to Life
Fridge Storage
Place cooled donuts in an airtight container lined with a paper towel to absorb excess oil. They’ll stay fresh for up to 3 days. When you’re ready to eat, reheat in a preheated 350°F oven for 5 minutes – the crust will regain its crunch.
Freezer Friendly
Arrange donuts in a single layer on a baking sheet and freeze until solid (about 2 hours). Transfer them to a zip‑top freezer bag. They keep for up to 2 months. To revive, pop them straight into a 350°F oven for 7‑8 minutes; add a splash of water to the pan to create steam and restore softness.
Best Reheating Method
For the ultimate “just‑out‑of‑the‑oven” feel, use a toaster oven set to 375°F and place the donuts on a wire rack. Add a tiny drizzle of water on the rack (not on the donuts) – the steam prevents the interior from drying while the exterior crisps up again.