I was in the middle of a rainy Saturday, the kind where the clouds look like a giant, soggy blanket, when my roommate dared me to bake a German chocolate cake that could actually make people forget about their favorite bakery. I laughed, grabbed a notebook, and stared at the pantry like it held the secret to world peace. The kitchen was a symphony of clinking pans, the faint hiss of the oven, and the unmistakable scent of cocoa that seemed to whisper promises of indulgence. I could almost hear the cake calling my name, “Come on, you’ll love me,” and I knew I was about to embark on a culinary adventure that would end with a masterpiece.
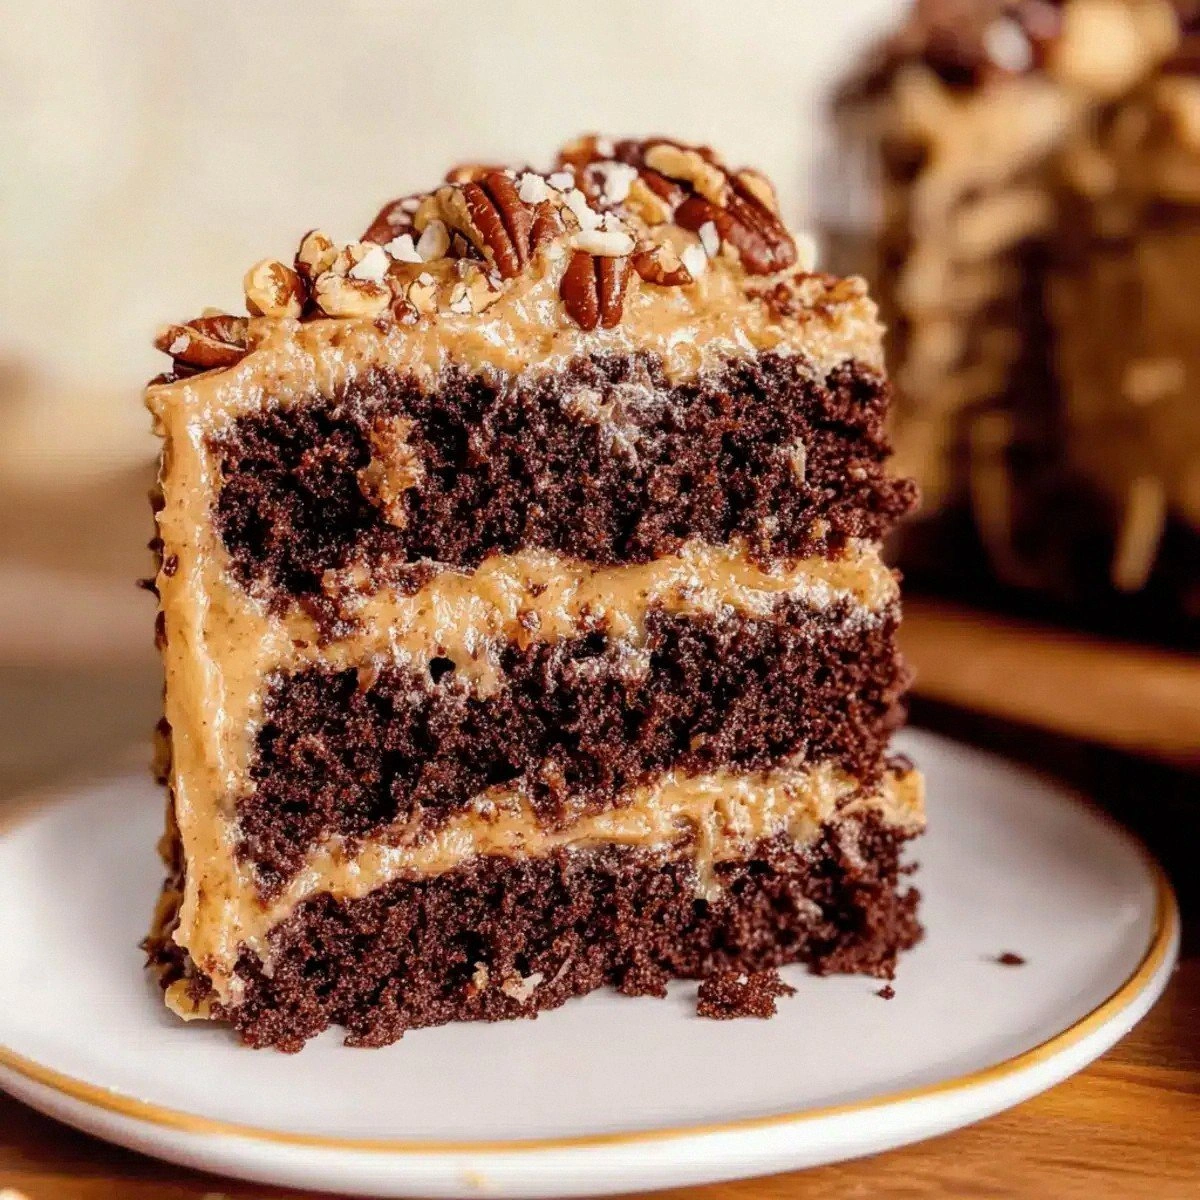
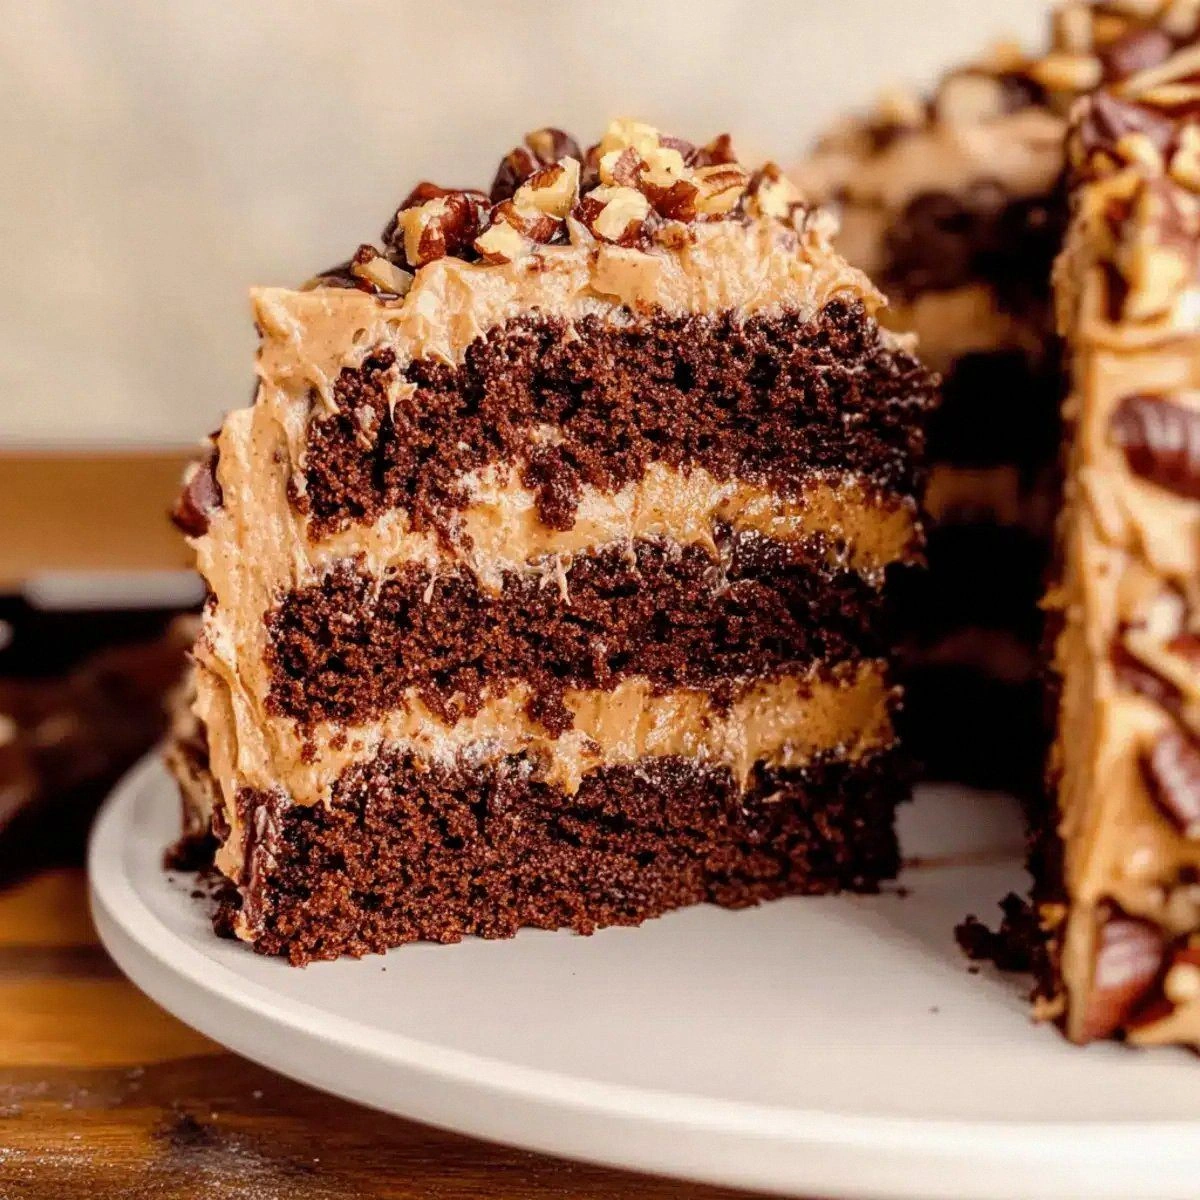
Picture this: a towering, glossy cake that looks like it was sculpted by a pastry architect, each layer soaked with a chocolatey crumb that’s softer than a cloud and richer than a velvet curtain. The frosting? A luscious, buttery blend of sweet shredded coconut and toasted pecans that drapes over the sides like a tropical sunset, with a glossy sheen that makes you want to dive right in. As the knife slices through, the cake yields a moist, almost fudgy interior that practically melts on the tongue, while the frosting cracks with a satisfying snap that releases a burst of caramelized nutty aroma. If you’ve ever dreamed of a cake that hugs you from the inside out, this is it.
Most German chocolate cake recipes out there either over‑bake the batter, leaving it dry, or they skimp on the frosting, turning it into a watery mess. I’ve tried them all, and I’ll be honest — I ate half the batch before anyone else got a chance to try it. This version flips the script by using a combination of buttermilk and evaporated milk to keep the crumb unbelievably tender, while a bar of milk chocolate adds depth without bitterness. The secret weapon? A splash of boiling water that blooms the cocoa, creating a silky batter that’s impossible to over‑mix. This is hands down the best version you’ll ever make at home.
I’m about to spill the beans on the technique that turns an ordinary batter into a moist marvel: the “hot‑water cocoa bloom.” It’s a simple step that most recipes skip, but it’s what makes the chocolate flavor sing like a choir of angels. And there’s a little twist with the frosting — I fold the coconut and pecans in at just the right temperature so they stay crunchy, not soggy. Okay, ready for the game‑changer? Let me walk you through every single step — by the end, you’ll wonder how you ever made it any other way.
What Makes This Version Stand Out
- Moisture: The dual‑milk system (buttermilk + evaporated milk) creates a tender crumb that stays soft for days, not just hours.
- Flavor Depth: Bloomed cocoa and a whole milk chocolate bar give a rich, balanced chocolate taste without a bitter edge.
- Frosting Crunch: Toasted pecans and sweetened coconut keep the frosting texturally exciting, providing that satisfying snap.
- Simplicity: Only a handful of tools are needed — a whisk, a mixer, and a good oven, making it approachable for any skill level.
- Make‑Ahead Friendly: The cake can be baked a day ahead; the frosting actually improves as the flavors meld.
- Visual Wow: The glossy top and the caramelized edges of the frosting make it picture‑perfect for any celebration.
- Universal Appeal: Kids love the sweet coconut, while adults appreciate the sophisticated chocolate‑nut combo.
- Ingredient Quality: Using real milk chocolate and fresh nuts elevates the whole experience beyond boxed mixes.
Inside the Ingredient List
The Flavor Base
All‑purpose flour is the canvas for this cake, providing structure while allowing the cocoa and chocolate to shine. The 2‑cup amount gives enough body without making the crumb dense. If you’re gluten‑sensitive, a blend of rice flour and tapioca starch works, but the texture will be slightly different. Cornstarch (½ cup) is the secret behind the feather‑light crumb; it interferes with gluten formation, ensuring each bite feels like a cloud. Skipping it would give you a tougher cake that doesn’t melt in your mouth.
The Leavening Crew
Baking powder (1 tbsp) and baking soda (1 tsp) are the dynamic duo that lift this cake to fluffy heights. The soda needs the acidity from buttermilk to react properly, creating those airy bubbles that keep the cake from being heavy. Salt (1 tsp) isn’t just a flavor enhancer; it balances the sweetness and accentuates the chocolate’s depth. Forgetting the salt would make the cake taste flat, like a song missing its bass line.
The Chocolate Symphony
A whole milk chocolate bar (1 bar) melts into the batter, adding richness that cocoa powder alone can’t achieve. The unsweetened cocoa (¾ cup) brings a deep, earthy note, while the boiling water (1 cup) blooms the cocoa, unlocking its full flavor potential. If you use cold water, you’ll miss that glossy, velvety texture. The oil (½ cup) keeps the crumb tender and adds a subtle sheen, making the cake look professionally glazed.
The Moisture Makers
Buttermilk (1 cup) adds acidity that reacts with the soda, giving the cake lift, while also contributing a buttery tang that balances the chocolate. Evaporated milk (1 cup) is the secret sauce for moisture; its concentrated dairy solids keep the crumb moist longer than regular milk. Eggs (4 large) and egg yolks (4 large) provide structure and richness; the yolks especially enrich the crumb, making it dense yet tender. Skipping the extra yolks would result in a drier, less luxurious texture.
The Final Flourish
For the frosting, sweetened shredded coconut (1 cup) and chopped pecans (1 cup) create a tropical crunch that contrasts beautifully with the chocolate. The butter (½ cup) is the base, giving a silky mouthfeel, while brown sugar (½ cup) and granulated sugar (½ cup) provide caramel notes and sweetness. The evaporated milk in the frosting (already listed) adds body, and a splash of vanilla (2 tsp) rounds out the flavor profile. If you prefer a nuttier frosting, swap half the coconut for more pecans.
Everything's prepped? Good. Let's get into the real action...
The Method — Step by Step
Preheat your oven to 350°F (175°C). Grease three 9‑inch round cake pans, line the bottoms with parchment, and give the sides a light dusting of flour. This ensures the cakes release cleanly later; a stuck cake is a sad cake. I always tap the pans on the counter to settle the flour evenly — that little sound is the first sign of a successful bake.
Kitchen Hack: Use a silicone baking mat instead of parchment for an even easier release; the cake slides right off.In a large bowl, whisk together the flour, cornstarch, baking powder, baking soda, and salt. This dry blend should look uniformly speckled, with no clumps. The cornstarch will keep the crumb airy, so resist the urge to over‑mix. If you see any pockets of flour, give it another quick whisk — the goal is a flawless, even mixture.
Melt the milk chocolate bar with ½ cup of oil in a heat‑proof bowl over a simmering pot of water (bain‑marie). Stir until smooth, then remove from heat and let it cool slightly. This gentle melt prevents scorching, which would give the batter a burnt taste. The mixture should be glossy and thick, like melted caramel.
In a separate bowl, combine the unsweetened cocoa with the boiling water, stirring vigorously for about 30 seconds. You’ll see the mixture turn from grainy to a deep, silky liquid — that’s the bloom working its magic. Let it sit for a minute to cool slightly, then blend it into the melted chocolate‑oil mixture.
Add the granulated sugar (2 cups) and vanilla extract (2 tsp) to the chocolate‑cocoa blend, whisking until fully incorporated. The sugar will dissolve a bit, creating a slightly glossy batter. At this point, the batter should smell like a chocolate perfume, rich and inviting.
One at a time, whisk in the eggs, then the egg yolks, making sure each addition is fully emulsified before adding the next. This creates a stable emulsion that traps air, essential for a fluffy crumb. The batter will thicken and turn a darker hue; that’s a good sign.
Stir in the buttermilk and evaporated milk, alternating with the dry ingredients from step 2. Begin and end with the dry mix, folding gently with a rubber spatula. The batter will be thick but pourable; if it feels too stiff, add a splash of water. The edges of the batter should pull away from the sides of the bowl — that’s the “clean‑edge” signal.
Watch Out: Over‑mixing at this stage can develop gluten, resulting in a dense cake. Stop as soon as the batter is just combined.Divide the batter evenly among the three prepared pans, smoothing the tops with a spatula. Tap the pans lightly on the counter to release any air bubbles. The batter should spread into a smooth dome; if you see cracks forming, the batter is too thick — add a tablespoon of milk.
Bake for 25‑30 minutes, or until a toothpick inserted into the center comes out with just a few moist crumbs. The top will have a slight dome and a faint crackle — that’s the crust forming. As the cake bakes, the kitchen will fill with a chocolatey perfume that’s impossible to ignore. Resist the urge to open the oven door early; the heat loss can cause the cake to sink.
Allow the cakes to cool in the pans for 10 minutes, then turn them out onto a wire rack to cool completely. While they’re cooling, you can prepare the frosting.
For the frosting, melt the butter (½ cup) in a saucepan over medium heat. Add the brown sugar (½ cup) and the remaining granulated sugar (½ cup), stirring until the mixture bubbles and turns a caramel color. This caramel base is what gives the frosting its signature deep sweetness.
Stir in the evaporated milk (1 cup) and bring the mixture to a gentle boil, then reduce to a simmer for 2‑3 minutes, stirring constantly. The sauce should thicken slightly and coat the back of a spoon. Remove from heat and let it cool for a minute before adding the shredded coconut (1 cup) and chopped pecans (1 cup). The nuts should stay crisp; if they soften, the frosting will lose its texture.
Once the cakes are completely cool, place the first layer on a serving plate, spread a generous amount of frosting, then add the second layer, more frosting, and finally the top layer. Use the remaining frosting to cover the sides, letting it cascade down the edges in a glossy waterfall. The frosting should be thick enough to hold its shape but soft enough to spread with a gentle hand.
Kitchen Hack: Warm the frosting slightly before spreading; it becomes silkier and easier to work with, preventing cracks.Chill the assembled cake for 20 minutes to let the frosting set, then slice with a hot, wet knife for clean cuts. Serve at room temperature and watch your guests’ eyes widen with every bite. That sizzle when it hits the pan? Absolute perfection. And now the fun part — taste testing!
That's it — you did it. But hold on, I've got a few more tricks that'll take this to another level. Stay with me here — this is worth it.
Insider Tricks for Flawless Results
The Temperature Rule Nobody Follows
Always bring your butter, eggs, and buttermilk to room temperature before mixing. Cold ingredients cause the batter to seize, leading to uneven crumb. I once tried using chilled eggs straight from the fridge and ended up with a cake that had a dense, gummy center. Letting everything sit for 30 minutes on the counter smooths out temperature differences, resulting in a uniform rise.
Why Your Nose Knows Best
Instead of relying on a timer alone, trust the aroma. When the frosting reaches a caramel hue and you smell a buttery toffee, you know it’s ready. Over‑cooking the caramel can turn it bitter, while under‑cooking leaves it too runny. The moment you detect that sweet, nutty perfume, pull it off the heat and move on.
The 5‑Minute Rest That Changes Everything
After you pull the cakes from the oven, let them rest in the pans for exactly 10 minutes, then turn them out to cool completely. Skipping this rest makes the cakes crumble when you try to frost them. The brief steam trapped in the pan finishes the bake, while the cooling on a rack prevents sogginess at the bottom.
Toast Those Pecans
A quick toast in a dry skillet for 3‑4 minutes unlocks a deeper, nuttier flavor that raw pecans can’t match. I once served a cake with untoasted nuts and the frosting tasted flat; the toast adds a subtle bitterness that balances the sweet coconut.
The “Hot‑Water Cocoa Bloom” Secret
Pouring boiling water over cocoa powder isn’t just a trick; it’s a chemistry lesson. The heat expands the cocoa particles, releasing aromatic oils that would otherwise stay locked. The result is a batter that tastes like a chocolate bar, not just cocoa powder. I dare you to taste this and not go back for seconds.
Creative Twists and Variations
This recipe is a playground. Here are some of my favorite ways to switch things up:
Dark Chocolate Delight
Swap the milk chocolate bar for an equal amount of 70% dark chocolate and increase the cocoa powder to 1 cup. The result is a richer, slightly bitter cake that pairs beautifully with a dark‑rum infused frosting. Chocolate purists will love the intensity.
Coffee‑Infused Kick
Add 2 teaspoons of instant espresso powder to the dry ingredients. The coffee amplifies the chocolate flavor without making the cake taste like coffee. It’s perfect for brunches where you want a subtle caffeine boost.
Tropical Coconut Burst
Replace half of the shredded coconut in the frosting with toasted coconut flakes and add a splash of coconut rum. The rum adds a warm, island vibe, turning the cake into a mini vacation.
Nut‑Free Version
Swap the pecans for toasted sunflower seeds or pumpkin seeds. The texture remains crunchy, and the flavor stays nut‑friendly for those with allergies. Just make sure the seeds are unsalted to keep the sweetness balanced.
Spiced Autumn Twist
Add ½ teaspoon of ground cinnamon and a pinch of nutmeg to the batter. This gives the cake a warm, cozy flavor that’s perfect for fall gatherings. Pair it with a caramel drizzle for extra decadence.
Storing and Bringing It Back to Life
Fridge Storage
Cover the cake loosely with plastic wrap or store it in an airtight container and refrigerate for up to 5 days. The frosting will firm up slightly, making the slices hold their shape. Before serving, let the cake sit at room temperature for 30 minutes to soften the frosting.
Freezer Friendly
Wrap each layer tightly in parchment, then in foil, and place them in a freezer bag. They’ll keep for up to 3 months. When you’re ready to enjoy, thaw overnight in the fridge, then bring to room temperature and add a fresh layer of frosting if needed.
Best Reheating Method
Slice a piece and microwave for 10‑15 seconds, adding a tiny splash of water (about a teaspoon) on the plate. The steam revives the moisture, and the frosting melts just enough to become silky again. Avoid over‑heating, or the cake will become rubbery.