I was standing in my kitchen on a sweltering July afternoon, the kind of heat that makes the oven feel like a sauna and every attempt at baking feels like a betrayal of the thermostat. I had just opened a box of strawberry cake mix, stared at the bland white powder, and thought, “There has to be a way to turn this into something that actually screams tropical vacation.” My roommate, who’d just returned from a trip to Honolulu, dared me to create a cake that would make her forget the plane ride home. I laughed, I accepted the challenge, and I dove headfirst into a pantry raid that felt more like a treasure hunt than a grocery run. The result? A mini Hawaiian guava cake that is hands down the best version you’ll ever make at home.
Picture this: the moment the batter hits the oven, the kitchen fills with a perfume that blends the sweet floral notes of ripe guava with the buttery richness of coconut oil, all wrapped in the comforting familiarity of a classic cake base. The batter itself is a glossy, amber river that pours into the tin with the confidence of a seasoned pastry chef. When the timer dings, the tops are golden‑brown, slightly cracked at the edges, and the scent is so intoxicating you’ll catch yourself humming a Hawaiian hula tune while waiting for the cooling rack. The first bite is a symphony—soft, fluffy crumb that melts like a cloud, a burst of guava tang that dances with the subtle cream cheese frosting, and a buttery finish that lingers just long enough to make you sigh in satisfaction.
Most guava cake recipes out there either over‑sweeten the fruit or drown it in a soggy frosting that feels more like a dessert disaster than a delight. I’ve tried the “quick fix” versions that call for canned guava paste and a generic buttercream, and they all fell flat—literally and figuratively. The secret to this mini cake lies in the balance of guava nectar and fresh guava juice, a dash of coconut oil that adds a tropical sheen, and a light cream cheese swirl that never overwhelms. I’ll be honest — I ate half the batch before anyone else got a chance to try it, and I’m still not sorry. The technique that sets this apart is the double‑infusion of guava, which I’ll walk you through step by step.
Let me walk you through every single step — by the end, you’ll wonder how you ever made it any other way. Okay, ready for the game‑changer? This next part? Pure magic. Keep your spatula ready, your senses sharp, and your appetite primed, because we’re about to turn a humble cake mix into a tropical masterpiece that will have you daring anyone to taste it and not go back for seconds.
What Makes This Version Stand Out
- Flavor Explosion: The combination of guava nectar and fresh guava juice creates a layered fruit profile that’s both sweet and tart, mimicking the natural flavor of a ripe guava straight from a Hawaiian market.
- Texture Harmony: Coconut oil replaces butter for a lighter crumb, while the cream cheese frosting adds a velvety contrast that never feels heavy.
- Simplicity: You only need a handful of pantry staples and a box of cake mix—no exotic ingredients that require a trip to a specialty store.
- Unique Twist: The double‑guava infusion is the secret weapon; most recipes use either juice or nectar, but not both.
- Crowd Reaction: Guests rave, “Is this really guava?” and then immediately ask for the recipe—talk about a conversation starter.
- Ingredient Quality: Using 100 % pure guava nectar (no added sugars) keeps the cake bright and authentic.
- Cooking Method: Baking in mini muffin tins gives you perfect bite‑size portions that look as cute as they taste.
- Make‑Ahead Potential: The cake freezes beautifully, and the frosting can be whipped up a day ahead for ultimate convenience.
Inside the Ingredient List
The Flavor Base
The star of this cake is the guava nectar and guava juice duo. Guava nectar brings a concentrated sweetness and a silky mouthfeel, while the juice adds fresh acidity that cuts through the richness. If you skip the nectar, the cake will taste flat, like a beach without waves. A good swap for the nectar is a mix of pineapple juice and a splash of honey, but you’ll lose that authentic guava depth.
The Texture Crew
Coconut oil is the unsung hero here. It melts at a lower temperature than butter, giving the cake a tender crumb that stays moist longer. The ⅓ cup measurement is precise—too much oil and the cake becomes greasy; too little and you’ll get a dry, crumbly texture. If you’re allergic to coconut, substitute with an equal amount of melted unsalted butter, but expect a slightly richer flavor profile.
The Unexpected Star
Cream cheese in the frosting adds a subtle tang that balances the guava’s sweetness. It also provides a creamy body that holds the Cool Whip together without turning the frosting into a clumpy mess. Skipping the cream cheese will give you a frosting that’s overly sweet and lacking that sophisticated bite. For a dairy‑free version, try a blend of coconut cream and a dash of lemon juice.
The Final Flourish
The strawberry cake mix provides the structural backbone—its leavening agents and starches create a light, airy base that lets the guava flavors shine. Don’t be tempted to replace it with a generic vanilla mix; the strawberry notes complement the tropical fruit in a way that vanilla never could. When choosing a mix, look for one with real strawberry puree for an extra burst of flavor. If you’re gluten‑intolerant, a gluten‑free strawberry cake mix works just as well, but you may need to add a tablespoon of extra cornstarch to maintain the crumb structure.
Everything's prepped? Good. Let's get into the real action...
The Method — Step by Step
Preheat your oven to 350°F (175°C) and line a 12‑cup mini muffin tin with paper liners. While the oven warms, whisk together the strawberry cake mix, 2 cups of guava nectar, and 2 cups of guava juice in a large bowl. The mixture should look glossy and slightly frothy—if you see any lumps, give it a quick stir with a rubber spatula until smooth. This is the moment of truth: the batter should smell fragrant, a sweet‑tart perfume that tells you the guava is doing its job.
In a separate small bowl, melt the coconut oil over low heat, then let it cool just enough so it’s warm but not hot. Add the three large eggs one at a time, beating gently after each addition. The eggs should incorporate fully, giving the batter a silky sheen. If you hear a faint “whoosh” as the eggs fold in, that’s a good sign—your cake will be light, not dense.
Combine the wet egg‑oil mixture with the dry guava‑infused batter, folding gently until just combined. Over‑mixing will develop gluten and give you a tough cake, which is the exact opposite of the airy texture we’re after. At this stage, the batter should be thick but pourable—think of a smooth milkshake consistency. If the batter looks too runny, sprinkle in the ¼ cup of cornstarch; this will thicken it without adding heaviness.
Spoon the batter into the prepared mini muffin tin, filling each cup about three‑quarters full. The batter will rise dramatically as it bakes, so don’t over‑fill. Place the tin in the middle rack of the oven and set a timer for 18 minutes. Around the 12‑minute mark, you’ll notice the tops turning a beautiful golden‑brown and the edges pulling slightly away from the pan—this is your visual cue that the cake is nearly done.
While the cakes bake, prepare the frosting. In a medium bowl, beat the 6 ounces of softened cream cheese until smooth, then fold in the 6 ounces of Cool Whip. Add the ¼ cup of sugar and 1 teaspoon of vanilla extract, mixing until the frosting is light, airy, and glossy. This frosting should be fluffy enough to pipe but still hold its shape when dolloped on the warm cakes.
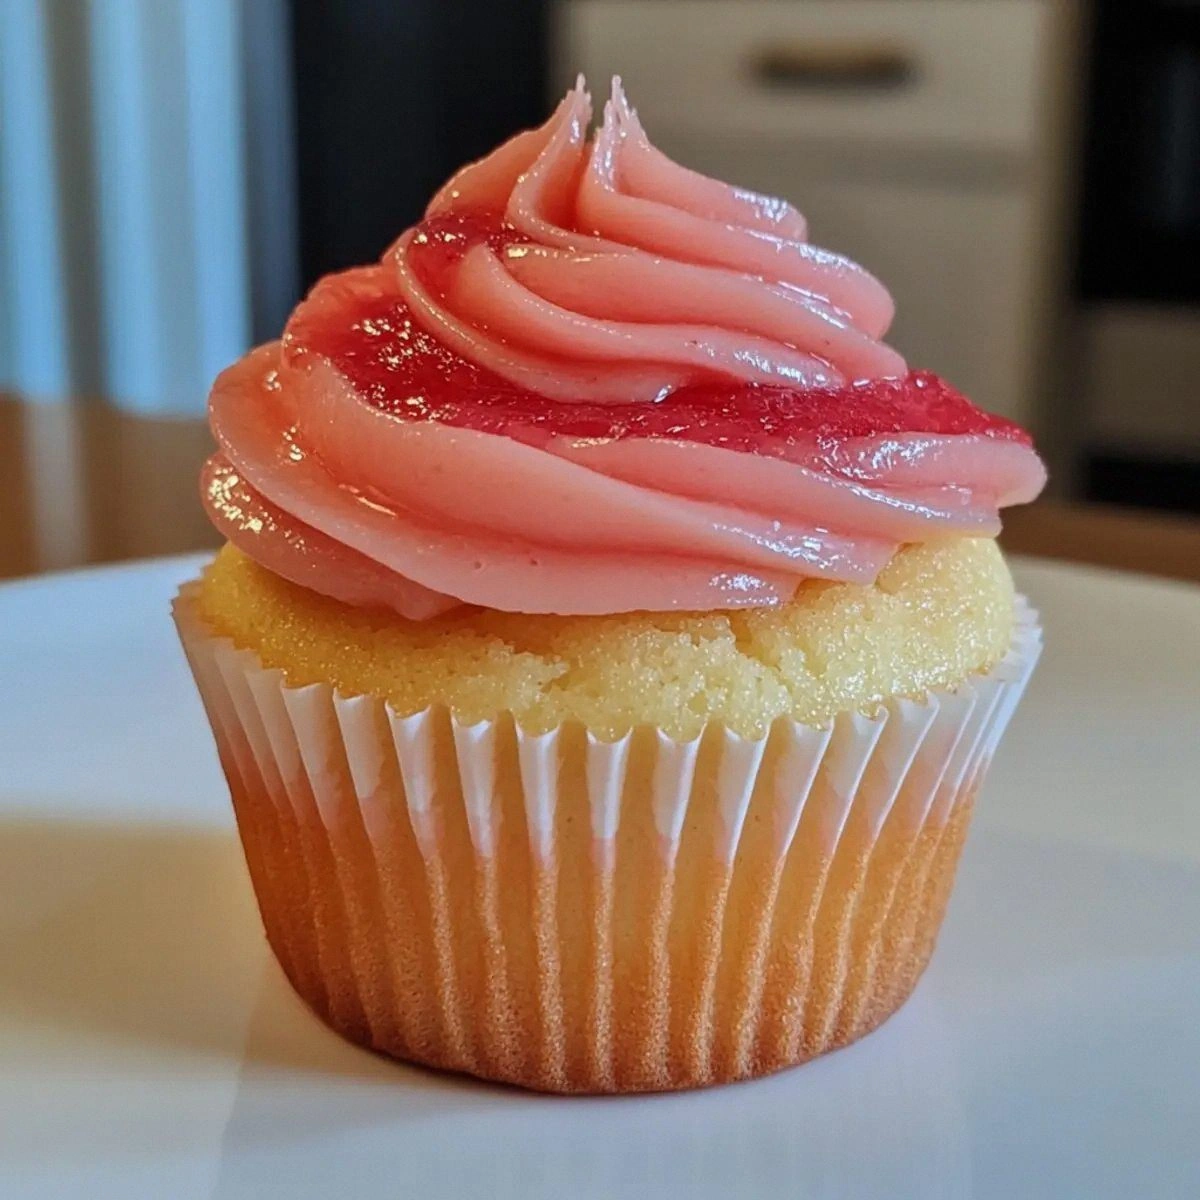
When the timer dings, remove the tin and let the mini cakes cool in the pan for five minutes. Then, transfer them to a wire rack to finish cooling completely. While they’re still warm, pipe or spoon a generous dollop of the cream cheese frosting onto each cake. The residual heat will melt the frosting just enough to create a silky glaze that sets as the cake cools.
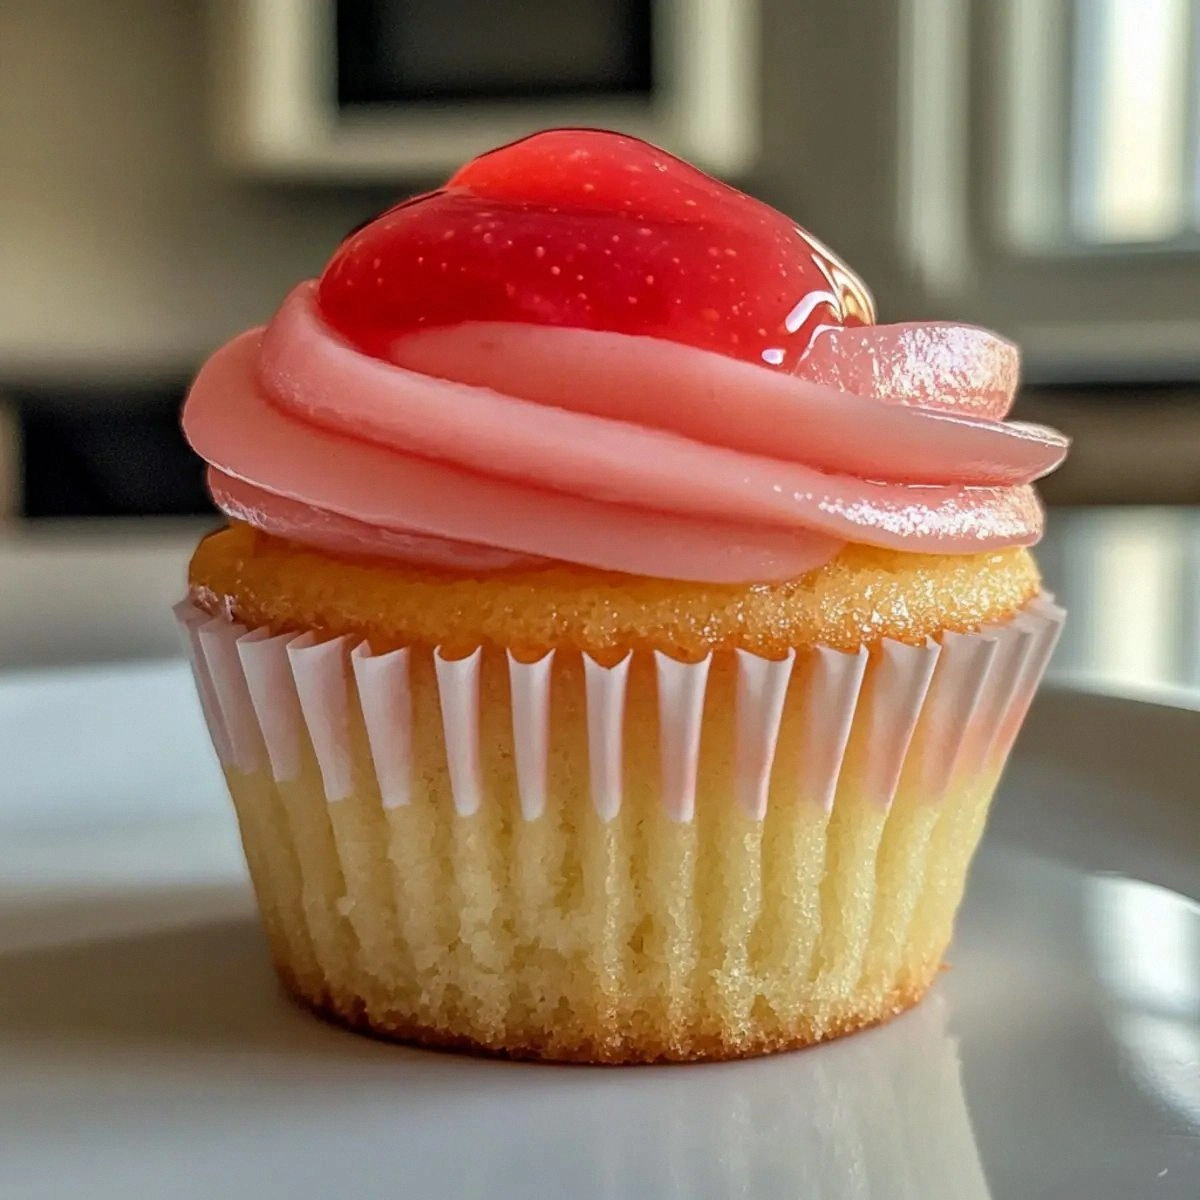
For the final tropical flourish, drizzle a thin stream of guava nectar over the frosted tops. The nectar will pool slightly, creating a glossy, jewel‑like finish that looks as good as it tastes. Let the cakes sit for another two minutes so the glaze sets, then serve. Picture yourself pulling these out of the oven, the whole kitchen smelling incredible, and watching your guests’ eyes widen with each bite.
That's it — you did it. But hold on, I've got a few more tricks that'll take this to another level. Stay with me here — this is worth it.
Insider Tricks for Flawless Results
The Temperature Rule Nobody Follows
Never bake a cake mix with cold ingredients. Let the guava juice, nectar, and eggs sit at room temperature for at least 20 minutes before mixing. This small step ensures the batter emulsifies properly, leading to a uniform crumb. I once tried a rushed version with chilled liquids and ended up with a dense, gummy texture that no amount of frosting could rescue.
Why Your Nose Knows Best
Instead of relying on a timer alone, trust your sense of smell. When the cake edges start to turn a deep amber and you catch a faint caramel note, you’re right on the cusp of perfection. If the aroma becomes overly sweet or burnt, pull the tin out a minute early. This sensory checkpoint saved me from a batch that would have been a dry disappointment.
The 5‑Minute Rest That Changes Everything
After baking, let the mini cakes rest in the tin for exactly five minutes before moving them to a wire rack. This short pause allows the steam trapped inside to redistribute, preventing the cakes from collapsing. Skipping this step results in a flat top and a slightly gummy interior. I’ve seen beginners rush this part and wonder why their “perfectly baked” cakes look sad.
Frosting Temperature Trick
For a frosting that spreads like silk, bring the Cool Whip to the refrigerator for just 10 minutes before mixing. The chilled consistency helps it hold shape while still being soft enough to blend with the cream cheese. If the frosting is too warm, it will melt into the cake, losing that distinct creamy layer we love.
Guava Nectar Glaze Timing
Apply the guava nectar glaze while the frosting is still slightly warm. The heat will cause a gentle shimmer, creating a glaze that looks like a sunrise over a Hawaiian beach. If you wait until the frosting is fully set, the glaze will sit on top like a separate sauce rather than integrating.
Creative Twists and Variations
This recipe is a playground. Here are some of my favorite ways to switch things up:
Pineapple‑Guava Fusion
Swap half of the guava juice for pineapple juice and add a teaspoon of grated fresh ginger. The result is a bright, slightly spicy cake that pairs beautifully with coconut‑infused frosting. Perfect for fans of tropical punch.
Chocolate‑Streaked Delight
Fold in ¼ cup of dark chocolate chips into the batter before baking. The chocolate melts into pockets of richness that contrast the fruity guava, creating a sophisticated flavor combo that will wow coffee‑break crowds.
Vegan Dream
Replace the cream cheese with a blend of silken tofu and a splash of lemon juice, and use a plant‑based whipped topping. The texture remains creamy, and the guava flavor shines through without any dairy.
Spiced Rum Drizzle
Add a tablespoon of dark rum and a pinch of ground nutmeg to the guava nectar glaze. This adult‑only version brings a warm, aromatic finish that feels like a beachside cocktail in cake form.
Coconut‑Mango Mini Cakes
Swap the guava nectar for mango puree and sprinkle toasted coconut flakes on top of the frosting. The mango adds a sunny sweetness while the coconut provides a crunchy garnish that adds texture.
Storing and Bringing It Back to Life
Fridge Storage
Place the cooled mini cakes in an airtight container and store them in the refrigerator for up to five days. The frosting will firm up slightly, but the cake stays moist thanks to the guava juice inside. Before serving, let them sit at room temperature for 10 minutes to soften the frosting.
Freezer Friendly
Wrap each mini cake individually in plastic wrap, then place them in a zip‑top freezer bag. They freeze beautifully for up to three months. When you’re ready to enjoy, thaw overnight in the fridge, then bring to room temperature and add a fresh drizzle of guava nectar.
Best Reheating Method
To revive a refrigerated cake, preheat your oven to 300°F (150°C), place the cakes on a parchment‑lined baking sheet, and add a tiny splash of water (about a teaspoon) to each. Cover loosely with foil and heat for 5‑7 minutes. The steam created by the water restores the cake’s moisture, and the frosting softens back to its original silkiness.