I was halfway through a night of binge‑watching old sitcoms when my kitchen turned into a smoky, chaotic mess. I’d tried the classic Pad Kra Pao recipe from a bland cookbook, only to end up with bland, limp chicken and a sauce that tasted like it had been left in a jar for a week. The moment that fire crackled in the wok and the basil leaves began to wilt sent a rush of aroma that made my heart skip a beat. That night, I vowed to rewrite the recipe, to create a version that would make my taste buds do a happy dance and my friends swoon.
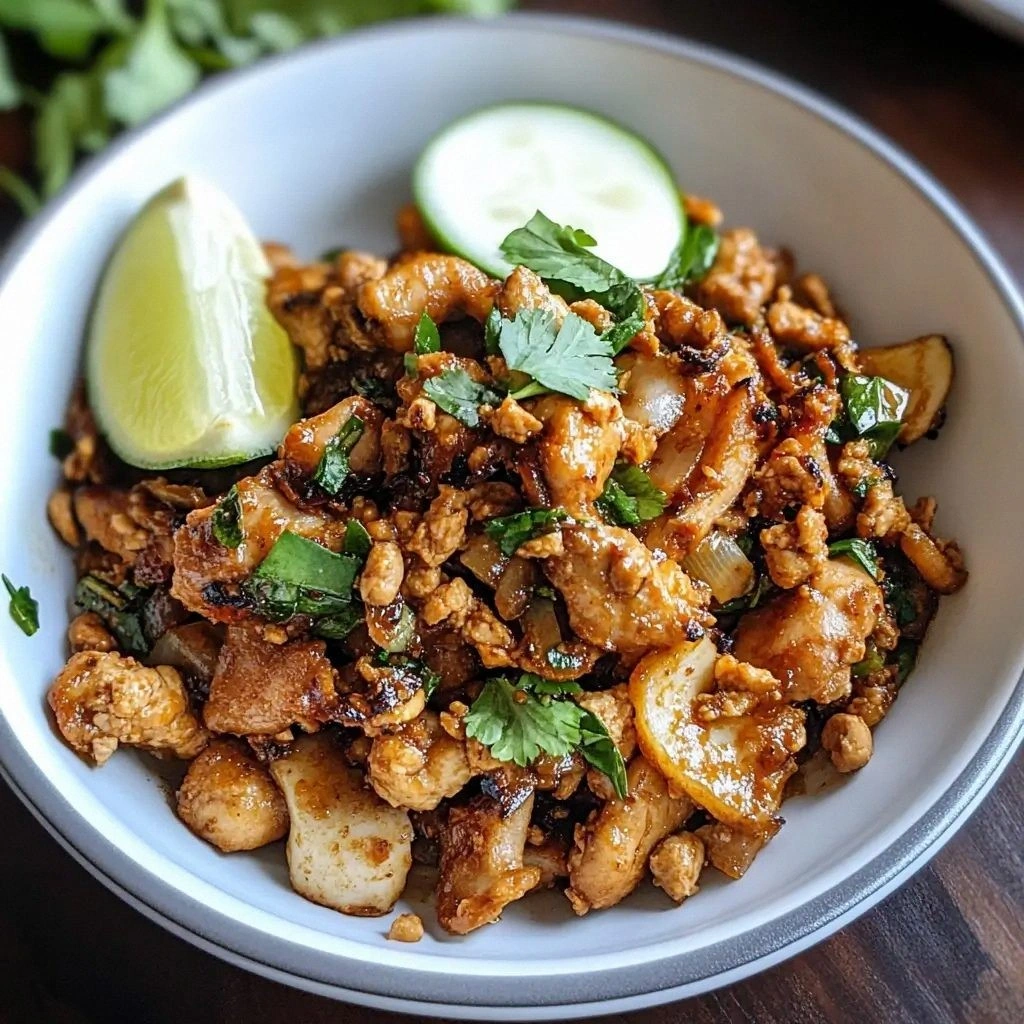
Picture this: the sizzling sound of garlic hitting hot oil, the sharp, peppery bite of fresh chilies, and the earthy aroma of Thai basil drifting through the air. The first bite is a burst of umami, followed by a subtle sweetness from the sugar, and a bright, citrusy lift from the fish sauce. The chicken is tender, not dry, and the sauce clings to every morsel like a silky coat of velvet. The final touch? A glossy sheen that glistens under the kitchen lights, promising a flavor explosion with every forkful.
What makes this version stand out? It’s not just the ingredients or the cooking technique; it’s the mindset. I approached Pad Kra Pao with the same enthusiasm I reserve for a midnight snack that’s both comforting and daring. I dared the sauce to be bold, the chicken to be succulent, and the basil to be the star that ties everything together. The result? A dish that’s hands down the best version you’ll ever make at home, one that turns an ordinary dinner into a celebration of flavor.
I dare you to taste this and not go back for seconds. I’ll be honest—my first bite was so addictive that I ate half the batch before anyone else got to try it. If you’ve ever struggled with the classic Pad Kra Pao, you’re not alone—and I’ve got the fix. Most recipes get this completely wrong, but here’s what actually works: the right balance of heat, the quick stir‑fry technique, and the secret ingredient that elevates the sauce to a new level.
Let me walk you through every single step—by the end, you’ll wonder how you ever made it any other way. From the moment you chop the aromatics to the final flourish of basil, each stage is a deliberate act of flavor engineering. The next part? Pure magic. And now the fun part: we’re going to dive deep into the ingredients that make this dish sing.
What Makes This Version Stand Out
- Flavor: The sauce balances sweet, salty, and umami with a subtle citrusy bite that cuts through the richness of the chicken.
- Texture: The chicken stays moist and tender, while the basil leaves snap just enough to release their aroma without falling apart.
- Simplicity: Only a handful of pantry staples are needed, yet the dish feels restaurant‑grade.
- Heat: Fresh chilies and a splash of chili oil give a controlled burn that’s customizable to your spice tolerance.
- Visual Appeal: The glossy sauce, bright green basil, and pop of red chilies create a feast for the eyes before the first bite.
- Versatility: Swap chicken for shrimp, tofu, or beef, and the dish remains delicious.
- Speed: The entire meal takes less than 45 minutes from prep to plate.
- Make‑Ahead Friendly: The sauce can be pre‑made and stored; just reheat and stir‑fry the chicken again.
Alright, let's break down exactly what goes into this masterpiece...
Inside the Ingredient List
The Flavor Base
The heart of Pad Kra Pao lies in the sauce blend: soy sauce, fish sauce, oyster sauce, and a touch of sugar. Each component plays a distinct role—soy provides depth, fish sauce adds briny umami, oyster sauce gives a subtle sweetness, and sugar balances the acidity. Skipping any of these will leave the dish feeling flat. If you’re looking for a low‑sodium alternative, reduce the soy sauce by half and add a splash of coconut aminos.
Buying tip: Look for soy sauce with a dark, rich color; it usually indicates a longer fermentation period and richer flavor. For fish sauce, choose a brand with a clear, fishy aroma rather than one that smells overly sweet or artificial. The quality of these sauces will directly influence the final taste.
The Aroma Crew
Garlic, shallots, and chilies form the aromatic foundation. Garlic brings a sharp, pungent note; shallots offer a subtle sweetness; chilies provide heat that lingers on the palate. If you’re sensitive to spice, use green chilies or reduce the number of red chilies. For a milder version, replace fresh chilies with a tablespoon of red pepper flakes.
Swap idea: Replace shallots with a small amount of minced onion for a different flavor profile. If you’re allergic to garlic, a pinch of garlic powder can mimic the essence without the intensity.
The Unexpected Star
Thai basil isn’t just a garnish; it’s the star that defines Pad Kra Pao. Its peppery, slightly sweet flavor contrasts beautifully with the savory sauce. If you can’t find Thai basil, sweet basil or holy basil can work, but the aroma will differ. When selecting basil, choose leaves that are glossy and free from yellow spots.
Tip: Store basil in a glass of water, cover loosely with a plastic bag, and keep it in the fridge. This keeps it fresh for up to a week and preserves its vibrant flavor.
The Final Flourish
The optional eggs add a silky texture and a subtle richness that balances the dish. If you prefer a vegetarian version, simply omit the eggs and add extra basil. A splash of lime juice at the end brightens the flavors and adds a refreshing zing. Remember, the goal is to keep the sauce glossy and clingy, so avoid adding too much liquid.
Everything's prepped? Good. Let's get into the real action...
The Method — Step by Step
- Start by heating a high‑heat wok or large skillet over medium‑high heat until it’s almost smoking. Add the vegetable oil, swirling to coat the bottom. The oil should shimmer but not smoke excessively—this indicates the pan is hot enough. This is the moment of truth; a hot pan guarantees a quick sear and caramelized edges.
- Add the minced garlic, sliced shallots, and chilies to the hot oil. Stir quickly, letting the aromatics release their fragrance within 10–15 seconds. Watch for the scent—if it turns metallic, you’ve over‑cooked them. This step is essential; it builds the foundation of flavor that carries through the dish.
- Introduce the chicken pieces, spreading them in a single layer. Let them sear undisturbed for 2–3 minutes before stirring. This allows the chicken to develop a golden crust that locks in juices. Keep the heat high but avoid overcrowding; if the pan starts to steam, reduce the heat slightly.
- Once the chicken has browned, pour in the soy sauce, fish sauce, oyster sauce, sugar, and pepper. Stir vigorously, ensuring the sauces coat every piece. The mixture should bubble and the sugar should dissolve within 30 seconds. This is the stage where the sauce starts to thicken and develop that glossy sheen.
- Add the Thai basil leaves, tossing quickly. The basil will wilt almost instantly; don’t overcook it. The goal is to preserve its bright green color and aromatic oils. The basil’s peppery bite will cut through the richness of the sauce.
- If you’re incorporating eggs, push the chicken to the side of the pan and pour the beaten eggs into the empty space. Let them scramble slightly before mixing them with the chicken. This creates a silky texture and a subtle richness that balances the dish.
- Taste the sauce. If it’s too salty, add a splash of water or a squeeze of lime juice to balance. If it’s lacking depth, a pinch of crushed red pepper flakes can add a final kick. The dish should feel cohesive, with each component harmonizing.
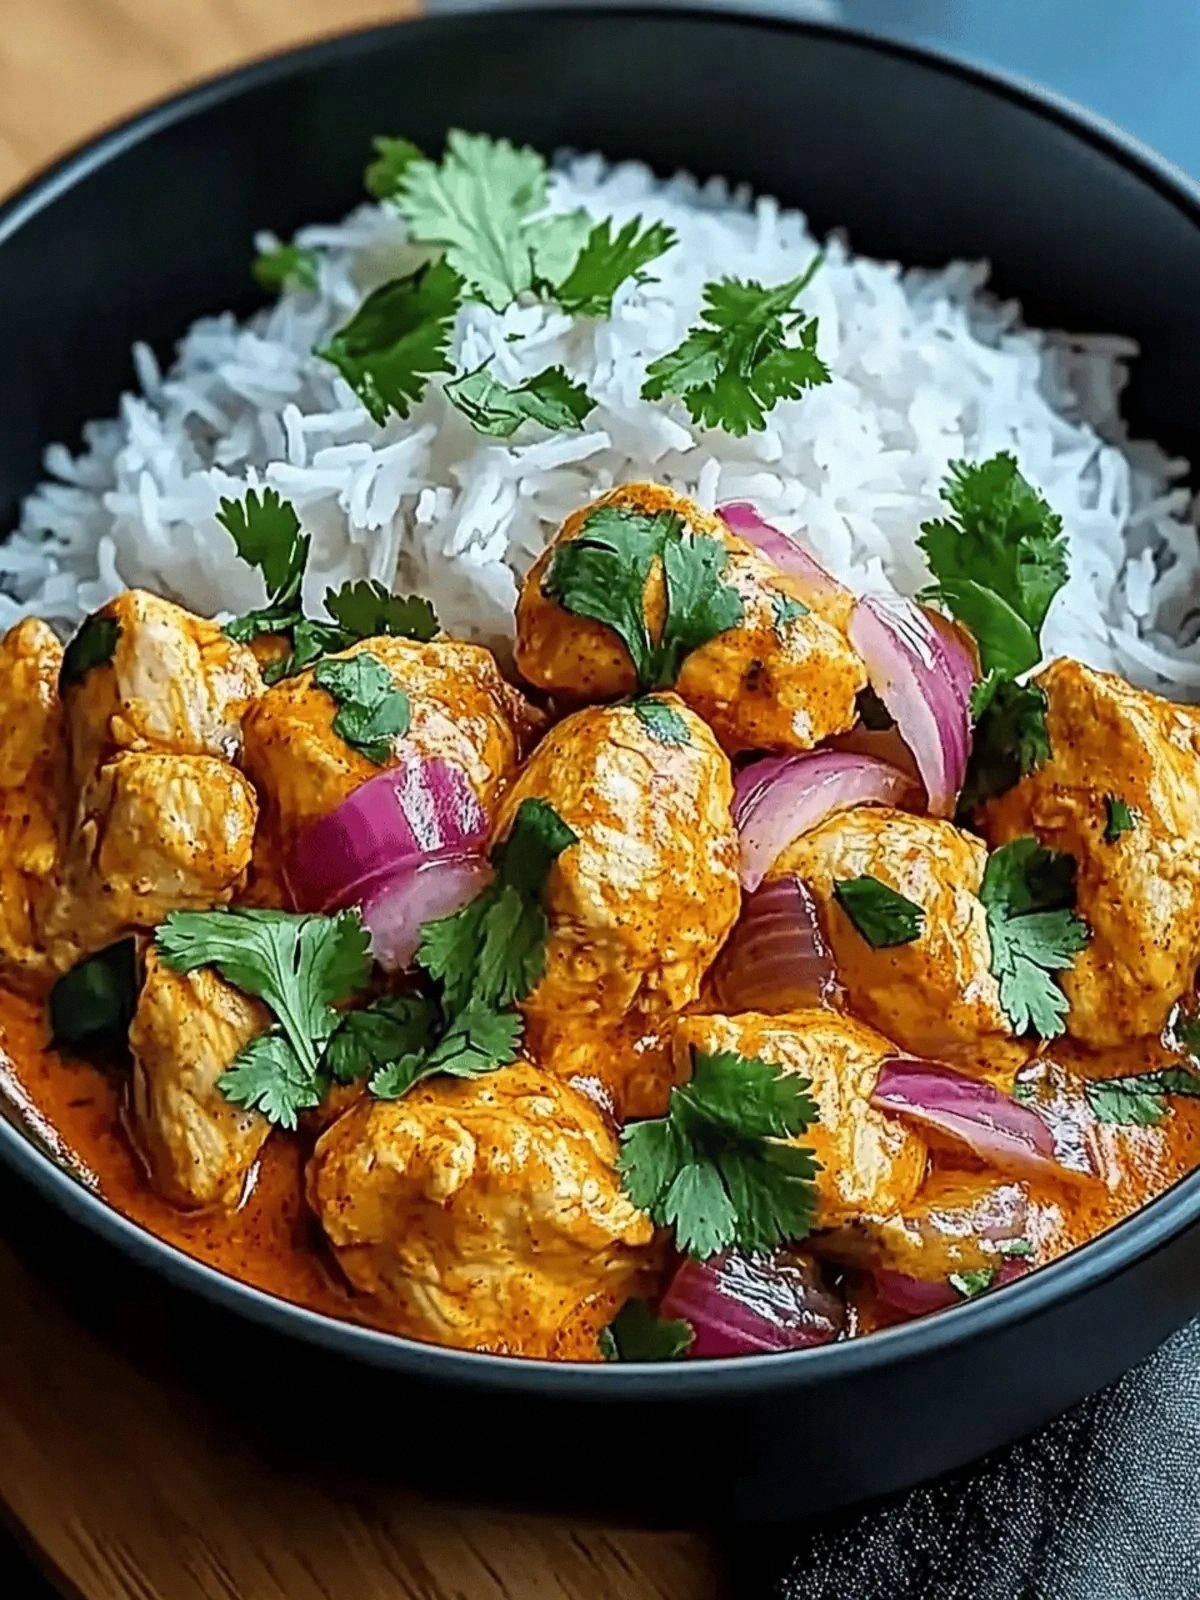
- Serve immediately over steaming jasmine rice. Garnish with a fried egg or fresh basil leaves if desired. The contrast between the hot stir‑fry and the cool, fluffy rice creates a satisfying textural experience. The dish is best enjoyed hot, so don’t let it sit too long before plating.
That's it — you did it. But hold on, I've got a few more tricks that'll take this to another level. These insider tips will help you avoid common pitfalls and elevate the dish to professional quality.
Insider Tricks for Flawless Results
The Temperature Rule Nobody Follows
A hot pan is the secret sauce to a perfect sear. If your wok isn’t hot enough, the chicken will steam instead of sear, resulting in a soggy texture. I use a small piece of bread; when it sizzles immediately, the pan is ready. Keep the heat high but not so high that the oil smokes, and you’ll get that coveted caramelized crust.
Why Your Nose Knows Best
The aroma of garlic and chilies is a reliable indicator of cooking progress. If you can smell a sweet, caramelized scent, the aromatics are ready. If the smell is sharp and raw, you need to cook them a little longer. Trust your nose; it’s the most accurate thermometer in the kitchen.
The 5‑Minute Rest That Changes Everything
After the chicken is cooked, let it rest for five minutes before serving. This allows the juices to redistribute, ensuring each bite is moist. A quick rest also gives the sauce time to thicken slightly, resulting in a richer coating.
The Secret of Fresh Basil
Use basil that’s been harvested the same day for maximum flavor. If you’re buying pre‑packed basil, look for a bright green color and no wilted leaves. Fresh basil releases its oils when it’s heated, giving the dish a vibrant aroma that dried basil can’t match.
The Quick Chili Oil Boost
A splash of chili oil at the end of cooking adds depth and a glossy sheen. It also provides a subtle, lingering heat that stays on the palate. I use a homemade chili oil made from crushed chilies, garlic, and a drizzle of sesame oil for an extra layer of flavor.
Creative Twists and Variations
This recipe is a playground. Here are some of my favorite ways to switch things up:
Shrimp Pad Kra Pao
Swap the chicken for peeled shrimp. The shrimp cooks in 2–3 minutes, so add it after the aromatics and before the sauces. The result is a lighter, seafood‑infused version that still carries the bold sauce.
Tofu Pad Kra Pao
For a vegetarian option, use firm tofu cut into cubes. Press the tofu to remove excess moisture before sautéing. The tofu absorbs the sauce beautifully, offering a hearty bite without the meat.
Sweet and Spicy Pad Kra Pao
Add a tablespoon of sriracha or a dash of honey to the sauce for a sweet, spicy kick. The sweetness balances the saltiness and adds a caramelized finish.
Coconut Pad Kra Pao
Replace half of the water in the sauce with coconut milk for a creamy, tropical twist. The coconut milk mellow the heat while adding a subtle nutty flavor that pairs well with the basil.
Pork Pad Kra Pao
Thinly sliced pork shoulder works wonderfully. It cooks quickly and develops a rich, savory flavor. Just be sure to trim any excess fat to avoid an overly greasy dish.
Egg Drop Pad Kra Pao
Instead of scrambling eggs in a separate pan, pour a thin stream of beaten eggs into the wok. Stir gently to create delicate ribbons that blend seamlessly into the sauce, adding protein and a silky texture.
Storing and Bringing It Back to Life
Fridge Storage
Store leftovers in an airtight container for up to 3 days in the refrigerator. Keep the rice separate to avoid sogginess. When reheating, add a splash of water to re‑hydrate the sauce and stir until hot.
Freezer Friendly
The dish freezes well for up to 2 months. Portion into individual servings, seal in freezer bags, and label with the date. Thaw overnight in the fridge before reheating on the stove or in the microwave.
Best Reheating Method
Reheat the dish in a hot wok or skillet over medium heat, adding a teaspoon of water or broth to loosen the sauce. Stir until the mixture is steaming hot and the sauce has thickened again. This method preserves the texture and flavor better than the microwave.