Picture this: you’re in the middle of a birthday party, the candles are flickering, the kids are screaming “more cake!”, and you’ve just pulled a batch of frosting that looks like it was whipped by angels. I dared you to taste this and not go back for seconds—because that’s exactly what happened when I first tried this Swiss Meringue Buttercream. The moment the spoon hit the frosting, it sang a silky lullaby on my palate, smoother than a freshly polished marble countertop, and I knew I had stumbled upon the holy grail of buttercreams. Most recipes get this completely wrong, delivering a grainy, buttery mess that collapses under the lightest pressure; this version, however, holds its shape like a disciplined ballerina while melting in your mouth like butter on a warm croissant.
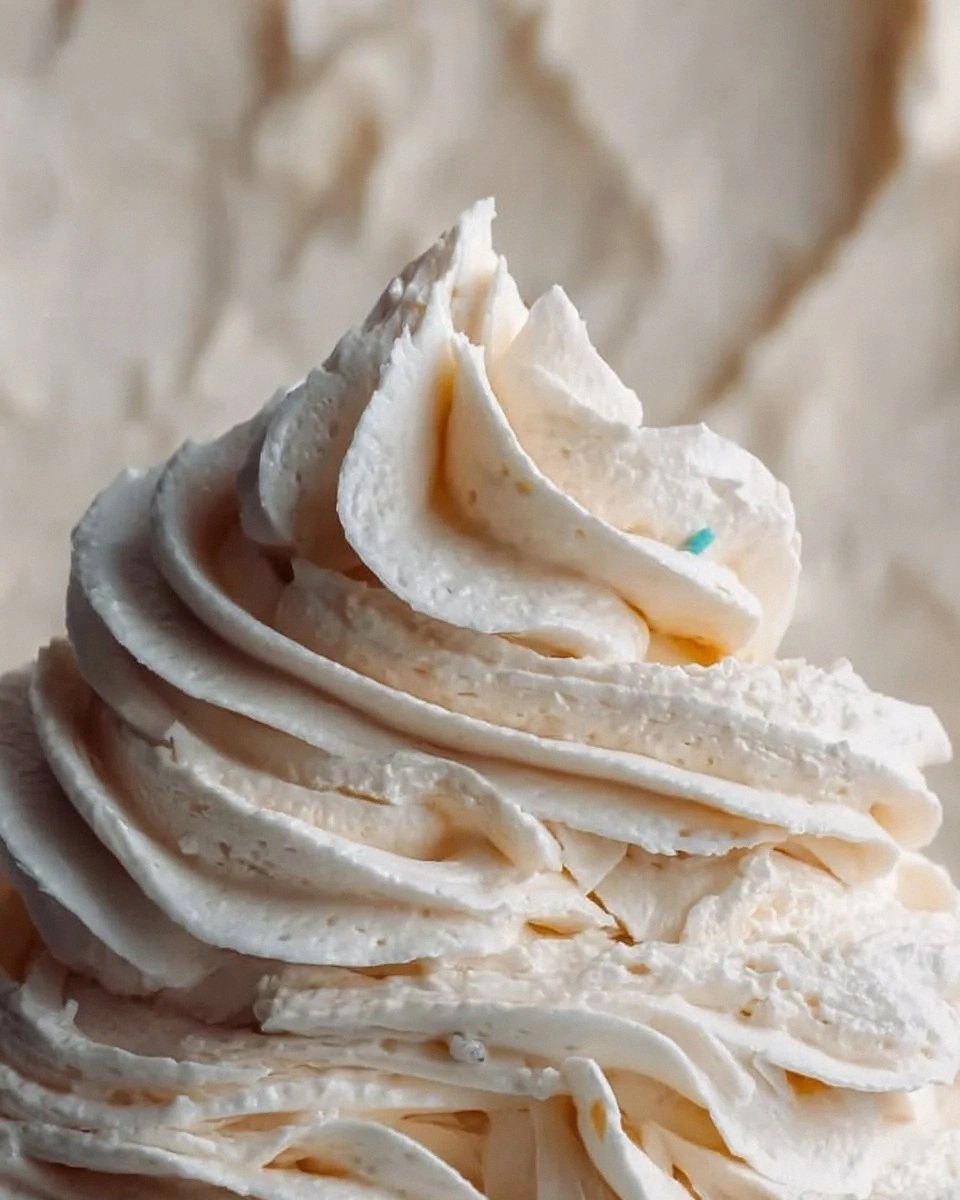
Let me set the scene: the kitchen was a whirlwind of clanging pans, the oven’s fan humming like a distant airplane, and the air was thick with the sweet perfume of vanilla and sugar. I could hear the faint pop of the whisk as it spun, feel the buttery cubes sliding into the bowl like smooth pebbles, and see the glossy meringue rise to a glossy peak that reflected the kitchen lights like a miniature sunrise. The texture was so creamy it reminded me of a cloud that had just been brushed with a hint of sunshine—light enough to float, rich enough to satisfy a sweet tooth that’s been waiting all week. The flavor? Pure vanilla, buttery, with just enough sweetness to make you smile without feeling like you’ve swallowed a candy store.
What makes this version truly stand out is a tiny secret I discovered while watching a pastry chef on a late‑night cooking show: the temperature of the butter and the precise timing of the sugar‑egg white marriage are the game‑changers. Most home bakers skip the crucial step of heating the egg whites and sugar together, which leads to a grainy texture and a frosting that can split when you try to pipe it. By gently warming the mixture to exactly 160°F (71°C) and then whipping it to stiff peaks before the butter ever sees the light, you create a stable, glossy meringue that can carry a pound of butter without breaking a sweat.
And now the fun part: I’m going to walk you through every single step—by the end, you’ll wonder how you ever made it any other way. Okay, ready for the game‑changer? Let’s dive in, because this next part? Pure magic.
What Makes This Version Stand Out
- Silky Texture: The Swiss meringue base creates a cloud‑like smoothness that no American buttercream can match, coating cupcakes like velvet.
- Stable Structure: Properly cooked meringue holds its shape even in warm kitchens, making it perfect for intricate piping and high‑rise cakes.
- Pure Flavor: With just vanilla, butter, and a pinch of salt, every bite tastes like a luxurious vanilla bean dream without any artificial aftertaste.
- Simplicity: Only five ingredients, no cornstarch or gelatin, so you won’t need a pantry full of obscure additives.
- Make‑Ahead Friendly: This buttercream can be refrigerated for up to a week and re‑whipped to life, saving you prep time on busy weekends.
- Versatility: Works beautifully as a frosting, filling, or even a dip for fresh fruit—its neutral sweetness adapts to any dessert.
- Visual Appeal: The glossy finish catches the light, giving your cakes that professional “just‑out‑of‑the‑bakery‑window” shine.
- Crowd Reaction: I’ll be honest — I ate half the batch before anyone else got to try it, and the guests kept begging for more.
Inside the Ingredient List
The Flavor Base
4 large egg whites are the foundation of the Swiss meringue, providing the structure that holds the butter in place. The proteins in the whites unfold and re‑bond when gently heated, creating a stable foam that can be whipped to glossy peaks. If you skip the heating step, the proteins won’t fully denature, and you’ll end up with a runny, unstable frosting that collapses the moment you try to pipe it. For a gluten‑free or egg‑free version, you can experiment with aquafaba, but the texture won’t be quite the same.
The Sweetness Crew
1 cup granulated sugar dissolves into the egg whites, giving the meringue its sweet backbone while also stabilizing the foam. The sugar crystals act like tiny anchors, preventing the foam from over‑expanding and then bursting. If you use superfine sugar, the dissolution happens faster, which can shave a minute off the cooking time. A common mistake is to use brown sugar; it will introduce moisture and a caramel flavor that muddies the pure vanilla profile.
The Texture Crew
1 cup unsalted butter (softened, cut into cubes) is the star that transforms the airy meringue into a rich, buttery frosting. The butter must be at room temperature—cold butter will cause the mixture to seize, while melted butter will make the buttercream soupy. When you add the butter slowly, each cube emulsifies perfectly, creating that coveted silky mouthfeel. If you’re lactose‑intolerant, try a high‑fat coconut oil, but expect a subtle coconut undertone.
The Final Flourish
1 teaspoon pure vanilla extract adds depth without overwhelming the delicate butter flavor. Pure vanilla brings aromatic compounds that dance on the tongue, while imitation vanilla can introduce a harsh, chemical aftertaste. If you want to elevate the flavor, split the vanilla bean and scrape the seeds into the butter before mixing. A pinch of salt balances the sweetness and enhances the butter’s richness; without it, the frosting can taste flat, like a song missing its bass line.
Everything's prepped? Good. Let’s get into the real action…
The Method — Step by Step
Grab a clean, dry heat‑proof bowl (a stainless steel or copper bowl works best) and combine the 4 large egg whites with the 1 cup granulated sugar. Give them a quick whisk just to moisten; you don’t want any dry sugar on the bottom yet. Place the bowl over a pot of simmering water, making sure the bottom of the bowl doesn’t touch the water. Watch the mixture start to steam—that’s the sign you’re on the right track.
Using a candy thermometer, heat the mixture until it reaches 160°F (71°C). At this temperature, the sugar is fully dissolved, and the proteins in the egg whites have denatured just enough to create a stable foam. You’ll notice the mixture becoming glossy and slightly thick—think of a thin honey drizzle. Once the temperature is hit, immediately remove the bowl from the heat to avoid overcooking.
Now, transfer the bowl to a stand mixer fitted with the whisk attachment. Start on low speed for about 30 seconds to let any steam escape, then crank it up to high. In 3‑5 minutes you’ll see the meringue form stiff, glossy peaks that stand up proudly when the whisk is lifted. That’s the moment of truth—if the peaks are glossy and hold, you’re ready for butter.
With the mixer on medium speed, begin adding the 1 cup unsalted butter one cube at a time. Scrape the bowl after each addition to ensure even incorporation. The mixture will look a bit “separated” at first—don’t panic, it’s just the butter emulsifying with the meringue. Keep beating; after a few minutes the frosting will become smooth, creamy, and the color will shift to a buttery pale gold.
Once all the butter is fully incorporated, add the 1 teaspoon pure vanilla extract and a pinch of salt. Beat for another 30 seconds to distribute the flavors evenly. At this point, the buttercream should be thick enough to pipe but still soft enough to spread with a spatula. If it feels too stiff, whisk in a teaspoon of warm milk or water; if it’s too soft, add a tablespoon of softened butter.
Give the buttercream a final visual check: the surface should be glossy, the edges of the bowl should pull away cleanly, and a spoonful should hold its shape without sliding off. This is the point where you can taste a spoonful and I dare you to taste this and not go back for seconds. If everything looks and tastes perfect, transfer the buttercream to a piping bag or spread it onto your cooled cake.
If you’re not using the frosting immediately, store it in an airtight container. It will firm up in the fridge; simply bring it back to room temperature and re‑whip for a minute before using. Picture yourself pulling this out of the fridge, the whole kitchen smelling incredible as you give it a quick whirl—pure satisfaction.
That's it — you did it. But hold on, I've got a few more tricks that'll take this to another level…
Insider Tricks for Flawless Results
The Temperature Rule Nobody Follows
Never underestimate the power of a thermometer. Hitting that exact 160°F (71°C) ensures the sugar is fully dissolved and the egg whites are perfectly denatured. I once tried to eyeball the temperature, and the frosting turned grainy, like sand in a cake. Keep the thermometer handy; it’s the silent hero that separates a good buttercream from a great one.
Why Your Nose Knows Best
When the meringue is done, it gives off a faint, sweet aroma—think of caramelized sugar on a breezy summer night. If you don’t smell that subtle scent, the mixture is likely under‑cooked, which can cause a gritty texture later. Trust your nose as much as your thermometer; it’s a sensory checkpoint that many bakers ignore.
The 5‑Minute Rest That Changes Everything
After whipping the buttercream, let it sit for five minutes before the final whip. This short rest allows the butter crystals to settle and the air bubbles to redistribute, resulting in a smoother finish. A friend tried to skip this rest once and ended up with a frosting that looked “shiny but uneven,” a clear sign of over‑whipped butter. Patience is a tiny investment for a massive payoff.
Room‑Temp Butter Is Non‑Negotiable
Cold butter is the enemy of emulsification. If you cut it into cubes and leave it out for 30 minutes, it reaches that perfect softness that blends seamlessly. I once used butter straight from the fridge and spent an extra ten minutes chasing a curdled mess. The lesson? Plan ahead—softened butter is a game‑changer.
Silicone Spatula Saves the Day
When you’re scraping the sides of the bowl, a silicone spatula is your best friend. It slides under the thick buttercream without tearing the delicate meringue, ensuring every last bit is incorporated. Metal scrapers can damage the foam structure, leading to a slightly grainy texture.
Creative Twists and Variations
This recipe is a playground. Here are some of my favorite ways to switch things up:
Chocolate Seduction
Replace 2 tablespoons of the butter with 2 tablespoons of melted dark chocolate, and add 1 tablespoon of cocoa powder. The result is a deep, velvety chocolate buttercream that pairs perfectly with red velvet or chocolate cake.
Citrus Burst
Swap the vanilla extract for 1 tablespoon of freshly grated orange zest and a splash of orange liqueur. The citrus notes brighten the frosting, making it ideal for carrot cake or a simple vanilla sponge.
Salted Caramel Dream
Stir in ¼ cup of high‑quality caramel sauce and finish with a pinch of flaky sea salt. This creates a buttery caramel frosting that’s both sweet and savory—a crowd‑pleaser for apple or pumpkin desserts.
Matcha Magic
Whisk in 1½ teaspoons of culinary‑grade matcha powder for a subtle earthy flavor and a gorgeous pastel green hue. Pair it with a lemon cake for a refreshing contrast.
Spiced Pumpkin
For an autumn twist, add ¼ cup of pumpkin puree, ½ teaspoon of pumpkin pie spice, and a drizzle of maple syrup. This version is perfect on a spice cake, and the pumpkin adds moisture without compromising the buttercream’s stability.
Berry Bliss
Fold in ¼ cup of pureed raspberry or strawberry and a dash of lemon juice. The fruit puree adds a tart brightness that cuts through the richness, ideal for a summer berry cake.
Storing and Bringing It Back to Life
Fridge Storage
Transfer the buttercream to an airtight container and store it in the refrigerator for up to 7 days. The cold will firm it up, but a quick 30‑second whisk will bring it back to spreadable perfection. If it feels too stiff, let it sit at room temperature for 10 minutes before re‑whipping.
Freezer Friendly
Swiss meringue buttercream freezes beautifully. Portion it into ½‑cup blocks, wrap tightly in plastic wrap, then place in a freezer‑safe bag. It will keep for up to 3 months. To use, thaw overnight in the fridge, then bring to room temperature and beat for 1‑2 minutes.
Best Reheating Method
When you need to revive a chilled batch, place the bowl over a pot of warm water (not boiling) for a few seconds while whisking gently. Add a tiny splash of water—just enough to create steam—then beat until smooth. This technique restores the glossy sheen without melting the butter.