It all started on a rainy Tuesday when my kitchen turned into a battlefield of soggy cereal and burnt marshmallows. I was half‑heartedly trying to salvage a classic Rice Krispie treat that had gone rogue, and a daring friend tossed me a challenge: “Make something that’s sweet, salty, and unforgettable.” I accepted, because honestly, who can say no to a culinary dare that promises bragging rights? The result? A treat that hits you like a warm hug wrapped in a crunchy, caramel‑kissed blanket. I dare you to taste this and not go back for seconds.
The moment I lifted the pan, a buttery aroma swirled with the deep, buttery notes of salted caramel, and I could already hear the crackle of the rice cereal like tiny fireworks. The kitchen smelled like a candy shop that had just been invaded by a sea‑salted breeze—sweet, smoky, and undeniably addictive. My taste buds were already doing a happy dance, and my hands were trembling with excitement as I watched the glossy caramel coat each puffed rice piece. This is hands down the best version you’ll ever make at home, and I’m about to spill every secret.
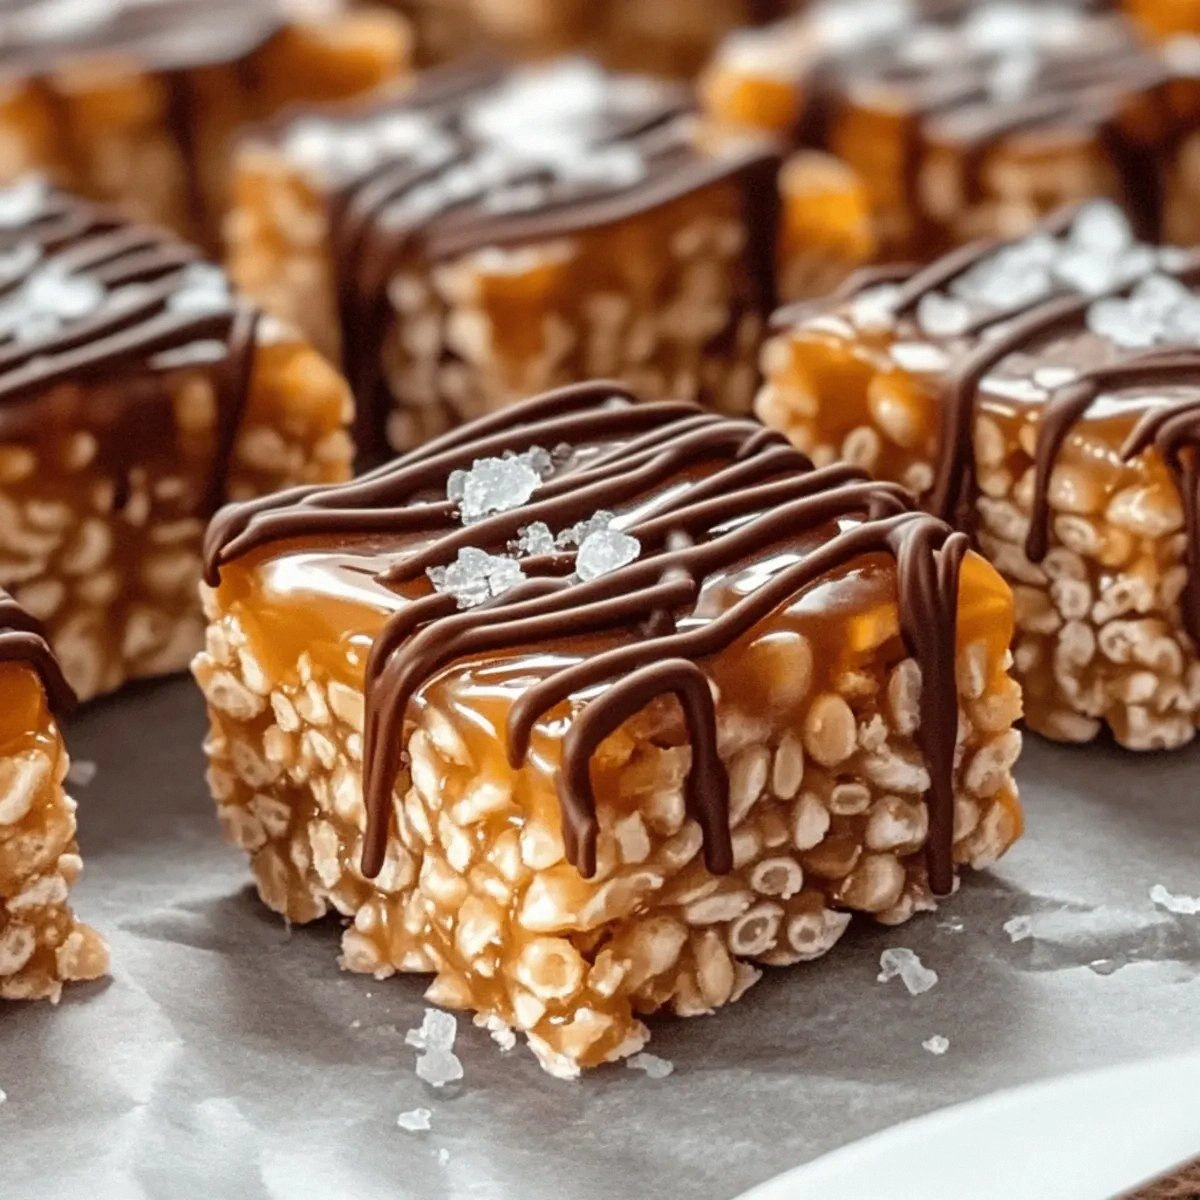
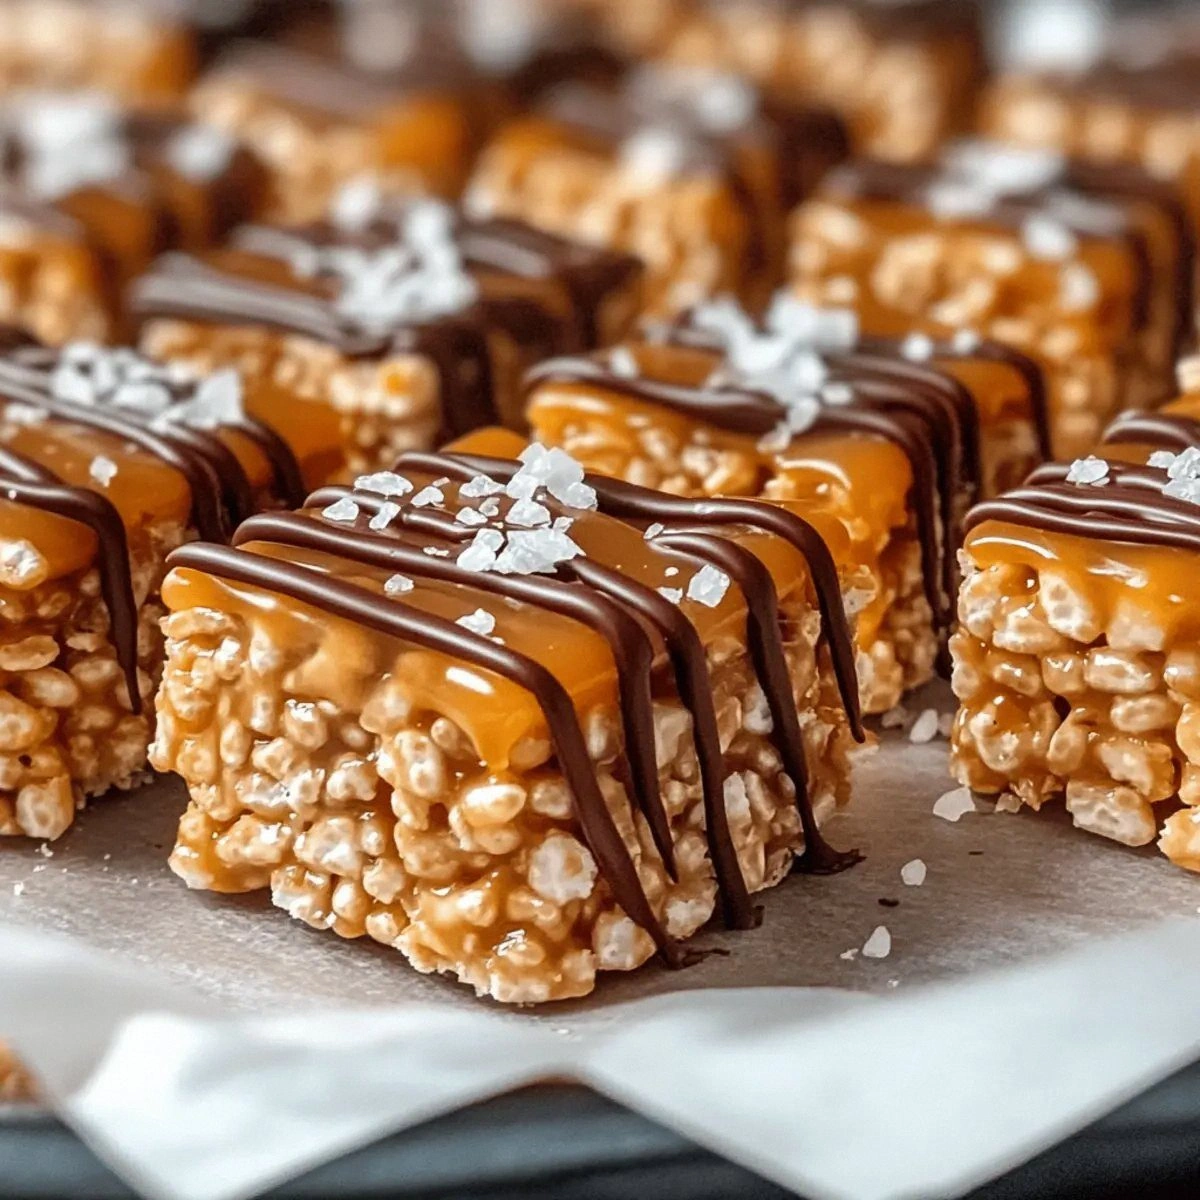
What makes this iteration a cut above the rest is the deliberate balance of flavors and textures. While most recipes rely on plain marshmallows and a splash of vanilla, I’m adding a luxurious cup of salted caramel sauce and a sprinkle of sea salt that transforms the treat from a simple snack to a sophisticated dessert. The milk chocolate chips melt into silky rivers that weave through the crunchy matrix, creating pockets of gooey bliss. Most recipes get this completely wrong. Here’s what actually works: a low‑heat melt that keeps the marshmallows airy and the caramel glossy.
Now, picture yourself pulling this out of the pan, the whole kitchen smelling incredible, the surface shimmering with caramel and chocolate, and the top dusted with a glistening hint of sea salt. That sizzle when the butter hits the pan? Absolute perfection. Okay, ready for the game‑changer? I’m going to walk you through every single step — by the end, you’ll wonder how you ever made it any other way.
What Makes This Version Stand Out
- Flavor Fusion: The sweet caramel and salty sea‑salt dance together, creating a complex taste that lingers long after the last bite.
- Texture Symphony: Crunchy rice cereal meets gooey marshmallow, with chocolate rivers adding a smooth contrast.
- Simplicity: Only six ingredients, yet each one plays a starring role—no fancy equipment required.
- Ingredient Quality: Using premium salted caramel sauce elevates the entire dish from pantry‑level to gourmet.
- Crowd Reaction: Expect gasps, cheers, and the inevitable “Can I have the recipe?” from anyone within a five‑foot radius.
- Cooking Method: A gentle stovetop melt preserves the marshmallows’ fluffiness while coaxing the caramel into a glossy sheen.
- Make‑Ahead Potential: These treats keep fresh for days, and the flavors actually deepen with a little rest.
- Versatility: Perfect as a dessert, a party snack, or a nostalgic breakfast treat with a grown‑up twist.
Inside the Ingredient List
The Flavor Base
The cornerstone of this treat is the salted caramel sauce. It provides a buttery, buttery‑sweet backbone that’s richer than any store‑bought caramel you’ve ever tried. If you skip it, you’ll lose that luxurious mouthfeel and the signature salty‑sweet contrast. Look for a sauce that lists real butter and sea salt as the first ingredients; the difference is night and day. As a swap, you can use homemade caramel, but be prepared for a longer prep time.
The Texture Crew
Rice Krispie cereal is the unsung hero that gives these treats their iconic crunch. Choose the original, not the honey‑nut variant, because the plain flavor lets the caramel shine. If you’re allergic to corn, puffed quinoa or puffed amaranth can stand in, though the texture will be slightly denser. Marshmallows are the fluffy binder; the 10‑ounce bag is the sweet spot—any less and you’ll end up with a dry, crumbly mess.
The Unexpected Star
Milk chocolate chips might seem like a garnish, but they melt into a glossy veil that softens the caramel’s edge. The chocolate’s creamy richness balances the salt, preventing the final bite from feeling overly salty. If you’re dairy‑free, dark chocolate chips work, but expect a bolder, less sweet profile.
The Final Flourish
Sea salt is the finishing touch that elevates the dish from “good” to “wow.” A half‑teaspoon might sound tiny, but it’s enough to awaken the palate without overwhelming the sweet components. Use flaky sea salt for a subtle crunch, or if you only have fine salt, sprinkle it evenly to avoid salty hotspots.
Everything's prepped? Good. Let's get into the real action…
The Method — Step by Step
Gather all your ingredients and line a 9×13‑inch baking pan with parchment paper, allowing the edges to overhang for easy removal. This step sounds simple, but trust me, the overhang is a lifesaver when you’re dealing with sticky caramel. Preheat your large saucepan over medium‑low heat; the goal is a gentle melt, not a scorching burn. Okay, ready for the game‑changer? This is where the butter meets the caramel, creating a glossy base that will coat every cereal piece.
Drop the butter into the pan and let it melt slowly, listening for a soft sizzle. As soon as it’s fully liquid, pour in the salted caramel sauce, stirring continuously with a silicone spatula. You’ll notice the mixture turning a deep amber—this is the scent of pure decadence. Watch the heat! If the sauce starts to bubble aggressively, lower the flame; you don’t want it to scorch.
Watch Out: Over‑heating caramel can turn bitter. Keep the temperature low and stir constantly.Once the caramel is smooth and glossy, add the marshmallows. They’ll begin to melt almost instantly, turning the mixture into a stretchy, velvety river. Keep the heat low and stir with patience; the marshmallows need time to fully dissolve without turning grainy. You’ll know it’s ready when the mixture looks like a glossy, golden cloud that clings to the back of your spoon.
Kitchen Hack: Add the marshmallows in two batches; this prevents them from clumping and ensures a smoother texture.Turn off the heat and quickly fold in the Rice Krispie cereal. The cereal should be evenly coated, each piece glittering with caramel. Work swiftly—if the mixture cools too much, it will harden before you can spread it. This is the moment of truth; the cereal must stay light and airy, not soggy.
Now sprinkle the milk chocolate chips over the warm mixture. The residual heat will melt them just enough to create glossy ribbons without turning them into a full‑on chocolate puddle. Stir gently to create chocolate‑marbled pockets. If you love extra chocolate, feel free to add a handful more—this is pure magic.
Transfer the entire mixture into the prepared pan, spreading it with an offset spatula. Press down just enough to create an even surface; over‑pressing will crush the crunch. The top should look glossy and slightly raised. Sprinkle the sea salt evenly across the surface; the tiny crystals will catch the light and add that final pop of flavor.
Fun Fact: Sea salt contains trace minerals that enhance flavor perception, making sweet foods taste even sweeter.Allow the treat to cool at room temperature for about 20 minutes. This rest period lets the caramel set while keeping the interior soft. If you’re impatient, pop the pan in the fridge for 10 minutes, but remember—cold air can make the chocolate firm up too quickly.
Once set, use the parchment overhang to lift the slab out of the pan and place it on a cutting board. Slice into bars using a sharp, warm knife (dip the blade in hot water and wipe dry). The warm blade cuts cleanly, giving you perfect squares without crumbling.
That's it — you did it. But hold on, I've got a few more tricks that'll take this to another level…
Insider Tricks for Flawless Results
The Temperature Rule Nobody Follows
Never melt the butter and caramel over high heat. Keep the flame low and steady; this prevents the sugars from caramelizing too quickly and turning bitter. I once tried to speed things up on high, and the result was a burnt, acrid mess that no amount of sea salt could rescue. Keep it gentle, and you’ll get that glossy, buttery sheen every single time.
Why Your Nose Knows Best
Trust the aroma. When the caramel reaches a deep amber hue and releases a buttery, toasted scent, you’re at the perfect point to add the marshmallows. If the smell is still faint, give it another 30 seconds. Your nose is a far better thermometer than any gadget in this kitchen.
The 5‑Minute Rest That Changes Everything
After spreading the mixture in the pan, let it sit untouched for exactly five minutes before sprinkling the sea salt. This brief pause lets the caramel firm just enough so the salt adheres without sinking. Skipping this step leads to a soggy top and uneven seasoning.
Chocolate Distribution Mastery
For even chocolate pockets, toss the chips in a tiny drizzle of melted butter before folding them in. The butter coats each chip, preventing them from clumping and ensuring they melt into silky ribbons throughout the treat. I tried adding dry chips once and ended up with clumps that didn’t melt—big mistake.
Cutting Cleanly Every Time
Warm your knife blade under hot water, dry it, and slice. The heat cuts through the caramel and chocolate like a hot knife through butter, giving you clean edges. A cold blade will crush the bars, leaving jagged edges and a messy presentation.
Creative Twists and Variations
This recipe is a playground. Here are some of my favorite ways to switch things up:
Nutty Crunch
Stir in ½ cup toasted chopped pecans or almonds after folding in the cereal. The nuts add a buttery crunch that pairs beautifully with the caramel, and they boost the protein content for a slightly healthier snack.
Spicy Kick
Add a pinch of cayenne pepper to the caramel sauce before melting. The subtle heat contrasts the sweetness, creating a flavor profile reminiscent of Mexican chocolate.
White Chocolate Dream
Swap the milk chocolate chips for white chocolate chips and add a teaspoon of vanilla extract. The result is a creamy, ivory‑colored treat that feels like a holiday confection.
Fruit Fusion
Fold in ¼ cup dried cranberries or chopped dried apricets for a tart surprise. The dried fruit’s chewiness balances the smooth caramel, delivering a complex bite.
Vegan Version
Use vegan butter, plant‑based marshmallows, and dairy‑free caramel. Replace milk chocolate chips with dark vegan chocolate. The texture remains the same, and you’ll have a fully plant‑based delight.
Storing and Bringing It Back to Life
Fridge Storage
Place the bars in an airtight container and store them in the refrigerator for up to five days. The cool environment keeps the caramel from getting too sticky, and the bars stay firm enough to slice without crumbling.
Freezer Friendly
Wrap each bar individually in parchment paper, then seal the whole batch in a zip‑top freezer bag. They’ll keep for up to three months. When you’re ready to enjoy one, let it thaw at room temperature for ten minutes, then give it a quick microwave zap (10‑15 seconds) to revive the gooey interior.
Best Reheating Method
To bring a refrigerated bar back to its peak, place it on a microwave‑safe plate, add a tiny splash of water (about a teaspoon), and heat for 10‑12 seconds. The steam generated re‑hydrates the caramel, making it melt-in‑your‑mouth again. Avoid microwaving for too long, or you’ll lose the crispness.