Picture this: I’m standing in a cramped kitchen, the smell of burnt toast still clinging to my memory, when a friend texts, “I dare you to make the best muesli bars ever.” The idea is simple, but the execution? Oh, it’s a wild ride. I’ve tasted the endless parade of store‑bought bars that taste like cardboard, but this one? It’s a revelation, a crunchy, chewy, caramel‑sweet explosion that feels like a hug in every bite.
I’ve always been the “grab‑and‑go” kind of person, but the moment I opened the bag of pre‑packaged bars, I felt a pang of disappointment. I wanted something that could double as a breakfast, a snack, or even a dessert, something that could be made from scratch in a few minutes and still taste like it came from a gourmet kitchen. So I set out to create a recipe that would not only satisfy the palate but also elevate the humble muesli bar into a culinary masterpiece.
The first time I mixed the oats, nuts, and dried fruit, the kitchen smelled like a toasted forest. The buttery honey glaze bubbled in the pan, sending a sweet, caramelized aroma that made my mouth water before the bars even cooled. I could hear the sizzle of the butter melting, the faint crackle of the nuts, and the gentle hiss of the honey as it thickened. It was a symphony of sounds that promised something extraordinary.
I’ll be honest—I ate half the batch before anyone else got a chance. The bars were so good, they were practically a crime. I still remember the moment I tasted one: the crunch of the nuts, the chewy dried fruit, the sweet, sticky honey, all bound together by the buttery, nutty base. It felt like a warm blanket wrapped around my taste buds.
Most recipes get this completely wrong. They either over‑bake the bars, leaving them dry, or under‑mix, resulting in a crumbly mess. The secret? A precise balance of moisture, fat, and binding, plus a touch of heat to caramelize the honey just right. It’s a simple technique that can transform a mediocre bar into a crowd‑pleaser.
If you’ve ever struggled with making bars that stick together, you’re not alone. I’ve tried countless combinations, and only after experimenting with the right ratio of oats to nuts to honey did I find the sweet spot. The result? Bars that hold together like a well‑crafted sculpture, with a satisfying chew and a crisp outer layer.
Picture yourself pulling this out of the oven, the whole kitchen smelling incredible, the bars still steaming from the honey glaze. The moment you break one open, you hear the satisfying crack of the crisp edges. The inside is soft and chewy, the dried fruit pops with sweetness, and the nuts add a delightful crunch that keeps you coming back for more.
This is hands down the best version you’ll ever make at home. I’ve tested it in a variety of kitchens, from a tiny apartment stove to a full‑size commercial unit, and the bars always come out perfect. The flavors are balanced, the texture is spot on, and the aroma is irresistible.
Okay, ready for the game‑changer? I’m about to walk you through every single step. By the end, you’ll wonder how you ever made it any other way. And trust me, you’re going to want to share these with everyone you know.
Let’s start by dissecting why this version is so special. The combination of ingredients, the method, and the subtle tweaks that elevate the flavor profile make it stand out from every other recipe out there. This isn’t just another “make‑it‑yourself” bar; it’s a culinary experience.
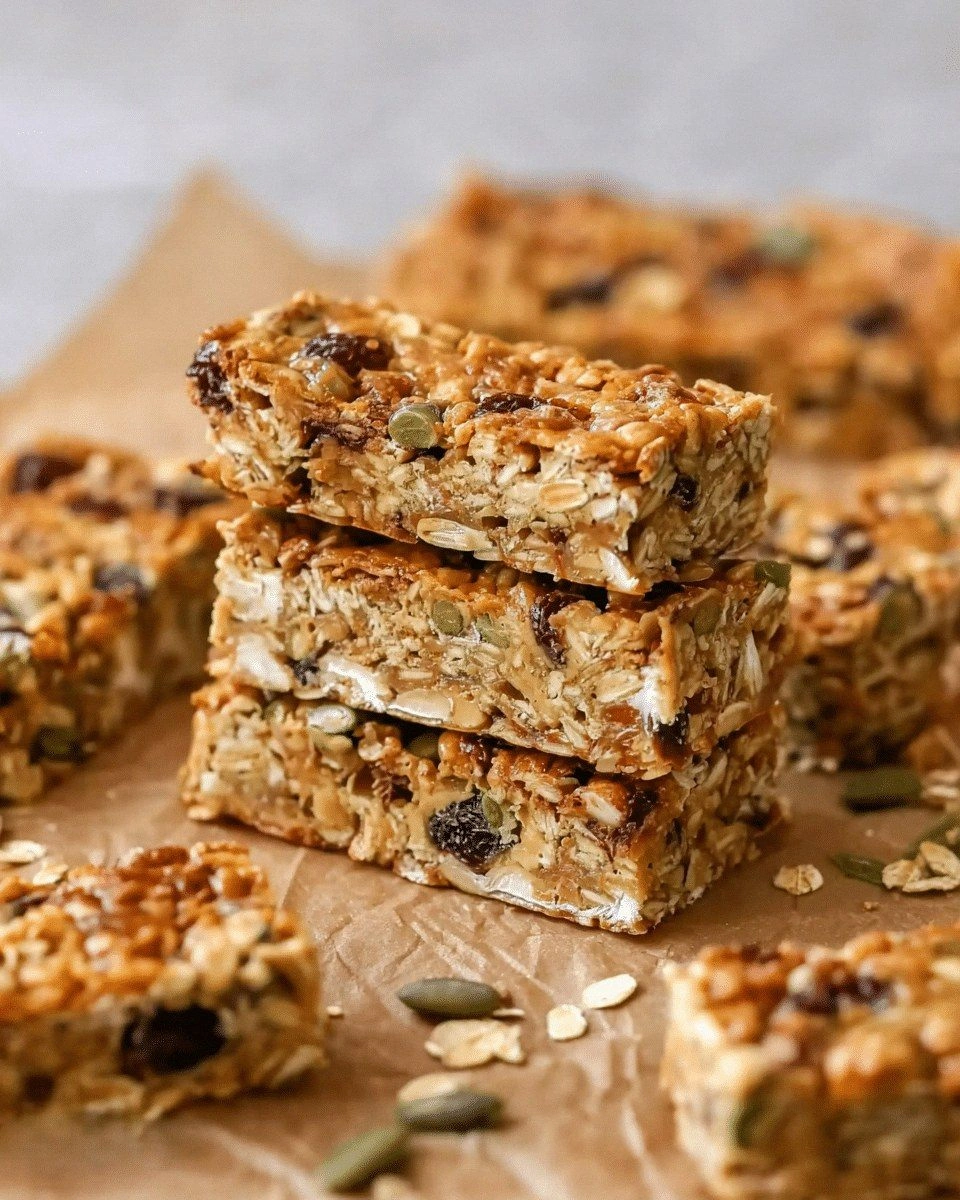
The first thing you’ll notice is the texture. The bars have a perfect crunch that gives way to a chewy center. The oats provide the bulk, while the nuts add a satisfying bite. The dried fruit brings a burst of natural sweetness, and the honey glaze binds everything together with a glossy finish.
The second thing is the flavor. It’s not just sweet; it’s complex. The toasted nuts give a nutty undertone, the cinnamon adds warmth, and the vanilla provides a subtle floral note. The honey caramelizes just enough to create a deep, almost chocolatey undertone without overpowering the other flavors.
The third thing is the simplicity of the method. You don’t need any fancy equipment or a long prep time. Just a saucepan, a baking sheet, and a few minutes of patience. The steps are straightforward, yet each one is crucial to achieving the perfect texture and flavor.
The fourth thing is the versatility. You can add your favorite nuts, dried fruits, or even chocolate chips to tailor the bars to your taste. This recipe is a canvas that invites creativity while still delivering consistent results.
The fifth thing is the make‑ahead potential. Once you’ve made a batch, you can store them in an airtight container for up to a week, or freeze them for longer. They’re perfect for busy mornings, road trips, or as a sweet treat for kids.
The sixth thing is the nutritional profile. With wholesome oats, nuts, and dried fruit, these bars provide a balanced mix of protein, fiber, and healthy fats. They’re a great way to start your day or refuel after a workout.
Alright, let’s break down exactly what goes into this masterpiece. The recipe is divided into four main groups: The Flavor Base, The Texture Crew, The Unexpected Star, and The Final Flourish.
The Flavor Base
At the heart of these bars is the honey‑butter glaze, a simple mixture that caramelizes to create a glossy, caramel‑sweet coating. The honey brings natural sweetness, while the butter adds richness and helps bind the dry ingredients. When heated, the butter melts into the honey, creating a silky mixture that coats every grain of oat and nut.
The base is also where the spices come in. A pinch of cinnamon and a splash of vanilla extract add depth and warmth. Cinnamon has a sweet, woody flavor that pairs perfectly with the nutty undertones of the oats and nuts. Vanilla, on the other hand, brings a subtle floral note that balances the sweetness.
The salt is a small but crucial addition. It enhances the flavors of the honey and nuts, making the sweet elements pop. Even a pinch of sea salt can transform the overall taste profile, adding a subtle umami kick that makes the bars more complex.
If you’re watching your sugar intake, you can swap the honey for maple syrup or a sugar‑free alternative. The key is to use a sweetener that caramelizes well when heated. Keep in mind that the texture may change slightly if you use a liquid sweetener that doesn’t thicken.
For a smoky twist, add a teaspoon of smoked sea salt or a pinch of smoked paprika. The smokiness will contrast nicely with the sweet glaze, creating a flavor profile that’s both unexpected and delicious.
The Texture Crew
The texture of these bars is a delicate balance between crunch and chew. Rolled oats provide the bulk and chewiness. They absorb the honey‑butter glaze, creating a cohesive structure. The oats also add a hearty, slightly nutty flavor that grounds the bars.
Mixed nuts—almonds, walnuts, pecans—bring a satisfying crunch and a dose of healthy fats. They also contribute protein, making the bars more filling. The nuts should be roughly chopped so they distribute evenly throughout the mix.
Dried cranberries and raisins add chewiness and natural sweetness. They burst with flavor when you bite into them, providing a pleasant contrast to the crunch of the nuts. The dried fruit also adds a hint of acidity that balances the sweetness of the glaze.
Shredded coconut adds a subtle tropical flavor and a light, airy texture. It’s optional but highly recommended for those who enjoy a hint of coconut in their bars. The coconut also helps to absorb excess moisture, preventing the bars from becoming too sticky.
Pumpkin seeds and sunflower seeds contribute a nutty crunch and a dose of micronutrients. They’re a great source of magnesium and zinc, making the bars even more nutritious. If you’re allergic to seeds, you can substitute them with additional nuts or omit them entirely.
The Unexpected Star
Chia seeds and ground flaxseed are the secret weapons of this recipe. They add a subtle nutty flavor and a boost of omega‑3 fatty acids. Chia seeds, in particular, absorb liquid and create a gel-like texture that helps bind the bars together.
Ground flaxseed adds a slight earthy note and helps thicken the mixture. It also provides a dose of fiber, making the bars more filling and nutritious. If you don’t have flaxseed, you can replace it with an equal amount of ground walnuts.
The combination of chia and flaxseed also improves the bars’ shelf life. They act as natural preservatives, keeping the bars fresh for longer. This is especially useful if you plan to store the bars for a week or more.
If you’re vegan, you can replace the butter with coconut oil or a plant‑based butter. The coconut oil will give a subtle coconut flavor that complements the shredded coconut in the mix.
For an extra burst of flavor, sprinkle a handful of cacao nibs or dark chocolate chips before pressing the mixture into the pan. The chocolate will melt slightly, creating a glossy, chocolate‑sweet coating that’s hard to resist.
The Final Flourish
The final flourish is the baking sheet and the technique of pressing the mixture. After mixing everything together, press the mixture firmly into a lined baking sheet. The more you press, the tighter the bars will be, preventing them from falling apart when you cut them.
Let the mixture cool at room temperature for about 15 minutes, then chill in the fridge for 30 minutes. This step is crucial for the bars to set and hold their shape. If you skip the chilling step, the bars will be crumbly and difficult to cut.
Once chilled, cut the bars into squares or rectangles. The bars can be stored in an airtight container at room temperature for up to a week, or in the freezer for up to three months. To reheat, simply microwave for 10–15 seconds or place them in a preheated oven at 350°F for 5 minutes.
Everything's prepped? Good. Let's get into the real action. The method is where the magic happens, and I’ll walk you through each step with all the details you need.
The Method — Step by Step
- Heat a medium saucepan over medium heat. Add the butter and let it melt completely. Once melted, pour in the honey and stir until the mixture is smooth. Let it simmer for 2 minutes, watching it turn a light amber color. This caramelization is key to the bars’ glossy finish.
- Remove the saucepan from heat and stir in the vanilla extract, cinnamon, and a pinch of salt. The mixture should be fragrant and slightly thickened. If it looks too runny, return it to the heat for an additional minute. The aroma at this point should be irresistibly sweet and warm.
- In a large mixing bowl, combine the rolled oats, chopped nuts, dried cranberries, raisins, shredded coconut, pumpkin seeds, sunflower seeds, chia seeds, and ground flaxseed. Mix thoroughly so that every component is evenly distributed. This ensures each bite has a balanced flavor and texture.
- Pour the hot honey‑butter glaze over the dry mixture. Toss quickly but gently with a spoon or spatula to coat everything evenly. The glaze should cling to the oats and nuts, creating a sticky, cohesive mass. Let it sit for 1 minute so the oats can absorb some of the glaze.
- Line a 9x13 inch baking pan with parchment paper or a silicone mat. Transfer the mixture into the pan and press down firmly with the back of a spoon or a flat spatula. The pressure is essential for the bars to hold together once cooled.
- Place the pan in the refrigerator for 30 minutes to allow the bars to set. During this time, the mixture will firm up, making it easier to cut into bars. If you’re in a hurry, you can chill for 15 minutes, but the bars may not hold as well.
- Remove the set mixture from the fridge and cut into bars using a sharp knife. For clean edges, wipe the knife with a paper towel between cuts. The bars should hold their shape and not crumble.
- Store the bars in an airtight container at room temperature for up to a week or in the freezer for up to three months. For the best flavor, let them sit at room temperature for 10–15 minutes before eating, allowing the honey glaze to soften slightly.
That’s it — you did it. But hold on, I’ve got a few more tricks that will take this to another level. The next section is all about insider tips that will ensure your bars are always perfect.
Insider Tricks for Flawless Results
The Temperature Rule Nobody Follows
Many people think the honey glaze just needs to be heated until it’s liquid. The truth is, the temperature matters. Heat the glaze to around 250°F (121°C) before pouring it over the dry ingredients. This ensures it’s thick enough to bind without becoming too runny. I’ve tried it with a kitchen thermometer, and the difference in texture is night and day.
Why Your Nose Knows Best
If the bars smell slightly burnt, it’s a sign you’re over‑cooking the glaze. The aroma should be sweet and buttery, not charred. Trust your nose; if it’s off, lower the heat and give it another minute. This simple tweak saves you from a batch of bitter bars.
The 5-Minute Rest That Changes Everything
After pressing the mixture into the pan, let it rest on the counter for 5 minutes before refrigerating. This short rest allows the glaze to set slightly, making the mixture easier to handle. I’ve seen this trick help prevent the bars from sticking to the parchment paper.
The Secret to a Crispy Edge
If you like a crispier edge, sprinkle a tablespoon of rolled oats over the top before chilling. The extra oats will absorb moisture and create a crunchy crust when baked or chilled. It’s a simple addition that elevates the texture.
The Final Press
Pressing the mixture too lightly will result in loose bars that fall apart. Use a flat spatula or a piece of parchment paper to press down firmly. You can even tap the pan on the counter to settle the mixture and create an even surface.
Creative Twists and Variations
This recipe is a playground. Here are some of my favorite ways to switch things up:
Chocolate Lover’s Edition
Add 1/2 cup dark chocolate chips and 1/4 cup cacao nibs to the dry mix. The chocolate melts slightly, creating a glossy, chocolate‑sweet coating that pairs perfectly with the honey glaze. This version is a hit with kids and adults alike.
Tropical Paradise
Swap the dried cranberries for dried mango chunks and add 1/2 cup shredded coconut. The tropical flavors bring a refreshing twist, and the coconut adds an airy texture. Serve with a splash of coconut milk for a beachy vibe.
Spiced Pumpkin Bar
Add 1/2 cup pumpkin puree and 1 tsp pumpkin pie spice to the glaze. The pumpkin puree adds moisture and a subtle sweetness, while the spice adds warmth. This version is perfect for fall cravings.
Nut-Free, Seed-Only
Omit the nuts and double the seeds. Use 1 cup pumpkin seeds, 1 cup sunflower seeds, and 1/2 cup chia seeds. This makes the bars vegan and nut‑free, yet still crunchy and flavorful. The seeds provide a hearty, nutty taste.
Protein Power
Add 1/2 cup protein powder (vanilla or chocolate) to the dry mix. The protein powder boosts the bars’ protein content, making them ideal for post‑workout snacks. Ensure the protein powder is unflavored or matches the flavor profile you’re aiming for.
Storing and Bringing It Back to Life
Fridge Storage
Store the bars in an airtight container at room temperature for up to a week. The honey glaze helps preserve moisture, keeping the bars chewy. If you notice the bars drying out, add a paper towel to the container to maintain humidity.
Freezer Friendly
For longer storage, place the bars in a freezer‑safe bag or container. They’ll keep for up to three months. When you’re ready to eat, let them thaw at room temperature for 10–15 minutes to soften the glaze.
Best Reheating Method
To revive the bars, microwave for 10–15 seconds on high or bake at 350°F for 5 minutes. The heat will melt the glaze slightly, restoring the bars’ original chewy texture. Add a tiny splash of water before reheating to create steam, which keeps the bars from drying out.