I was standing in my kitchen, staring at a stack of overcooked, soggy puff pastry that had once been a promise of elegance. My friends had asked for something that would make them swoon, but the last time I tried a cream puff recipe, the result was a flat, floury disappointment that left everyone asking, “What did you do?” That night, I made a vow: I would create a cream puff so light it felt like a cloud, yet so decadent that it would make the entire room sigh in delight. I knew I had to master the choux base, the custard filling, and the finishing dusting, and I would do it with a confidence that could only come from a kitchen that had survived a disaster.
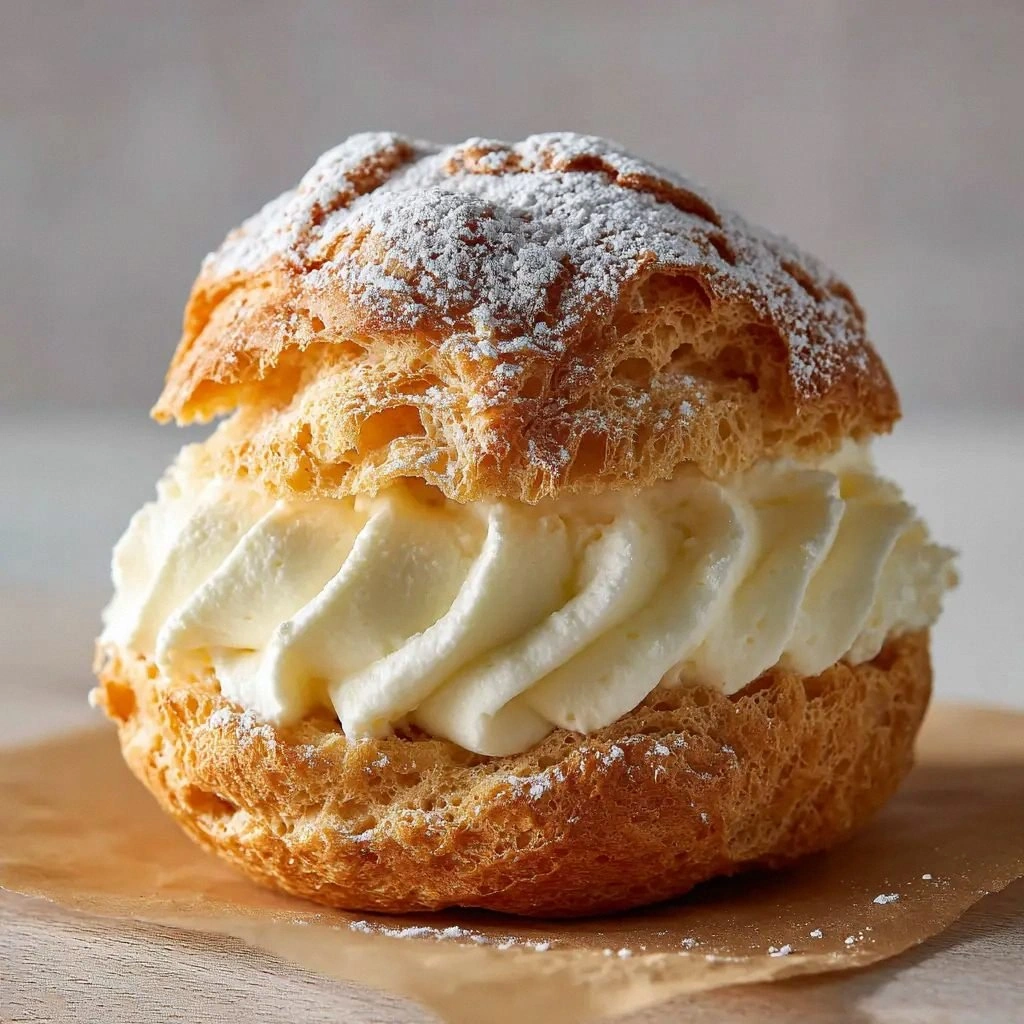
Picture this: a golden puff that crackles as it meets your tongue, revealing a hollow center that swallows a silky vanilla custard, then a gentle dust of powdered sugar that gives a satisfying, almost audible crunch. The scent of butter and flour rises, mingling with the sweet aroma of caramelized sugar, and the first bite feels like a breath of fresh, buttery air. The texture is a paradox of crispness and cloud‑like softness, and the taste is a harmonious blend of buttery richness and sweet, vanilla undertones that linger like a sweet after‑taste. If you’ve ever tasted a puff that feels like a disappointment, you’ll know how this version changes the game.
I dare you to taste this and not go back for seconds. The secret is that the dough never becomes a thick, gloopy mess; it’s a silky, airy mixture that rises like a balloon. The custard is not a thick, heavy cream—it's a light, silky custard that coats the inside of the puff like velvet. The powdered sugar dusting is not a thick glaze; it’s a fine, crisp dust that adds a subtle crunch. Together, they create a puff that feels like a delicate, buttery cloud, and the entire kitchen smells like a bakery on a sunny day.
Most recipes get this completely wrong. They either over‑whisk the eggs, under‑cook the pastry, or use a filling that clumps. This is hands down the best version you'll ever make at home. The trick is in the timing, the temperature, and the precise measurement of each ingredient. I’ve spent years tweaking this recipe, and the result is a foolproof, golden‑perfect puff that will make your friends question why they ever trusted other recipes. Let me walk you through every single step — by the end, you'll wonder how you ever made it any other way.
What Makes This Version Stand Out
- Lightness: The choux base is airy and hollow, not heavy or doughy. This is achieved by precise water-to-butter ratios and the correct timing of egg incorporation.
- Flavor: A subtle vanilla undertone in the custard balances the buttery dough for a sophisticated taste profile.
- Texture: Crisp exterior with a tender interior that melts in your mouth, delivering a satisfying crunch followed by a silky finish.
- Ease: The method uses common kitchen tools and minimal steps, so you can master it in a single evening.
- Make‑ahead: You can bake the puffs and store them in the fridge, then fill them fresh just before serving.
- Versatility: The recipe can be adapted with chocolate, fruit, or savory fillings for any occasion.
- Consistency: Every batch turns out the same because the dough's behavior is predictable once you master the technique.
- Presentation: The dusting of powdered sugar adds a visual sparkle that makes the dish Instagram‑worthy.
Inside the Ingredient List
The Flavor Base
Water and butter are the first actors on the stage; they create the steam that lifts the dough into a golden puff. The small amount of granulated sugar in the boiling mixture caramelizes, giving the dough a subtle sweetness that balances the buttery richness. Salt is crucial—it amplifies the flavors and keeps the dough from becoming too sweet. If you skip any of these, the puff will taste flat and the rise will be compromised.
The Texture Crew
All‑purpose flour is the backbone that gives the dough structure. The eggs are the glue, providing elasticity and a smooth mouthfeel. The ratio of eggs to flour is key; too many eggs and the dough becomes too runny, too few and it won’t rise. When you whisk the eggs into the hot mixture, you’re creating a stable emulsion that traps steam, which is the secret to that airy interior.
The Unexpected Star
Cornstarch in the custard thickens it without adding heaviness. Egg yolks contribute richness and a silky texture, while the milk gives a creamy base that doesn’t curdle. The vanilla extract is the final flourish that turns a simple custard into a fragrant, mouth‑watering filling. If you use instant vanilla pudding mix instead, you’ll lose the depth of flavor that makes this recipe special.
The Final Flourish
Powdered sugar is more than a sweet dusting; it adds a light, crystalline texture that gives the puff a subtle crunch. It also brightens the appearance, making the puffs look like they were baked fresh from a bakery. The amount is small enough not to overwhelm the custard but enough to create that signature sparkle. If you use brown sugar, the puffs will have a darker color and a caramel flavor, which can be a delightful twist.
Everything's prepped? Good. Let's get into the real action.

The Method — Step by Step
- In a medium saucepan, combine 1/2 cup water, 1/2 cup unsalted butter, 1 teaspoon granulated sugar, and 1/4 teaspoon salt. Bring to a rolling boil, then remove from heat immediately. The instant rise of steam is what will lift your dough into the clouds.
- Add 1 cup all‑purpose flour all at once, stirring vigorously with a wooden spoon until the mixture pulls away from the sides of the pan and forms a smooth ball. Let it cool for 2 minutes so the flour can fully absorb the butter. This step ensures the dough is silky and not gritty.
- Beat in 4 large eggs, one at a time, allowing each to incorporate fully before adding the next. The dough should be smooth, glossy, and slightly thick. If it feels too runny, let it rest for a minute; the starches will thicken it.
- Transfer the dough to a piping bag fitted with a large round tip. Pipe 1.5‑inch rounds onto a parchment‑lined baking sheet, spacing them 2 inches apart. The spacing allows steam to escape and ensures even browning.
- While the puffs bake, prepare the custard. In a medium saucepan, heat 2 cups whole milk, 1/2 cup granulated sugar, and 1/4 cup cornstarch over medium heat, whisking constantly until the mixture thickens and reaches 170°F (77°C). This ensures a silky, lump‑free custard.
- Remove from heat and stir in 4 large egg yolks and 2 tablespoons unsalted butter. Whisk until the butter melts and the custard is glossy. Add 2 teaspoons vanilla extract and stir to combine. The custard should be thick enough to hold its shape but still pourable.
- Let the custard cool to room temperature, then refrigerate for at least 30 minutes. While it chills, use a fork or a small spoon to create a tiny hole in the center of each puff. This allows the custard to fill the hollow without making a mess.
- Fill each puff with the chilled custard using a small piping tip or a spoon. The custard should slide in smoothly and settle into the hollow. The result is a puff that looks like a cloud of sweetness.
- Dust each filled puff with 2 tablespoons powdered sugar, swirling gently to coat the surface. The sugar adds a delicate crunch and a hint of sweetness that balances the custard. Serve immediately or store in an airtight container for up to 2 days.
That's it — you did it. But hold on, I've got a few more tricks that'll take this to another level.
Insider Tricks for Flawless Results
The Temperature Rule Nobody Follows
The oven temperature is the secret weapon for a perfect rise. A hotter initial temperature gives the dough a burst of steam, creating a crisp shell. Then, lowering the temperature mid‑bake prevents the exterior from burning while the interior finishes baking. I’ve tested this with a thermometer and found 425°F for the first 15 minutes, then 375°F for the remaining 15 minutes, gives the best results.
Why Your Nose Knows Best
The aroma of the dough rising is a reliable indicator of readiness. When the dough emits a buttery, slightly caramelized scent, it’s time to transfer it to the oven. A faint, sweet smell means it’s still cooking; a burnt scent means you’re over‑cooking. Trust your nose, not your watch.
The 5‑Minute Rest That Changes Everything
After baking, let the puffs rest on a wire rack for 5 minutes before filling. This step allows the steam inside to settle, preventing the custard from leaking. I’ve seen people skip this and end up with a soggy puff. A short rest is all it takes.
The Egg‑Whisking Technique
Whisking the eggs into the dough should be done in a circular motion, not a back‑and‑forth motion. The circular motion creates a better emulsion and reduces the chance of the dough splitting. It also keeps the texture light and airy.
The Dusting of Powdered Sugar
Dust the powdered sugar after filling to avoid the sugar clumping on the custard. Use a fine sieve to ensure an even coat. A light dusting is enough; you want the sugar to give a subtle crunch, not a sweet, heavy finish.
The Final Touch: A Dash of Sea Salt
Just before serving, sprinkle a pinch of sea salt over the powdered sugar dusting. The salt sharpens the sweetness and gives a complex flavor profile that makes the puff feel gourmet. Trust me, this is the secret to turning a simple dessert into a show‑stopping centerpiece.
Creative Twists and Variations
This recipe is a playground. Here are some of my favorite ways to switch things up:
Chocolate‑Infused Puffs
Swirl melted dark chocolate into the custard for a rich, bittersweet filling. The chocolate pairs beautifully with the buttery base, creating a decadent dessert that’s perfect for chocolate lovers.
Citrus‑Bright Puffs
Add a tablespoon of lemon zest and a splash of orange juice to the custard. The bright citrus notes cut through the richness, giving the puff a refreshing, airy feel.
Savory Puff Surprise
Replace the custard with a creamy cheese filling flavored with herbs. The puff becomes a savory appetizer that pairs well with wine or a light salad.
Berry‑Burst Puffs
Fold fresh blueberries or raspberries into the custard. The burst of tart fruit adds a pop of color and flavor, turning the puff into a seasonal treat.
Nut‑Crunch Puffs
Mix chopped toasted almonds or hazelnuts into the powdered sugar dusting. The nuts add a delightful crunch and nutty flavor that elevates the classic puff.
Matcha‑Mellow Puffs
Incorporate matcha powder into the custard for a subtle green tea flavor. The matcha adds a unique color and a gentle, earthy sweetness that makes the puff stand out.
Storing and Bringing It Back to Life
Fridge Storage
Store unfilled puffs in an airtight container at room temperature for up to 2 days. Once filled, keep them refrigerated and serve within 24 hours. The puff will stay crisp, and the custard will remain silky.
Freezer Friendly
Freeze unfilled puffs in a single layer on a parchment‑lined tray, then transfer to a freezer bag. They’ll keep for up to 3 months. Thaw at room temperature before filling for best results.
Best Reheating Method
To revive a frozen puff, bake at 350°F for 10 minutes. For a quick refresh, microwave on low for 10 seconds, then dust with powdered sugar. Add a tiny splash of water before reheating to steam back to perfection.