It started with a kitchen disaster that could have been a cautionary tale. I was scrambling to whip up a quick breakfast after a late‑night binge, but the eggs I cracked into the pan began to stick like stubborn glue. The smell of over‑cooked oil filled the air, and I stared at the sizzling mess, wondering why my usual scramble never turned out so bland. That moment of culinary frustration sparked a dare from a friend: “I dare you to taste this and not go back for seconds.” I laughed, but I was already plotting a fiery rescue.
Fast forward to the next morning, the kitchen was a battlefield of aromas—rich sesame oil, sharp garlic, and the unmistakable scent of chili flakes. The sizzle that greeted me was a promise: something bold, something that would shake up the ordinary. I could almost taste the glossy sheen of the oil coating the eggs, the way the heat kissed the yolks while the whites stayed tender. The idea of a breakfast that was both simple and daring began to form, like a secret recipe waiting to be shared. I could already imagine the eyes widening when I unveiled the dish.
Why does this version stand out from every other chili‑oil egg recipe you’ve ever tried? Because it balances heat, umami, and subtle sweetness in a way that makes each bite feel like a small celebration. The sesame oil brings a nutty depth that turns plain eggs into a silky canvas, while the neutral oil lets the chili flakes shine without overwhelming the palate. The green onions add a bright, almost citrusy crunch that cuts through the richness, and the sugar brings a whisper of caramel that tempers the heat. And let’s not forget the sauce—an umami‑laden splash that ties everything together like a well‑crafted orchestra.
There’s a twist you won’t expect: I’m using a sauce that’s a blend of soy, oyster, and a dash of fermented bean paste, which adds layers of flavor that most people skip. This sauce coats the eggs like velvet, giving them a glossy finish that’s as beautiful as it is delicious. The result is a dish that feels like a gourmet breakfast, but you can make it in a fraction of the time. Picture yourself pulling this out of the pan, the whole kitchen smelling incredible, and knowing that you’ve just created something that will be talked about for days.
Let me walk you through every single step—by the end, you’ll wonder how you ever made it any other way. I’m going to share the exact technique, the ingredient secrets, and the little hacks that will elevate this dish from simple to unforgettable. Whether you’re a seasoned cook or a kitchen newbie, you’ll find that each part of this recipe is designed to be approachable yet packed with flavor. So grab a notebook, set your timer, and let’s dive into the world of chili oil eggs.
What Makes This Version Stand Out
- Flavor: The combination of sesame and neutral oil creates a base that’s both nutty and clean, allowing the chili flakes to dominate without overpowering. The sauce adds depth, turning the dish into a savory masterpiece. The sweet hint from sugar balances the heat, making every bite harmonious.
- Texture: The eggs are cooked to a silky, slightly runny center that clings to every grain of rice. The green onions add a fresh crunch that contrasts the softness, while the oil provides a glossy finish that feels luxurious on the tongue.
- Heat Control: By using 1 teaspoon of chili flakes, the dish hits the sweet spot of spiciness—enough to wake up your senses but not so much that it overwhelms. The balance is achieved through careful timing and the addition of sugar.
- Ingredient Quality: Using high‑grade sesame oil brings out its natural nuttiness, and fresh garlic and green onions add bright, vibrant notes. The sauce’s umami richness comes from a blend that’s superior to plain soy.
- Speed: The entire process takes less than 30 minutes, making it ideal for busy mornings or a quick weekday meal. No elaborate prep, no time‑consuming steps—just a few simple actions that produce a dish that feels indulgent.
- Versatility: This recipe can be served over rice, as a side dish, or even as a filling for breakfast tacos. The flavors adapt well to different bases, allowing you to customize the dish to your taste.
- Make‑Ahead Potential:
Inside the Ingredient List
The Flavor Base
Sesame oil is the star that gives this dish its signature nutty aroma. It’s the foundation that carries the chili flakes and sauce, allowing each bite to taste layered. Using a high‑quality sesame oil, preferably toasted, amplifies the depth and gives the eggs a subtle toasty finish. If you’re on a budget, a neutral oil can work, but you’ll lose that distinctive flavor profile.
The Texture Crew
Neutral oil keeps the dish from becoming too heavy, letting the flavors of the chili and sauce shine. Green onions provide a crisp bite that contrasts the silky eggs. Garlic, when minced finely, releases its aroma quickly, infusing the oil without burning. The eggs themselves are the centerpiece—cooked to a perfect balance of firmness and runniness. The rice acts as a sponge, soaking up every drop of sauce for a comforting bite.
The Unexpected Star
The sauce—an umami blend of soy, oyster, and fermented bean paste—acts like a secret weapon. It brings a depth that you’d expect from a slow‑cooked stew, but in just minutes. The sauce’s acidity cuts through the richness of the eggs, creating a balanced bite. If you’re vegan, replace oyster sauce with a mushroom‑based alternative to keep the umami intact.
The Final Flourish
Red chili flakes deliver the heat that wakes up the palate. Sugar provides a subtle caramelization, smoothing out the sharpness of the chili. Black pepper adds a whisper of earthiness that ties the dish together. Together, these final touches elevate a simple breakfast into a memorable experience. The result is a dish that feels both comforting and adventurous.
Everything’s prepped? Good. Let’s get into the real action.
The Method — Step by Step
- First, bring a medium saucepan to a gentle simmer and add the sesame oil. Let it heat until it begins to shimmer but not smoke—this is where the nutty aroma will start to unfold. While the oil warms, finely mince the garlic and slice the green onions into thin rings. This prep ensures everything is ready for a quick, seamless cooking process. Once the oil is hot, add the garlic and sauté until it turns golden, a sign that the flavor is ready to bloom.
- Add the chili flakes to the pan, stirring immediately to coat the garlic. The sizzle you hear is a cue that the chili is releasing its oils, creating a fragrant base for the eggs. Allow the mixture to bubble for about 30 seconds, then pour in the sauce, letting the liquid coat the aromatics. This step creates a glossy, savory coating that will cling to the eggs.
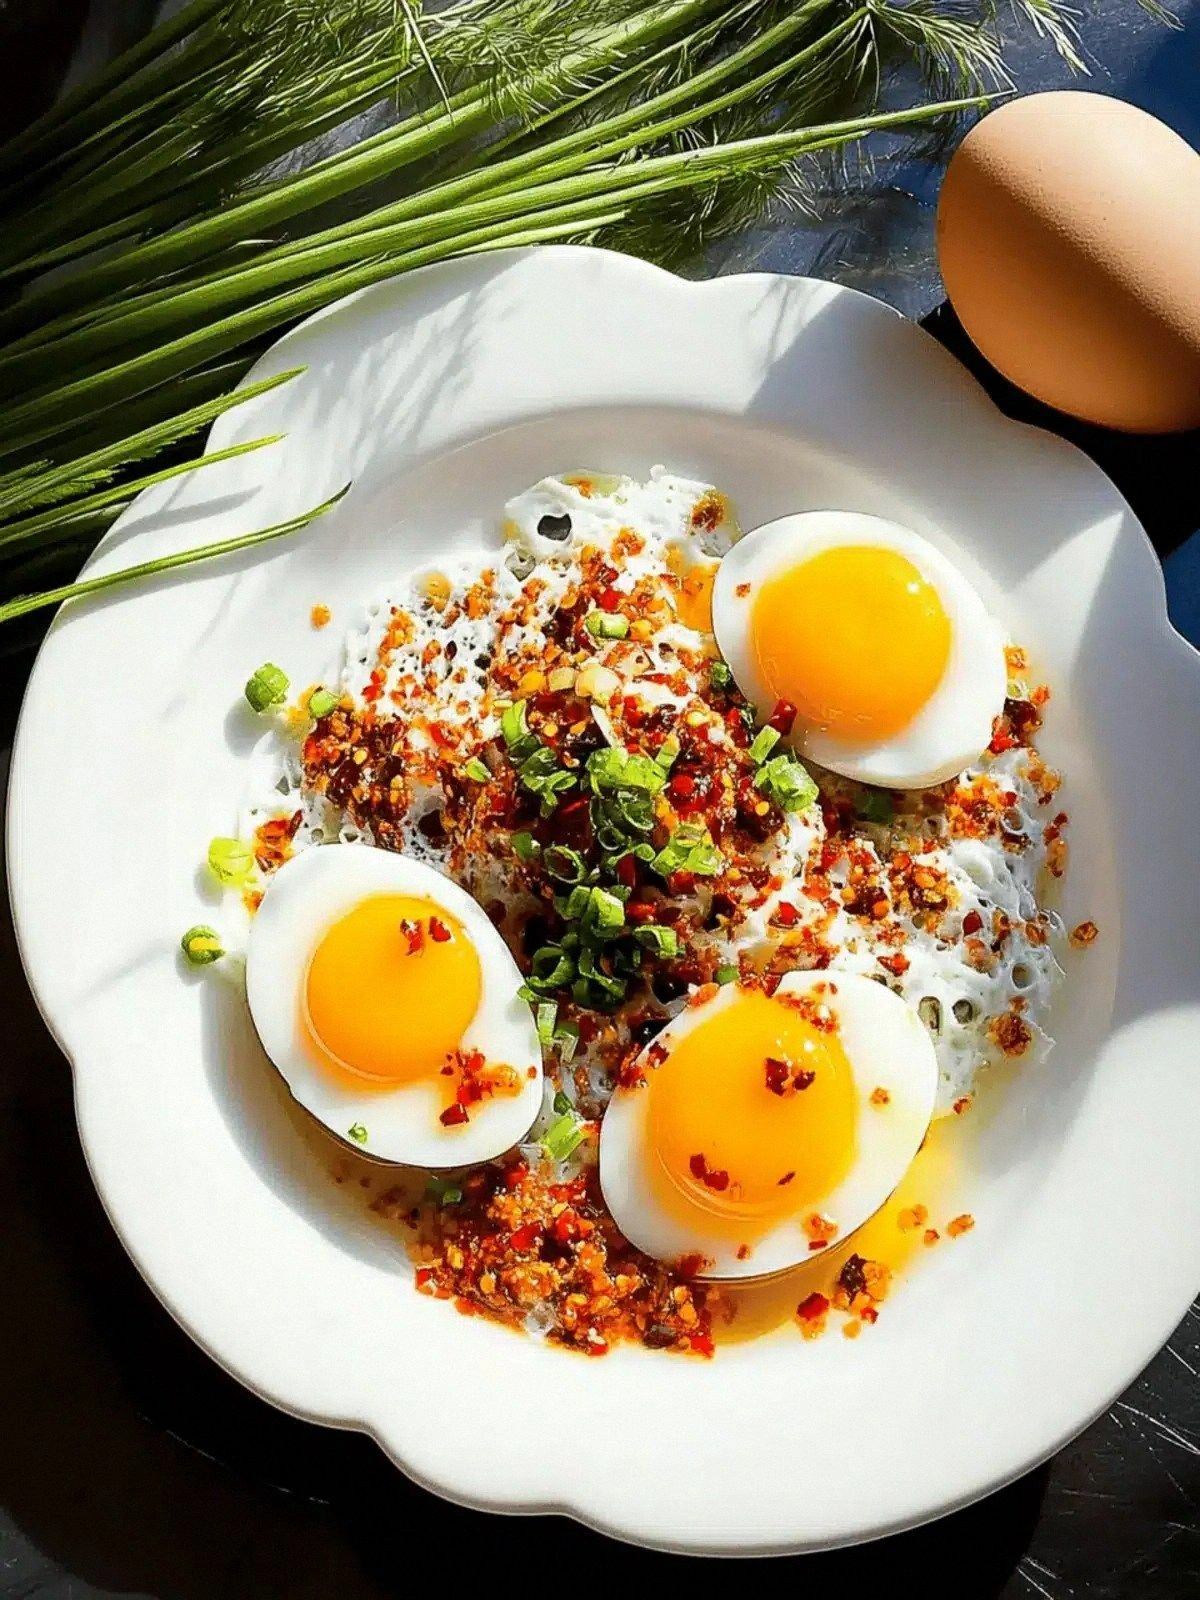
- Crack the eggs directly into the pan, spacing them evenly so they don’t touch. The eggs should sizzle as they hit the hot oil, a sound that signals they’re cooking just right. Stir gently to let the sauce coat the whites, then sprinkle the sugar and black pepper over the top. The sugar will caramelize slightly, adding a subtle sweetness that balances the heat.
- Lower the heat to medium-low and let the eggs simmer for about 4 minutes. You’ll notice the edges start to pull away from the pan, a sign that the whites are firming up. The sauce should thicken slightly, creating a glossy glaze that coats the eggs. Keep an eye on the texture—if the eggs are cooking too fast, reduce the heat further.
- Once the eggs are cooked to your liking, transfer them onto a plate lined with a paper towel to absorb excess oil. While they rest, sprinkle the sliced green onions over the top for a burst of freshness. The contrast of the hot, oily eggs with the crisp green onion is a flavor explosion that keeps the dish lively.
- In the meantime, steam or boil the rice until it’s fluffy and ready to soak up the sauce. If you’re short on time, microwave the rice in a microwave-safe bowl, adding a splash of water to keep it moist. The rice should be tender, not mushy, to provide the right texture when combined with the eggs.
- Plate the eggs over a bed of rice, ensuring that each egg is surrounded by a generous amount of sauce. The sauce should coat the rice, creating a cohesive, flavorful bite. Garnish with a few extra green onion rings for color and crunch. This final touch makes the dish visually appealing and adds a fresh note.
- Serve hot, and let the aroma of chili, sesame, and soy envelop the room. The first bite should feel like a warm hug with a kick that wakes your senses. Pair it with a glass of iced tea or a light citrus drink to balance the heat. If you’re sharing, offer extra sauce on the side for guests who love a little extra spice.
That's it—you did it. But hold on, I've got a few more tricks that'll take this to another level.
Insider Tricks for Flawless Results
The Temperature Rule Nobody Follows
Temperature is everything when cooking eggs in oil. If the oil is too hot, the eggs will cook too quickly, resulting in a rubbery texture. Aim for a gentle heat that allows the whites to set while the yolks remain runny. This technique ensures the sauce can coat the eggs evenly, creating that glossy finish you love.
Why Your Nose Knows Best
Smell is a powerful guide when cooking. If the oil starts to give off a burnt scent, it’s time to lower the heat. A slight smoky aroma indicates the sauce is caramelizing, which is great, but too much smoke means you’re overcooking. Trust your nose to tell you when the dish is ready to move to the next step.
The 5-Minute Rest That Changes Everything
Letting the eggs rest for a minute after cooking allows the flavors to settle. The yolks will thicken slightly, making them easier to handle when plated. A brief rest also lets the sauce thicken, creating a richer coating. This simple step can elevate the dish from good to unforgettable.
Use Fresh, Not Frozen, Green Onions
Fresh green onions bring a bright, crisp flavor that frozen ones lack. They also maintain their crunch, which is essential for the textural contrast. If you can’t find fresh green onions, try using scallions from a grocery store—they’re often fresher and more vibrant.
Don’t Skip the Sugar
Sugar is the secret that tempers the heat and brings a subtle caramelization. Skipping it will make the dish feel too sharp and lacking depth. Even a teaspoon can make a noticeable difference, turning the chili into a balanced, savory-sweet experience.
Keep the Rice Warm
Warm rice absorbs sauce better than cold rice. Keep the rice in a covered pot on low heat until you’re ready to serve. This ensures each grain is coated, preventing a dry, uneven bite.
Creative Twists and Variations
This recipe is a playground. Here are some of my favorite ways to switch things up:
Asian Noodle Bowl
Swap the rice for ramen noodles or soba for an instant upgrade. Toss the noodles in the same chili oil sauce, then top with the eggs. Add sliced carrots, bamboo shoots, and a drizzle of sesame seeds for extra texture. This version turns the dish into a hearty, noodle‑filled breakfast that feels like a takeout favorite.
Vegan Egg Replacement
Use chickpea flour batter to create tofu “eggs.” Whisk chickpea flour with water, salt, and turmeric, then pour into the pan. Cook until golden, then coat with the chili oil sauce. This vegan twist keeps all the flavors while offering a plant‑based protein option.
Spicy Egg Fried Rice
After cooking the eggs, scramble them with leftover rice, soy sauce, and a pinch of sesame oil. Add diced bell peppers and peas for color and crunch. Finish with a splash of chili oil for that signature kick. This version is perfect for a quick lunch or dinner.
Eggs on Toast
Spread the chili oil sauce on toasted sourdough or rye bread, then top with the eggs. Add a sprinkle of fresh cilantro and a squeeze of lime for a zesty finish. This breakfast sandwich is quick, portable, and packed with flavor.
Breakfast Burrito
Wrap the eggs, rice, and sauce in a warm flour tortilla. Add a handful of shredded cheese, a dash of hot sauce, and some diced tomatoes for a Mexican‑inspired twist. The result is a breakfast burrito that’s both satisfying and spicy.
Green Onion & Egg Omelette
Whisk the eggs with a splash of milk, then pour into a hot pan. Add chopped green onions and a sprinkle of chili flakes before folding. Drizzle the chili oil sauce over the finished omelette for a rich, flavorful bite. This variation gives you an omelette that’s both fluffy and fiery.
Storing and Bringing It Back to Life
Fridge Storage
Store the cooked eggs and rice separately in airtight containers in the refrigerator. Keep the sauce in a small jar to avoid it mixing with the rice. Consume within 2 days for optimal freshness. Reheat gently on the stove, adding a splash of water to keep the sauce from drying out.
Freezer Friendly
Freeze the rice and eggs in separate freezer bags, labeling them with the date. When ready to eat, thaw overnight in the fridge, then reheat on the stovetop with a bit of water. The sauce should be reheated separately to maintain its consistency.
Best Reheating Method
The best way to reheat is on low heat with a splash of water or broth to steam the dish back to life. Stir occasionally to ensure even heating. This technique preserves the sauce’s silky texture and the eggs’ tenderness.