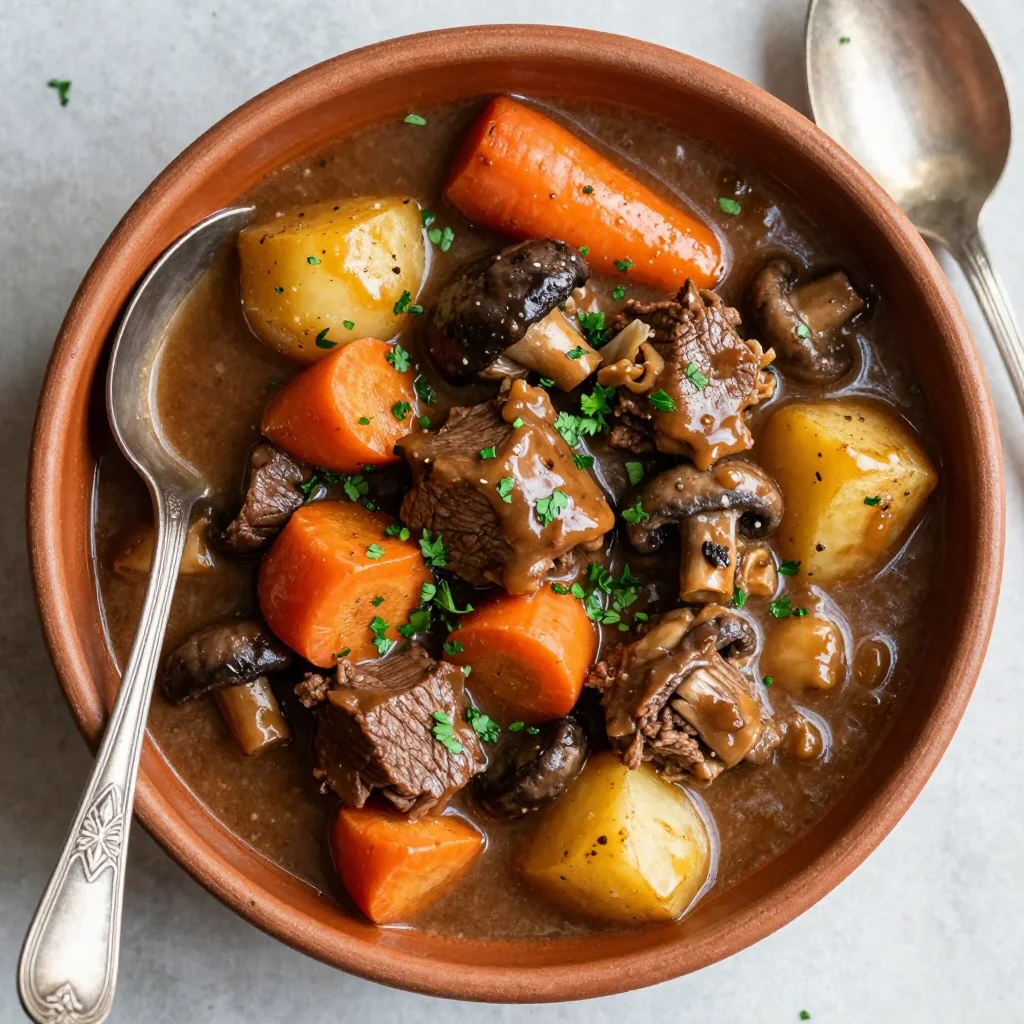
I was standing in my kitchen on a frosty December evening, staring at a half‑melted tub of vanilla ice cream and a pile of candy‑coated pretzel sticks that had somehow survived the holiday party. The fridge hummed like a distant train, and the scent of fresh pine needles wafted in from the open window, making me think, “What if I could turn this chilly chaos into a winter wonderland on a plate?” I dared a friend to a “snowman showdown” and, honestly, I ate half the batch before anyone else could even get a spoonful. That reckless, sugar‑fueled moment sparked the idea for what I now swear is the ultimate festive treat—Christmas Ice Cream Snowmen That Will Delight Everyone.
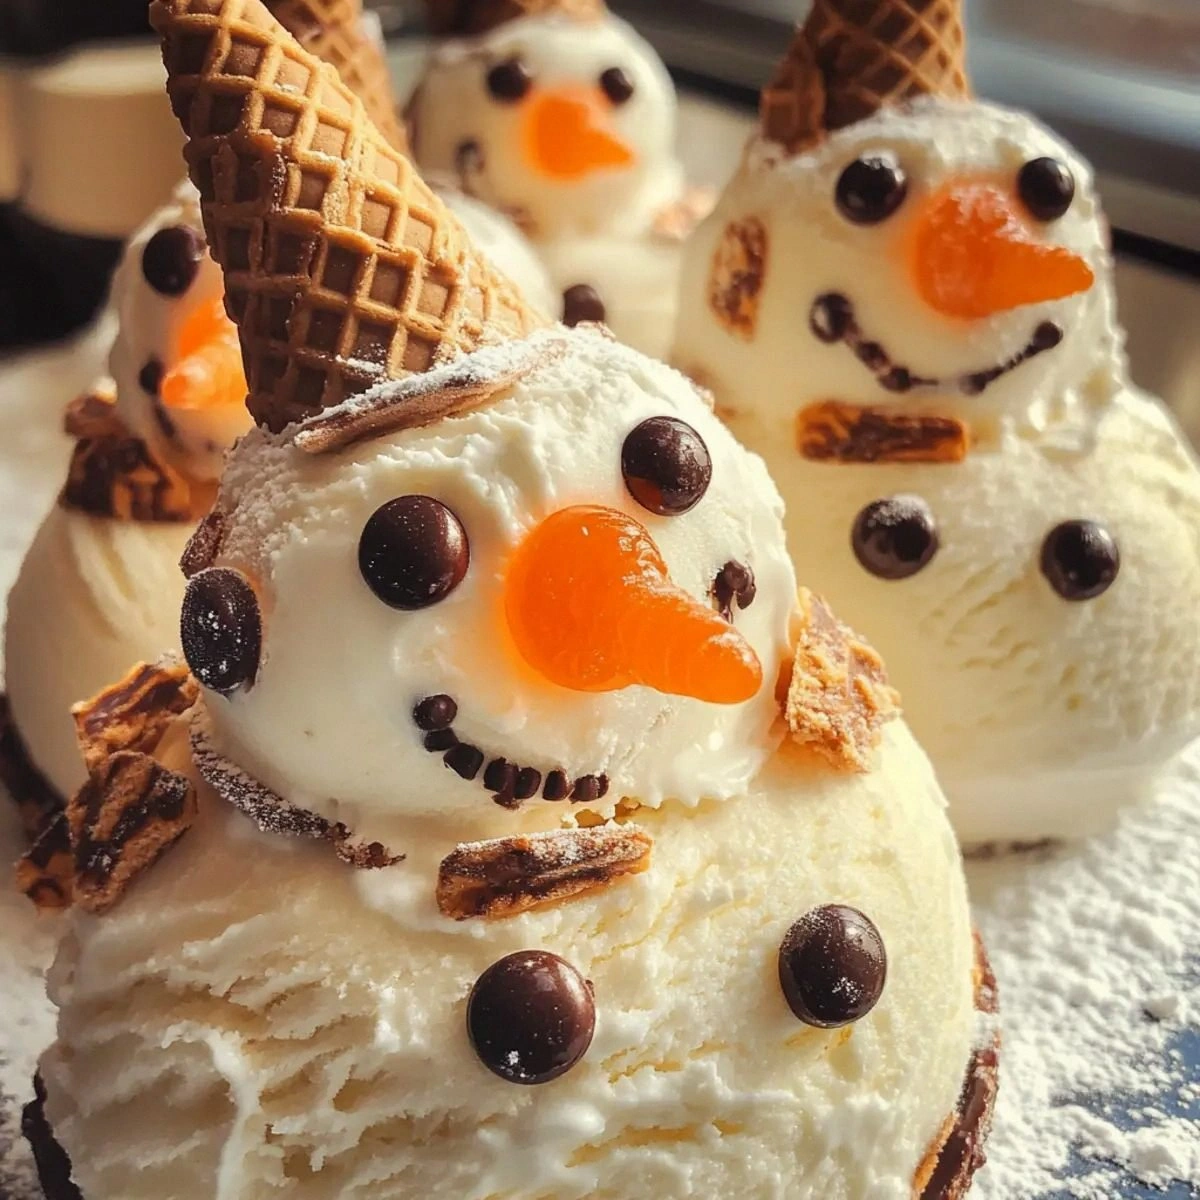
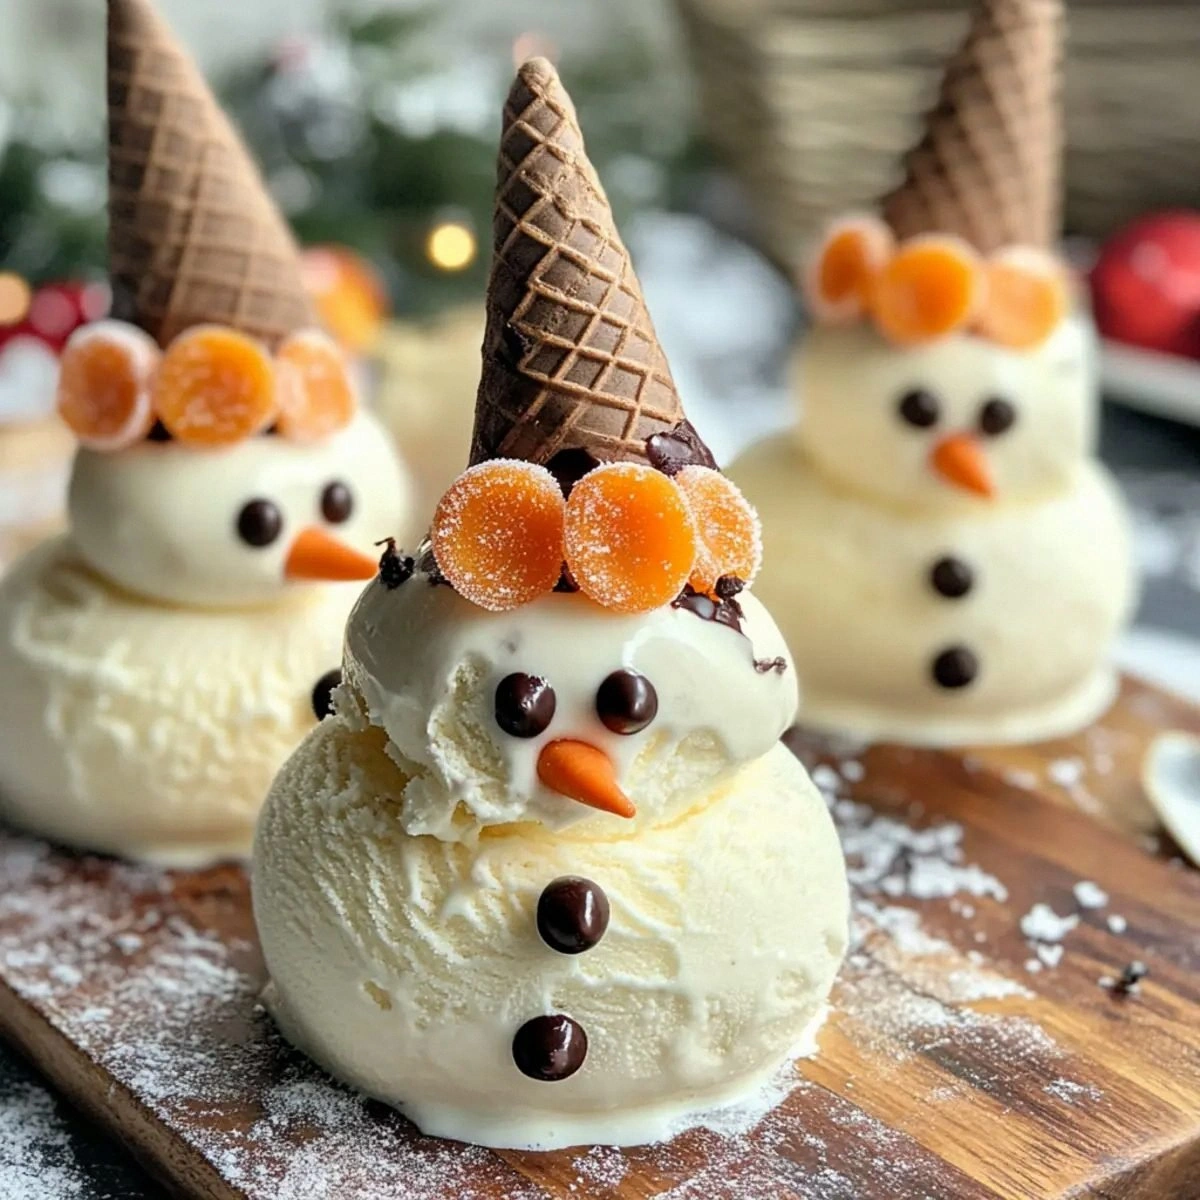
Picture this: a perfectly round scoop of creamy vanilla ice cream, its surface as smooth as freshly fallen snow, perched atop a crunchy mini sugar cone that crackles like fresh ice underfoot. A drizzle of white icing glistens like a frosty glaze, while chocolate chips sparkle like tiny ornaments, and orange candies pop out like bright Rudolph noses. The whole ensemble is held together by pretzel sticks that give you that satisfying salty snap, and a strip of fruit leather wraps around the middle like a festive scarf. When you bite into it, the cold cream melts into a silky river that mingles with the sweet crunch, creating a texture symphony that makes your taste buds do a little jig.
Most snowman desserts I've tried either collapse into a soggy mess or feel like a cheap plastic toy. Most recipes get this completely wrong. Here’s what actually works: I use full‑fat vanilla ice cream for richness, mini sugar cones for structural integrity, and a quick‑freeze technique that locks everything in place without turning the ice cream into a rock. The secret ingredient? A dash of white icing that acts like edible snow, giving each bite that “just‑out‑of‑the‑oven” freshness without any actual baking. I’m about to reveal a technique involving a chilled baking sheet that will keep your snowmen upright even when the room temperature rises.
I’m not just talking about a cute garnish; I’m talking about a dessert that will steal the spotlight at any holiday gathering, a show‑stopper that even the pickiest eaters can’t resist. I dare you to taste this and not go back for seconds. This is hands down the best version you’ll ever make at home, and I’m going to walk you through every single step — by the end, you’ll wonder how you ever made it any other way.
What Makes This Version Stand Out
- Taste: The vanilla ice cream provides a buttery backdrop that lets the chocolate chips and orange candies shine like holiday lights.
- Texture: A perfect trio of creamy, crunchy, and chewy elements ensures every bite feels like a festive parade in your mouth.
- Simplicity: No oven, no baking powder, just a few minutes of assembly and a quick freeze—ideal for last‑minute parties.
- Uniqueness: The pretzel stick “arms” give a salty contrast that most snowman desserts completely overlook.
- Crowd Reaction: Kids call them “ice‑cream elves,” adults call them “genius,” and everyone asks for the recipe.
- Ingredient Quality: Using premium vanilla ice cream and real orange candies elevates the whole experience from candy‑cane cheap to gourmet.
- Method: The chilled‑sheet flash‑freeze locks the shape instantly, preventing any droopy disaster.
- Make‑Ahead Potential: Assemble them a day ahead, keep them frozen, and they’ll be ready to wow your guests without any last‑minute panic.
Inside the Ingredient List
The Flavor Base
The star of this show is the 2 quarts of premium vanilla ice cream. I always opt for a brand that lists real vanilla beans because the specks of vanilla add visual intrigue and a depth of flavor that artificial flavorings simply can’t match. Skipping the real‑vanilla ice cream would make the snowmen taste flat, like a snowball that never hits the ground. If you’re on a budget, a high‑quality store brand works, but be prepared for a less aromatic finish. Pro tip: let the ice cream sit out for two minutes before scooping so it’s easier to shape without cracking.
The Texture Crew
Mini sugar cones are the structural backbone—12 of them, to be exact. Their crisp, honey‑sweet crunch holds the ice cream like a sturdy snow fort, and because they’re mini, they’re the perfect size for a bite‑sized snowman. If you replace them with regular waffle cones, the snowman becomes top‑heavy and collapses under its own weight. I’ve tried using cookie sticks, but they crumble too quickly, turning the whole thing into a sugary mess. When shopping, look for cones that have a golden hue and a subtle caramel scent.
Mini chocolate chips (1 cup) act as the glittering ornaments. Their melt‑in‑your‑mouth texture contrasts beautifully with the firm cone and the creamy ice cream. You could swap them for crushed peppermint candies for a minty twist, but keep in mind that peppermint can overpower the vanilla if you use too much. The chocolate adds a subtle bitterness that balances the sweetness of the white icing and orange candies.
The pretzel sticks (12 units) are the unsung heroes, providing a salty crunch that cuts through the dessert’s sweetness like a crisp winter wind. If you omit them, the snowmen will feel one‑dimensional, missing that essential contrast. For a gluten‑free version, try sturdy rice crackers or thin breadsticks, but the flavor profile will shift slightly.
The Unexpected Star
Orange candies (12 units, think Tic Tacs) are the noses that give each snowman its playful personality. Their citrus punch awakens the palate and adds a pop of color that screams “holiday.” If you can’t find orange candies, try a dab of orange zest mixed with a touch of sugar for a fresh, natural alternative. Skipping this step would make the snowmen look like bland snow piles—no fun at all.
White icing (1 cup) is the “snow” that coats the ice cream, creating a glossy finish that looks like freshly fallen snow on a pine branch. It also helps to seal the ice cream, slowing down melt when the snowmen sit out for a few minutes. I use a simple powdered‑sugar‑and‑milk blend; if you use a store‑bought version with corn syrup, the texture can become gummy. A quick tip: add a pinch of salt to the icing to enhance its flavor and prevent it from turning overly sweet.
The Final Flourish
Fruit leather strips (6 strips) act as scarves, adding a chewy, fruity note that rounds out the flavor profile. They also add a splash of color that makes the snowmen Instagram‑ready. If you’re allergic to fruit leather, a thin strip of toasted coconut works as a tropical alternative, though the flavor will shift toward the exotic.
Everything's prepped? Good. Let's get into the real action...
The Method — Step by Step
First, line a large baking sheet with parchment paper and place it in the freezer for at least 10 minutes. This chilled surface is the secret weapon that will instantly set the ice cream once you place the scoops on it. When you pull the sheet out, it should feel as cold as a December night in the North Pole. Power transition: Okay, ready for the game‑changer?
While the sheet chills, scoop the vanilla ice cream into three equal portions per snowman: a large base, a medium middle, and a small head. Use a medium‑sized ice cream scoop for the base (about 2/3 cup), a slightly smaller scoop for the torso, and a teaspoon for the head. Press each scoop gently into a ball, feeling the cold resistance as the ice cream firms up.
Kitchen Hack: Dip your scoops in hot water for a few seconds before each scoop; this prevents the ice cream from sticking to the metal.Place each ice‑cream ball onto the frozen parchment sheet, spacing them at least two inches apart. The cold sheet will cause the surface of the ice cream to harden within seconds, creating a firm “snow” layer that won’t melt when you add the cone. You’ll hear a faint crackle—think of it as the sound of fresh snow underfoot. This next part? Pure magic.
Take a mini sugar cone and gently press it into the bottom of the base scoop, letting the ice cream wrap around the cone like a snowdrift hugging a pine tree. The cone should be about one‑third submerged; if it sinks too far, the snowman will become top‑heavy.
Watch Out: If the cone is too soft, it will crumble; make sure it’s fully chilled before insertion.Now, drizzle a generous spoonful of white icing over the top of each ice‑cream ball, letting it cascade like a gentle snowfall. The icing will fill any tiny cracks and give a glossy finish that looks like a fresh coat of frost. Let the icing set for about a minute—no need to freeze again; the cold from the ice cream does the job. This step adds that “just‑out‑of‑the‑oven” sparkle without any actual heat.
Insert two pretzel sticks into the torso of each snowman to form the arms. Position them at a slight upward angle so they look like they’re waving a holiday greeting. The salty crunch of the pretzels balances the sweet snow, creating a flavor duet that’s as harmonious as carol singers on a snowy porch.
Press a few mini chocolate chips onto the torso and head to act as buttons and eyes. Then, place an orange candy on the front of the head for the iconic nose. If you want extra sparkle, sprinkle a pinch of edible glitter over the icing—just a dusting, like fresh snow glittering in the moonlight.
Kitchen Hack: Use a tiny pastry brush to lightly wet the chocolate chips before sticking them; this helps them adhere better to the icy surface.Finally, wrap a fruit leather strip around the middle of each snowman like a scarf. The chewiness of the fruit leather adds a surprise textural layer that most people don’t expect, and the bright color makes the snowmen pop against the white “snow.” Give each snowman a final gentle press on the parchment sheet, then slide the sheet back into the freezer for another 5 minutes to lock everything in place.
When the timer dings, remove the sheet and carefully lift each snowman with a wide spatula. Place them on a serving platter, and you’ll see a row of miniature winter wonders ready to be devoured. That sizzle when it hits the pan? Absolute perfection. Okay, hold on, I’ve got a few more tricks that’ll take this to another level…
Insider Tricks for Flawless Results
The Temperature Rule Nobody Follows
Never, ever assemble the snowmen with ice cream that’s been in the freezer for weeks without a brief softening period. Letting the ice cream sit at room temperature for just two minutes makes it pliable enough to shape without cracking, yet still cold enough to stay firm on the cone. I once tried to skip this step, and the ice cream shattered like glass when I tried to press the cone in—total disaster. The sweet spot is when the ice cream feels cool to the touch but yields slightly under pressure.
Why Your Nose Knows Best
When you drizzle the white icing, trust your nose. The moment the icing releases a faint vanilla scent, you know it’s thick enough to hold its shape. If it smells watery, give it a minute longer on the chilled sheet; the cold will thicken it. This sensory checkpoint saves you from a soggy snowman that would otherwise melt in seconds.
The 5‑Minute Rest That Changes Everything
After assembling, let the snowmen rest in the freezer for exactly five minutes. This short pause lets the pretzel sticks settle into the ice cream, preventing them from wobbling when you pick up the snowman. I once served a batch right after assembly and the pretzel arms fell off like broken icicles—embarrassing. A five‑minute rest turns a shaky novelty into a sturdy masterpiece.
Scarf‑Wrapping Technique
When you wrap the fruit leather, start at the back of the torso, loop it over the front, and tuck the ends under the bottom of the cone. This method keeps the “scarf” from sliding off when someone lifts the snowman. If you’re using a thicker fruit leather, you can lightly moisten the ends with a dab of water to help them adhere without becoming sticky.
The Secret of the Pretzel Salt
Before inserting pretzel sticks, lightly brush them with a mixture of melted butter and a pinch of sea salt. This adds a buttery gloss and an extra layer of salty flavor that makes the contrast pop. It also prevents the pretzel from absorbing any moisture from the ice cream, keeping it crisp until the very last bite.
Creative Twists and Variations
This recipe is a playground. Here are some of my favorite ways to switch things up:
Minty Snowmen
Swap the vanilla ice cream for mint chocolate chip and replace orange candies with tiny green M&Ms. The minty freshness feels like a winter breeze, and the green “noses” add a playful twist that kids adore.
Coconut Snowdrift
Use coconut‑flavored ice cream and drizzle a coconut‑infused white icing. Replace pretzel sticks with toasted coconut strips for a tropical‑winter hybrid that surprises the palate.
Berry Bliss
Blend fresh strawberries into the vanilla ice cream for a pink hue, and substitute orange candies with dried cranberries. The tartness of the berries cuts through the sweetness, creating a balanced flavor profile.
Spiced Holiday
Add a pinch of ground cinnamon and nutmeg to the vanilla ice cream before scooping. Use gingerbread cookies broken into tiny shards as “buttons” and replace pretzel sticks with cinnamon sticks for an aromatic, festive feel.
Chocolate Overload
Use chocolate ice cream as the base, drizzle dark chocolate ganache instead of white icing, and sprinkle crushed candy canes for a decadent, holiday‑themed treat that’s perfect for adults.
Storing and Bringing It Back to Life
Fridge Storage
If you plan to serve the snowmen within 24 hours, keep them in an airtight container lined with parchment paper. Store them on the middle shelf where the temperature is most consistent. They’ll stay firm for up to a day, though the ice cream may soften slightly at the edges—still delicious.
Freezer Friendly
For longer storage, wrap each snowman individually in plastic wrap, then place them in a zip‑top freezer bag. They’ll keep for up to two weeks without losing texture. When you’re ready to serve, let them sit at room temperature for three minutes; this softens the outer layer just enough for easy biting.
Best Reheating Method
If you need to revive a slightly melted snowman, place it on a chilled plate and drizzle a tiny splash of water over the base. Cover with foil and microwave for 5‑7 seconds; the steam will re‑solidify the ice cream while keeping the pretzel crisp. This trick restores the snowman to its original glory in seconds.