I still remember the night I tried to recreate that legendary Kentucky bar‑becue chicken on a scorching summer evening. The grill hissed like a trapped dragon, the chicken was stubbornly dry, and my kitchen smelled of burnt sugar. I stared at the charred, flavorless meat, feeling the disappointment sink in. That disaster sparked a mission: to find a grilled chicken that would sing in your mouth, not sob.
Close your eyes and imagine the first bite: a golden, crackling crust that shatters like thin ice, releasing a burst of smoky, herbaceous perfume. The meat inside is tender, the buttermilk soak making it melt like butter, while a hint of hot sauce sneaks into every fiber. The sound of the sizzling chicken against the grill is the soundtrack of triumph, the visual of charred ridges a badge of honor. The aroma mingles with the sweet scent of summer grass, creating an almost cinematic scene.
What sets this recipe apart is not just the flavor but the balance of technique and simplicity. We use a two‑step coating—first a marinated buttermilk dip, then a seasoned flour blend—that creates a crisp, flavorful shell. The hot sauce is a secret weapon, giving a subtle heat that never overwhelms. The result is a chicken that stays juicy inside while the outside offers a satisfying crunch, a texture profile that most recipes miss.
And here's a teaser you won't see in a typical recipe: we introduce a small amount of baking powder into the flour mix. That tiny tweak turns the coating into a cloud‑like crisp, like the lightness of a soufflé, but without the fuss. This is the game‑changer that turns a good grilled chicken into an unforgettable experience.
Let me walk you through every single step—by the end, you'll wonder how you ever made it any other way. I dare you to taste this and not go back for seconds. This is hands down the best version you'll ever make at home.
What Makes This Version Stand Out
- Flavor: A bold blend of herbs, spices, and a touch of heat that penetrates the meat, delivering a punch that lingers.
- Texture: A two‑layer coating that crisps to a perfect crunch while keeping the inside moist and tender.
- Simplicity: No elaborate marinades or pre‑mixes—just pantry staples, a few minutes of prep, and a grill.
- Uniqueness: The addition of baking powder in the flour creates a light, airy crust that sets this apart from ordinary grilled chicken.
- Crowd Reaction: Friends will ask for the recipe after the first bite—expect compliments, requests, and a few "I need a copy" emails.
- Ingredient Quality: Fresh herbs and good‑grade chicken make the difference between good and great.
- Cooking Method: Grilling preserves the smoky flavor while the coating locks in moisture.
- Make‑Ahead Potential: The marination can be done hours ahead, letting the flavors seep deep into the meat.
Inside the Ingredient List
The Flavor Base
The buttermilk is the secret to that silky, melt‑in‑your‑mouth texture. It’s acidic, breaking down the proteins on the chicken’s surface so the meat stays juicy. Skipping it would leave the chicken dry, especially when grilled over high heat.
The hot sauce adds a subtle heat that lingers without being overpowering. If you prefer a milder version, reduce the amount to one tablespoon or replace it with a smoky chipotle paste for a different kick.
The garlic, thyme, and oregano create a fragrant, earthy undertone that balances the heat. Fresh herbs would elevate the flavor further, but dried herbs are perfectly fine for a quick prep.
The Texture Crew
The flour forms the backbone of the crust. It’s the canvas that holds the spices and baking powder, which together create that airy crunch. If you’re avoiding gluten, substitute with a gluten‑free blend or a mixture of rice flour and cornstarch.
The second batch of paprika, garlic powder, onion powder, thyme, and oregano gives the coating depth. These spices blend into a savory, slightly sweet profile that complements the smoky grill flavor. Skipping any of them will dilute the complexity.
The olive oil or cooking spray ensures the grill stays non‑stick and adds a subtle richness to the crust. A light mist of oil on the grill surface is enough; no need for heavy brushing.
The Unexpected Star
Baking powder is the unsung hero that turns a dense coating into a light, crisp shell. It reacts with the buttermilk’s acidity, forming tiny bubbles that expand during grilling. Without it, the coating would be heavy and soggy.
If you don’t have baking powder on hand, a pinch of baking soda can work, but the reaction will be slower, so keep an eye on the chicken’s color to avoid over‑browning.
This tiny tweak is why the crust feels like a delicate pastry, not a thick batter. It’s the difference between a good grilled chicken and a memorable one.
The Final Flourish
Salt and pepper are the finishing touches that elevate every bite. They’re essential for bringing out the natural flavors of the chicken and spices. Remember, “to taste” means adjust to your preference; a pinch more salt can make the crust pop.
The olive oil or spray is not just for greasing; it also helps the coating adhere and creates a subtle sheen that looks appetizing. A light coat is enough—over‑oilting can cause flare‑ups on the grill.
Everything’s prepped? Good. Let’s get into the real action.
The Method — Step by Step
- Start by patting the chicken dry with paper towels; moisture on the surface will prevent the coating from sticking. Then, whisk together the buttermilk, hot sauce, minced garlic, paprika, thyme, oregano, salt, and pepper in a shallow dish. This is your marination basin. Place the chicken pieces in the mixture, ensuring each piece is fully submerged. Cover and refrigerate for at least 30 minutes, or up to 4 hours for deeper flavor.
- While the chicken marinates, prepare the coating. In a separate bowl, combine the flour, baking powder, paprika, garlic powder, onion powder, thyme, oregano, salt, and pepper. Whisk until the spices are evenly distributed. The flour mixture should look like fine sand; it’s ready when you can see the baking powder peeking through.
- Heat your grill to medium‑high, about 375°F (190°C). Lightly oil the grill grates with a paper towel soaked in olive oil or use a spray. This prevents sticking and adds a subtle flavor. While the grill heats, remove the chicken from the buttermilk, letting the excess drip off. Then, dredge each piece in the flour mixture, pressing gently to coat. Shake off any excess flour.
- Place the coated chicken on the grill. Let it cook for 6–8 minutes on the first side. The crust should develop a golden brown color and emit a smoky aroma. Flip the chicken carefully with tongs, watching for the edges to start pulling away from the grates—a sign it’s ready to turn.
- After flipping, grill for another 6–8 minutes. The internal temperature should reach 165°F (74°C). If you’re unsure, use a meat thermometer inserted into the thickest part. The chicken should feel firm, not rubbery, and the juices should run clear.
- Once cooked, transfer the chicken to a wire rack or plate. Let it rest for 5 minutes; this allows the juices to redistribute, ensuring each bite remains moist. While resting, the crust will firm up slightly, enhancing the crunch.
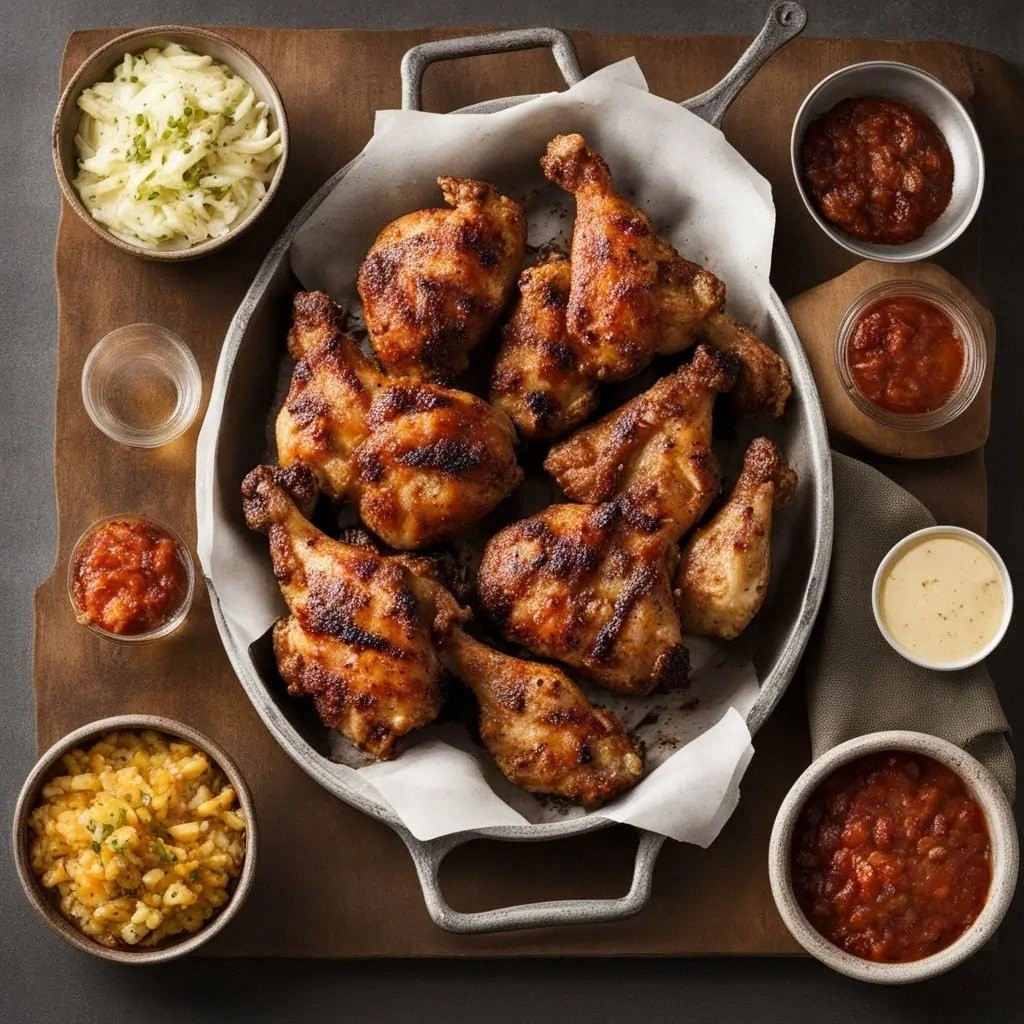
- Serve immediately with your favorite sides—coleslaw, corn on the cob, or a fresh green salad. The smoky, herbaceous flavor pairs beautifully with a tangy vinaigrette or a creamy ranch.
- If you have leftovers, store them in an airtight container in the fridge for up to 3 days. Reheat in a preheated oven at 350°F (175°C) for 10 minutes; this keeps the crust crisp.
That’s it—you did it. But hold on, I've got a few more tricks that'll take this to another level. Keep reading for insider secrets that will make your grilled chicken unbeatable.
Insider Tricks for Flawless Results
The Temperature Rule Nobody Follows
Many cooks set the grill to a single high heat, but the trick is to start medium‑high and then lower to medium once the chicken begins to brown. This prevents the coating from burning while allowing the interior to cook evenly. If you notice the edges are blackening too quickly, reduce the heat or move the chicken to a cooler part of the grill.
Why Your Nose Knows Best
As the chicken grills, the aroma evolves from raw spices to a smoky, caramelized scent. Trust your nose: when the smell is sweet and slightly charred, the chicken is ready to flip. This sensory cue is more reliable than a timer, especially if your grill runs hot.
The 5‑Minute Rest That Changes Everything
Letting the chicken rest after grilling lets the juices redistribute, preventing them from spilling out on the first bite. A brief five‑minute pause also allows the crust to firm up, making each bite crispier. Skip this step and you’ll end up with a soggy, less satisfying texture.
Don’t Skimp on the Oil
A light coating of oil on the grill grates is essential for a clean sear and a beautiful crust. If you use too little, the chicken will stick and tear; too much, and you’ll get a greasy finish. Aim for a thin, even layer that glistens without dripping.
Use Fresh Herbs When Possible
Fresh thyme and oregano add a bright, green note that dried herbs can’t match. If you have them, use a handful of fresh leaves, crushing them lightly before adding to the flour. The result is a more vibrant, aromatic crust.
Keep the Grill Clean
After each use, clean the grill grates to prevent residue buildup that can burn onto your next batch. A clean grill ensures even heat distribution and a consistent flavor profile. Don’t let a dirty grill ruin your culinary masterpiece.
Creative Twists and Variations
This recipe is a playground. Here are some of my favorite ways to switch things up:
Smoky Chipotle Version
Swap the hot sauce for chipotle in adobo for a deeper, smoky heat. Add a pinch of cumin to the flour mix for earthiness. This version is perfect for a Tex‑Mex themed dinner.
Herb‑Infused Lemon Twist
Add fresh lemon zest to the buttermilk mixture and a splash of lemon juice. Incorporate rosemary into the flour coating. The citrus brightens the dish, making it ideal for summer gatherings.
Spicy Cajun Kick
Replace paprika with a Cajun spice blend. Use cayenne pepper in the flour for an extra punch. Pair with a cool yogurt sauce to balance the heat.
Sweet & Smoky BBQ Glaze
Brush the chicken with a homemade BBQ glaze during the last few minutes of grilling. The glaze caramelizes, giving a glossy, sweet finish. Serve with a side of cornbread for a classic Southern vibe.
Gluten‑Free Adaptation
Use a gluten‑free flour blend and cornstarch in place of all‑purpose flour. The coating will still crisp beautifully. This version is safe for gluten‑sensitive diners.
Vegetarian “Chicken” Alternative
Replace chicken with thick slices of marinated portobello mushrooms. Follow the same coating and grilling steps. The result is a hearty, plant‑based main course.
Storing and Bringing It Back to Life
Fridge Storage
Cool the chicken completely before placing it in an airtight container. Store in the fridge for up to 3 days. The crust may soften slightly, but the flavor remains intact.
Freezer Friendly
Wrap the chicken individually in parchment paper, then place in a freezer bag. Freeze for up to 2 months. Thaw overnight in the fridge before reheating.
Best Reheating Method
Reheat in a preheated oven at 350°F (175°C) for 10 minutes. For extra crispness, finish under the broiler for 1–2 minutes. Add a tiny splash of water before reheating to steam the chicken back to juicy perfection.