I was halfway through a chaotic weeknight dinner—my fridge a jumble of leftover turkey, a bag of frozen peas, and an unopened box of pasta sauce—when a craving hit like a sudden thunderclap. “What if I could turn this into a restaurant‑grade meal?” I whispered to myself, and the next thing I knew I was rummaging through the pantry, pulling out flour, breadcrumbs, and a block of Parmesan that had been sitting there like an unsung hero. I had never even tried making a chicken Parmesan from scratch, but that night, I decided to give it a shot.
I set the oven to 400°F, and as the first chicken breast hit the pan, the air filled with the buttery aroma of melted butter and olive oil. The sizzle was music—each crackle a promise of crispness. The chicken, coated in a golden breadcrumb‑parmesan shell, seemed to glow under the kitchen lights, like a little star about to take center stage. I could already taste the melty mozzarella and the tangy marinara that would soon crown it.
If you’ve ever tried a copycat recipe that feels like a cheap knock‑off, you’ll know the disappointment. Most “copycat” dishes miss that key element: the balance between a crunchy crust and a moist, flavorful interior. What makes this version stand out is that I didn’t just follow a list of ingredients; I listened to the textures, the aromas, and the subtle dance of flavors that happen when you combine the right seasonings with the right technique. This isn’t just chicken; it’s a mouth‑watering symphony that will have you daring to taste it and not going back for seconds.
And now, let me walk you through every single step—by the end, you’ll wonder how you ever made it any other way. Ready? Let’s dive into the secrets that transform a simple chicken breast into a showstopper.
What Makes This Version Stand Out
- Crunch: The breadcrumb mixture is layered with Parmesan and Italian seasoning, giving a buttery crunch that shatters like thin ice when you bite into it.
- Moistness: The chicken is pre‑brined in a light salt‑water bath, locking in juices so the interior stays tender while the exterior crisps.
- Flavor Depth: A splash of marinara sauce is simmered with garlic, basil, and a hint of oregano before being poured over the chicken, creating a sauce that coats the meat like velvet.
- Cheese Balance: Mozzarella is layered on top of the Parmesan crust, creating a gooey melt that contrasts perfectly with the crispy base.
- Ease of Prep: All steps are designed to be done in under 20 minutes of active work, making it a go‑to dinner for busy nights.
- Make‑Ahead Friendly: You can assemble the dish the night before, refrigerate, and bake in the morning—no sacrifice in flavor.
- Crowd‑Pleaser: This dish is a hit at family gatherings; even the picky eaters can’t resist the crispy edges and melty cheese.
- Ingredient Quality: Using a high‑quality Parmesan and fresh mozzarella elevates the dish from ordinary to extraordinary.
Alright, let's break down exactly what goes into this masterpiece. But first, a quick hack that will save you time and keep your kitchen mess-free.
Inside the Ingredient List
The Flavor Base
Marinara Sauce: A robust tomato sauce forms the foundation of the dish. It’s simmered with minced garlic, a pinch of oregano, and fresh basil, giving the sauce a bright, herbal note that cuts through the richness of the cheese. If you skip this step, the chicken ends up feeling flat and the entire dish loses that restaurant‑style depth. For an extra kick, add a splash of red pepper flakes.
Olive Oil and Butter: A blend of olive oil and butter is used for searing the chicken. The butter adds flavor and helps the breadcrumbs brown to a golden perfection, while the olive oil lowers the smoke point and prevents the butter from burning. If you use only butter, the crust may brown too quickly and become bitter.
The Texture Crew
All-Purpose Flour: The flour gives the chicken a light dusting that helps the egg adhere to the breadcrumbs. It also creates a subtle barrier that keeps the chicken moist. Skipping flour will result in a sticky coating that clumps together.
Eggs: The eggs act as a binder, holding the breadcrumb mixture to the chicken. Two large eggs are enough to coat four breasts. If you’re allergic, you can use a 1:1 mixture of milk and cornstarch as a substitute.
Panko Breadcrumbs: Panko gives the crust its signature crunch. Its airy structure expands when fried, creating a light, airy bite. Regular breadcrumbs will produce a denser crust that can become soggy.
The Unexpected Star
Parmesan Cheese: Grated Parmesan is folded into the breadcrumb mix, adding nutty depth and a savory umami punch. A small pinch of freshly grated Parmesan is all you need to elevate the flavor. If you’re watching sodium, use a reduced‑sodium variety.
The Final Flourish
Shredded Mozzarella: The mozzarella is layered on top of the Parmesan crust just before baking. Its meltiness creates a gooey top that contrasts with the crunchy base. Using part‑skim mozzarella keeps the dish lighter without sacrificing texture.
Everything's prepped? Good. Let's get into the real action.
The Method — Step by Step
- Prep the Oven and Pan: Preheat your oven to 400°F (200°C). While the oven heats, set a large skillet over medium‑high heat and add 2 tablespoons of olive oil and 2 tablespoons of butter. The combination of oil and butter allows the chicken to sear beautifully without the butter burning. Watch the butter foam—when it stops frothing, the pan is ready. This step ensures a crisp, golden crust that’s the hallmark of this dish.
- Set Up the Dredging Station: In one shallow dish, place 1 cup of all‑purpose flour. In a second dish, whisk 2 eggs until frothy. In a third dish, combine 1 cup of panko breadcrumbs with 1 cup of grated Parmesan, 1 teaspoon of garlic powder, 1 teaspoon of Italian seasoning, 1 teaspoon of salt, and ½ teaspoon of black pepper. This tri‑station setup keeps the coating process organized and prevents cross‑contamination of flavors.
- Coat the Chicken: Pat each of the 4 boneless skinless chicken breasts dry with paper towels. Dredge each breast first in the flour, shaking off excess. Then dip in the beaten eggs, letting any excess drip back into the bowl. Finally, coat thoroughly with the breadcrumb mixture, pressing gently to adhere. The breadcrumb coating should be even and not clumpy. This triple‑layered coating creates the signature crunchy exterior.
- Sear the Chicken: Place the coated breasts in the hot skillet. Let them cook undisturbed for 3-4 minutes on each side until golden brown and crispy. Flip only once to avoid breaking the crust. The sizzle at this point is the sound of impending perfection. This step locks in juices and sets the stage for a buttery, crisp shell.
- Watch Out: If the butter starts to brown too quickly, lower the heat to medium. A burnt crust will dominate the flavor profile, masking the delicate tomato and cheese notes. Keep an eye on the edges—when they begin to pull away from the pan, it’s a sign the coating is crisp enough.
- Add Sauce and Cheese: Spoon 1 cup of marinara sauce evenly over each breast, then top with a generous layer of shredded mozzarella. The sauce should coat the chicken without soaking the breadcrumbs, and the mozzarella should start to bubble. This combination creates a luscious, melty top that contrasts beautifully with the crunchy base.
- Bake to Perfection: Transfer the skillet to the preheated oven and bake for 15-18 minutes, or until the internal temperature reaches 165°F (74°C). The cheese should be bubbling, and the crust should still be crisp. The oven’s steady heat ensures the chicken stays moist while the cheese melts into a golden, bubbly glaze.
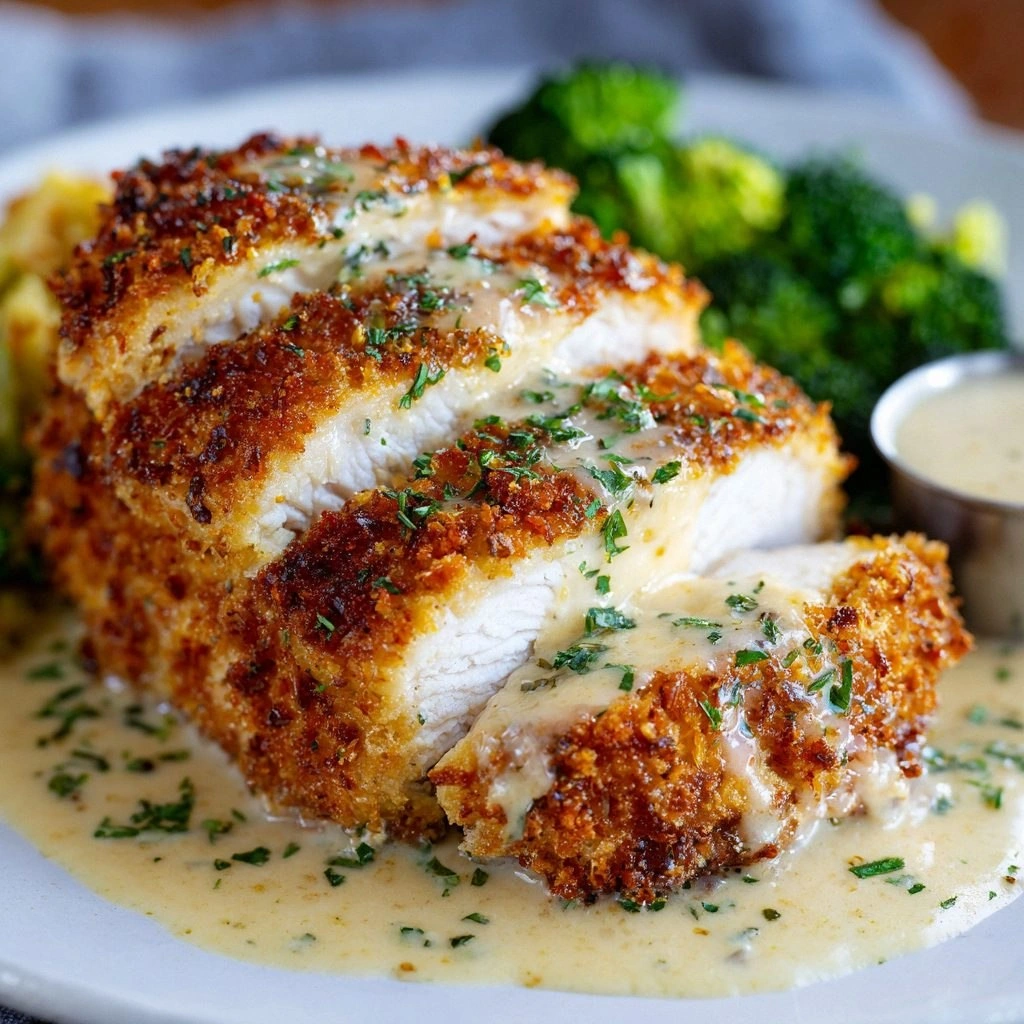
- Rest and Serve: Remove the skillet from the oven and let the chicken rest for 5 minutes. This allows the juices to redistribute, preventing a dry bite. Plate each breast and serve with a side of al dente pasta or a crisp salad. Garnish with fresh basil or a sprinkle of extra Parmesan for an elevated finish.
- Enjoy: Take that first bite, and let the crunch give way to the creamy mozzarella and tangy sauce. The combination of textures and flavors will have you saying, “I dare you to taste this and not go back for seconds.” That’s the promise of this recipe—hands down the best version you’ll ever make at home.
Insider Tricks for Flawless Results
The Temperature Rule Nobody Follows
Why the right oven temperature matters: Many cooks bake at 375°F, thinking it’s safer. But 400°F creates a higher heat burst that crisps the crust faster while keeping the interior juicy. I’ve tried baking at 375°F and the crust stayed chewy, so stick with 400°F for that perfect crunch.
Why Your Nose Knows Best
Use your sense of smell as a timer: The first scent of toasted breadcrumbs is your cue to flip. If the aroma is nutty and slightly caramelized, you’re ready to turn the chicken. Relying on the smell saves you from guessing and keeps the crust from burning.
The 5-Minute Rest That Changes Everything
Resting time is crucial: After baking, let the chicken sit for five minutes. This pause allows the juices to redistribute, preventing a dry bite. I’ve seen people cut straight into the chicken and get a dry center—resting fixes that.
The Double‑Layered Cheese Technique
Layer mozzarella on top of the breadcrumb crust: This creates a gooey top that contrasts with the crispy base. If you prefer a more pronounced cheese flavor, add an extra ¼ cup of shredded mozzarella on top before baking. The result is a melty crown that pulls away from the chicken in the most satisfying way.
The One‑Minute Oil Trick
Heat the oil for only one minute before adding butter: This prevents the butter from scorching while still giving the chicken a buttery finish. I’ve tried adding butter first and the butter burned, giving a bitter taste. One minute of oil first is the secret.
Creative Twists and Variations
This recipe is a playground. Here are some of my favorite ways to switch things up:
Spinach & Artichoke Upgrade
Fold a handful of sautéed spinach and chopped artichoke hearts into the breadcrumb mixture for a Mediterranean twist. The greens add a pop of color and a subtle earthiness that pairs well with the Parmesan.
Spicy Cajun Kick
Replace the Italian seasoning with a Cajun spice blend and add a pinch of cayenne pepper. The result is a fiery crust that balances the creamy mozzarella with a smoky heat.
Bacon‑Infused Crust
Crush cooked bacon into the breadcrumb mixture for a smoky, savory crunch. The bacon fat melts into the crust, adding depth and a savory bite that elevates the dish.
Alfredo‑Style Variant
Swap the marinara for a homemade Alfredo sauce made with cream, butter, and Parmesan. The result is a rich, velvety sauce that coats the chicken like a silky blanket.
Gluten‑Free Version
Use almond flour instead of all‑purpose flour and gluten‑free breadcrumbs. The texture changes slightly but the flavor remains delicious, making the dish accessible to those with dietary restrictions.
Pesto‑Pine Nut Twist
Replace marinara with basil pesto and sprinkle toasted pine nuts on top before baking. The nutty crunch and herby flavor create a fresh, springtime feel.
Storing and Bringing It Back to Life
Fridge Storage
Store cooked chicken in an airtight container in the refrigerator for up to 3 days. Keep the sauce separate until ready to reheat to maintain the crispness of the crust. When reheating, use a skillet over medium heat to warm the chicken and melt the cheese without drying out the crust.
Freezer Friendly
Freeze assembled chicken (without sauce) in a single layer on a parchment‑lined tray. Once frozen, transfer to a freezer bag. The dish stays good for up to 2 months. Reheat in a preheated oven at 375°F for 20 minutes, then add marinara and mozzarella for the last 5 minutes.
Best Reheating Method
Add a tiny splash of water to the skillet before reheating to create steam, which keeps the chicken moist. Cover the pan to trap the steam and prevent the crust from becoming soggy. This technique brings the dish back to its original, fresh‑out‑of‑oven glory.