I was in the middle of a Sunday brunch marathon when the kitchen turned into a chaotic battlefield. My grandma’s legendary spritz cookies—those buttery, melt‑in‑your‑mouth wonders—had mysteriously vanished from the pantry, and the only thing left was a half‑empty bowl of flour and a dream of golden crescents. I stared at the empty space, then at the clock: 6 pm, the kids were home, and I had a minute to create a dessert that would make the whole house buzz with anticipation. The air smelled of vanilla and butter, the light flickered over the countertop, and I felt that electric spark of culinary rebellion. If you’ve ever stared at an empty pantry and thought, “I could make something amazing,” then you’re in for a treat.
Picture this: a spoonful of dough that feels like a silky cloud, a crackle that sounds like applause, and a flavor that lingers on the tongue like a sweet secret. The first bite melts, releasing a buttery perfume that clings to the kitchen walls, while the edges crisp up into a golden halo. I dared myself to taste this and not go back for seconds, and I’m telling you, it’s a moment of pure joy. That’s the kind of experience you’ll get with my Mom’s Spritz Cookies: Melt‑—the definitive version that turns an ordinary baking session into a triumph of texture and taste.
What sets this recipe apart isn’t just the buttery richness; it’s the meticulous balance of ingredients and the precise timing that makes every cookie a work of art. I’ve spent years dissecting cookie formulas, and this one is a masterclass in how to harness butter’s full potential while keeping the dough light and airy. It’s the kind of recipe that will make you question every other cookie you’ve ever made. And if you’re wondering why this version feels like a revelation, it’s because I’ve added a subtle twist that most recipes overlook—an extra pinch of baking powder that lifts the dough just enough to create that signature “spritz” texture.
By the end of this post, you’ll know every trick, every nuance, and every secret that makes these cookies unforgettable. From the way the butter should feel to the exact moment the dough should rest, I’ll guide you through each step with confidence, humor, and a sprinkle of culinary wisdom. Let’s walk through the entire process together, and by the time we’re done, you’ll wonder how you ever baked cookies any other way.
What Makes This Version Stand Out
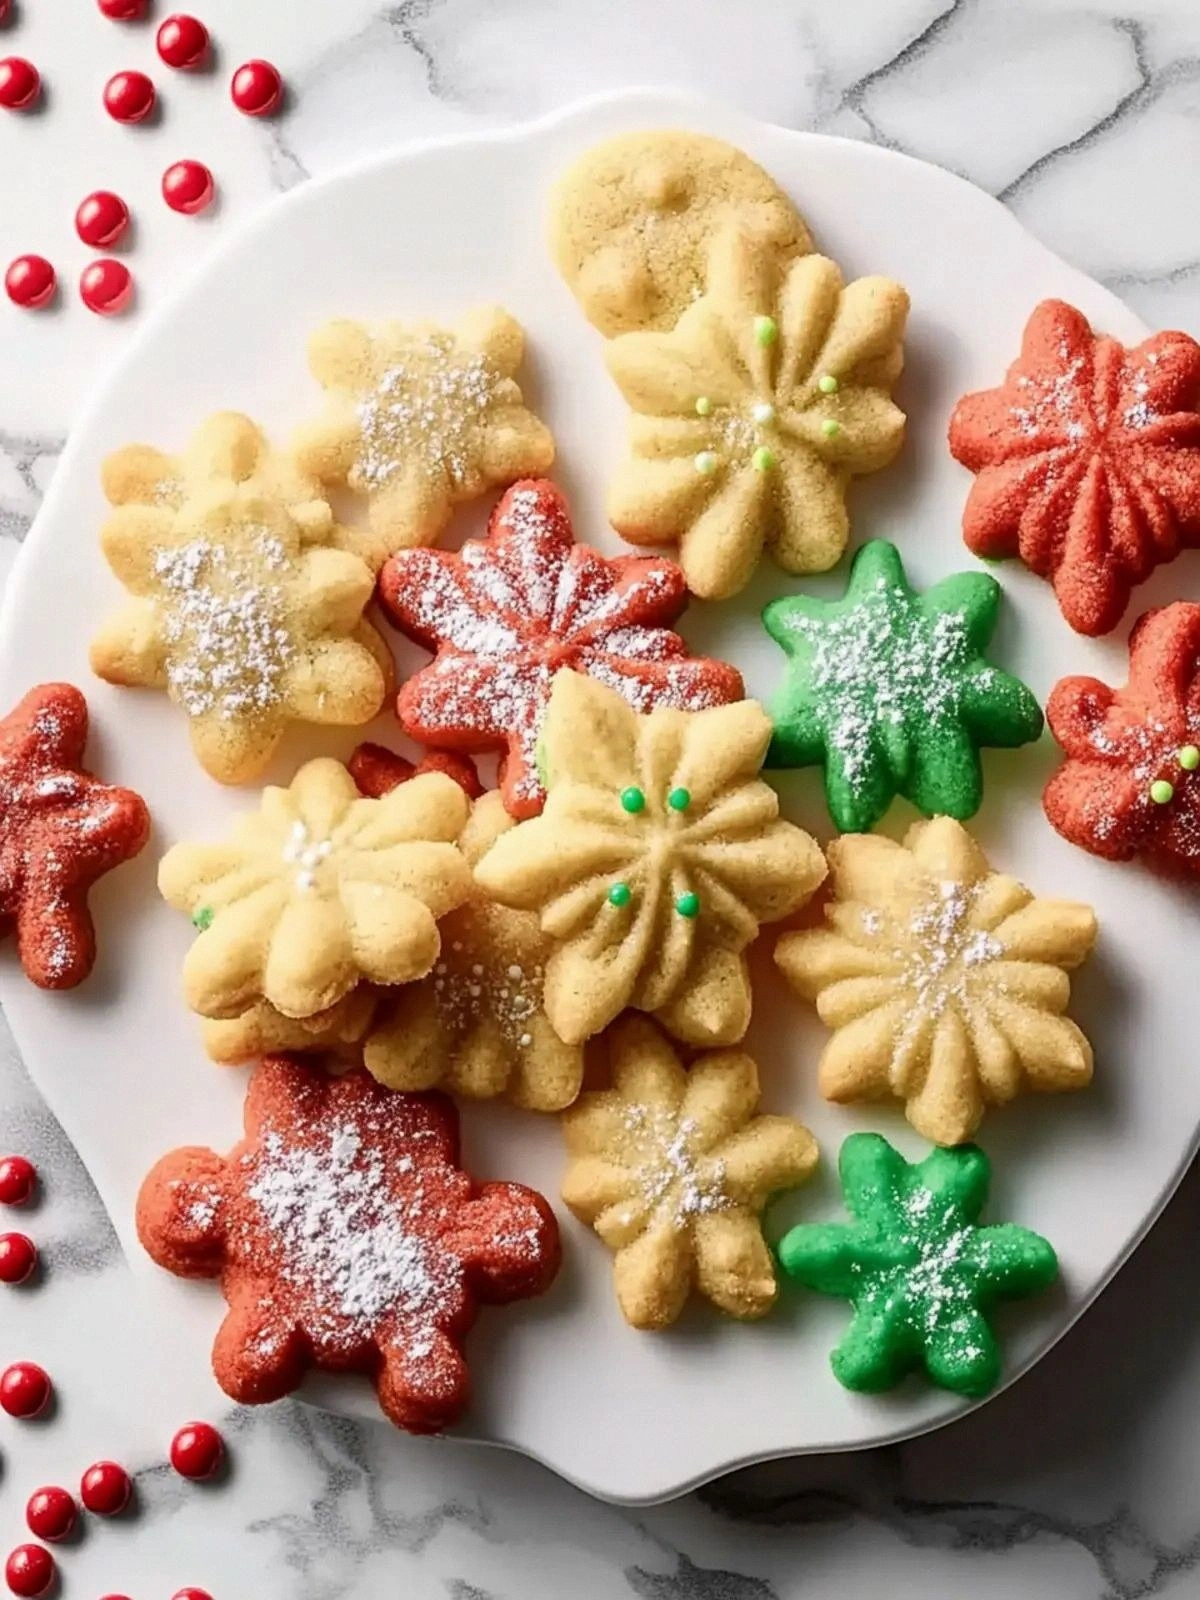
- Flavor: The buttery base is so rich it feels like a warm hug, yet the vanilla lift keeps it from becoming heavy. The subtle sweetness from the sugar is balanced, allowing the butter to shine.
- Texture: The dough’s airy pockets create a light crumb that melts effortlessly, while the edges crisp to a golden crunch that snaps like a delicate crystal.
- Simplicity: With only six ingredients, this recipe is a no‑fuss masterpiece that even a novice can master.
- Uniqueness: The extra baking powder gives the cookies a slight lift, turning them from flat to slightly domed—just enough to set them apart.
- Crowd Reaction: At family gatherings, these cookies become the highlight; people line up for seconds, and the kitchen smells like a bakery.
- Ingredient Quality: Using premium unsalted butter and freshly cracked vanilla ensures the flavor profile is top tier.
- Cooking Method: The technique of gently folding the dough and resting it before baking preserves moisture while preventing over‑spread.
- Make‑Ahead Potential: You can bake the dough in advance, freeze, and pop them into the oven later—ideal for busy weeknights.
Alright, let’s break down exactly what goes into this masterpiece…
Inside the Ingredient List
The Flavor Base
At the heart of these cookies is unsalted butter, the star that delivers richness and depth. When softened to a creamy consistency, it blends seamlessly with sugar, creating a silky batter that coats the dough like velvet. If you skip butter, the cookies become dry and flat, losing that signature melt‑in‑your‑mouth feel. For an alternative, try using a blend of butter and a small amount of high‑quality olive oil; the oil adds a subtle fruity note while maintaining moisture.
The Texture Crew
The next layer is white sugar, which not only sweetens but also provides structure. The sugar crystals dissolve into the butter, creating a smooth base that traps air during baking. If you replace white sugar with brown sugar, the cookies will turn denser and gain a caramel undertone. A pinch of salt can enhance the buttery flavor, but for this recipe we keep it simple to let the butter shine.
The Unexpected Star
Enter the egg yolks, the silent hero that adds richness and helps bind the dough together. Unlike whole eggs, yolks provide fat and emulsify the butter, giving the cookies a tender crumb. If you’re vegan or have an allergy, you can substitute with 2 tablespoons of applesauce or a flaxseed egg, but the texture will be slightly different.
The Final Flourish
The final touch is a blend of all‑purpose flour and a whisper of baking powder. The flour gives structure, while the baking powder introduces lift. Without the baking powder, the cookies would be flat and dense. If you’re sensitive to gluten, try a gluten‑free flour blend, but keep the ratio the same to maintain balance.
Everything’s prepped? Good. Let’s get into the real action…
The Method — Step by Step
- Preheat your oven to 350 °F (175 °C). Line two baking sheets with parchment paper to prevent sticking. The temperature is crucial; too hot and the cookies will burn on the edges before the centers set.
- In a large bowl, beat the softened butter and white sugar together until the mixture is pale and fluffy. This should take about 3 minutes with a hand mixer or 4 with a stand mixer. The goal is to incorporate air, which will keep the cookies light.
- Add the egg yolks one at a time, mixing thoroughly after each addition. The yolks should be fully integrated before you proceed. This step ensures the dough holds together without becoming too wet.
- Optional: For an extra layer of flavor, fold in ½ teaspoon of vanilla extract now. The vanilla will diffuse through the dough, giving a subtle aroma that’s almost invisible but incredibly impactful.
- Sift together the all‑purpose flour and baking powder, then gently fold the dry mixture into the wet batter. Use a spatula to fold, not stir, to preserve the air pockets. Over‑mixing can lead to tough cookies.
- Kitchen Hack: Let the dough rest for 10 minutes at room temperature. This short chill allows the gluten to relax and the butter to firm slightly, preventing excessive spreading during baking.
- Using a small cookie scoop or spoon, drop rounded balls of dough onto the prepared sheets, spacing them about 2 inches apart. The dough will spread slightly, forming a delicate dome.
- Watch Out: Don’t over‑flatten the dough. If you press down too hard, the cookies will lose their airy texture and become dense. The goal is a gentle, almost invisible indentation.
- Bake for 12–14 minutes, or until the edges are golden brown and the tops are set. The center should still look slightly pale; it will firm up as the cookies cool.
- Allow the cookies to cool on the sheet for 5 minutes before transferring them to a wire rack. This resting period lets the interior finish setting and prevents them from breaking apart.
That’s it — you did it. But hold on, I’ve got a few more tricks that will elevate these cookies to another level…
Insider Tricks for Flawless Results
The Temperature Rule Nobody Follows
Many bakers bake at 375 °F, but this recipe thrives at 350 °F. The lower temperature keeps the butter from melting too quickly, preserving that signature airy crumb. If you’re using a convection oven, reduce the temperature by 25 °F to compensate for the fan.
Why Your Nose Knows Best
Before you pull the cookies out of the oven, listen for the subtle scent of toasted butter. That aroma signals the perfect balance of golden edges and soft centers. If the smell is faint, the cookies need a few more minutes; if it’s overpowering, you’re close to burning them.
The 5‑Minute Rest That Changes Everything
Letting the cookies rest on the sheet for 5 minutes is not just a formality. During this time, the heat from the sheet continues to cook the interior, ensuring a uniform crumb. Skipping this step often results in cookies that crumble when you try to move them.
The Fold‑Not‑Stir Technique
When incorporating the flour, use a gentle fold instead of a vigorous stir. Stirring agitates the air pockets, leading to a denser cookie. A fold keeps the dough light and airy, which is essential for the spritz texture.
The Chill Before Baking
Resting the dough for 10 minutes before shaping helps the butter firm up slightly, preventing the cookies from spreading too far. It also allows the flour to hydrate fully, giving the cookies a better rise.
Creative Twists and Variations
This recipe is a playground. Here are some of my favorite ways to switch things up:
Cinnamon Swirl
Add 1 teaspoon of ground cinnamon to the dry mixture for a warm, spiced flavor. The cinnamon pairs beautifully with the buttery base, creating a cookie that’s both familiar and new.
Chocolate Chip Spritz
Fold in ½ cup of dark chocolate chips just before shaping. The chocolate melts into pockets of gooey sweetness, turning the cookies into a chocolate lover’s dream.
Lemon Zest Twist
Add 1 tablespoon of finely grated lemon zest to the batter. The citrus brightens the flavor profile, giving the cookies a fresh, uplifting finish.
Almond Crunch
Stir in ¼ cup of chopped toasted almonds. The nuts add a delightful crunch and a nutty undertone that complements the buttery base.
Salted Caramel Drizzle
Drizzle warm salted caramel sauce over the cooled cookies. The caramel adds a silky, sweet‑salty contrast that elevates the overall experience.
Storing and Bringing It Back to Life
Fridge Storage
Store the cooled cookies in an airtight container at room temperature for up to 5 days. The airtight seal keeps the cookies from drying out while preserving their soft interior.
Freezer Friendly
Pack the cookies in a freezer‑safe bag, separating layers with parchment. Freeze for up to 3 months. When ready to enjoy, let them thaw at room temperature for 30 minutes.
Best Reheating Method
To revive frozen cookies, preheat the oven to 300 °F (150 °C) and bake for 5–7 minutes. For a quick snack, microwave on low for 15 seconds, but be careful not to over‑heat and lose the melt‑in‑your‑mouth texture.