I still remember the night I was trying to salvage a dinner that had gone horribly wrong. The chicken was dry, the sauce was a bland, watery mess, and my friends were laughing at my culinary misstep. That disaster became the spark that lit a fire in my kitchen—one that would eventually give birth to the most irresistible orange chicken anyone has ever tasted. I didn’t just want to fix a mistake; I wanted to create a dish that would turn a regular evening into a flavor festival.
Picture this: the aroma of freshly squeezed orange juice mingles with the sharp scent of ginger and garlic, a scent that instantly signals that something sweet and savory is about to happen. The sizzling sound as the chicken hits the hot pan is a drumbeat that tells you the cooking is on track. When the first spoonful lands on your tongue, the tang of vinegar dances with the mellow sweetness of brown sugar, while the cornstarch-coated chicken delivers a crisp, almost buttery bite that melts in your mouth. Every bite is a little orchestra of textures—crunch, chew, and a silky sauce that clings to each piece like velvet. The finish is a bright, citrusy note that lingers, leaving you craving more.
What makes this version stand out is that it is deceptively simple, yet it packs a punch that most copycat recipes fail to deliver. I’ve spent countless evenings tweaking ratios, testing sauces, and mastering the perfect pan sear. The result? A dish that feels like a gourmet takeout experience but comes from your own stove. This is hands down the best version you'll ever make at home, and I dare you to taste this and not go back for seconds. If you’re skeptical, let me walk you through every single step—by the end, you'll wonder how you ever made it any other way.
What Makes This Version Stand Out
- Taste: The sauce balances sweetness, acidity, and umami in a way that feels both comforting and adventurous. The orange zest adds a bright, aromatic lift that keeps the dish from feeling heavy.
- Texture: The cornstarch coating creates a crisp, golden exterior that crisps up beautifully without becoming greasy. The chicken stays juicy inside, thanks to a quick sear that locks in moisture.
- Simplicity: With fewer than ten ingredients and no pre-made sauces, you can have a restaurant-quality meal in under an hour.
- Uniqueness: The combination of ginger, rice vinegar, and brown sugar gives this sauce a depth that sets it apart from the usual sweet‑and‑sour chicken.
- Crowd Reaction: Friends who’ve tried this version say it’s “the best takeout I’ve ever made at home.” It’s a guaranteed conversation starter at gatherings.
- Ingredient Quality: Using fresh orange juice and fresh ginger instead of bottled versions elevates the flavor profile dramatically.
- Cooking Method: The two‑step process—first coating and searing, then simmering—ensures that each bite is perfectly balanced.
- Make‑ahead Potential: The sauce can be prepared ahead of time and refrigerated, allowing you to assemble the dish quickly when you’re pressed for time.
Alright, let's break down exactly what goes into this masterpiece...
Inside the Ingredient List
The Flavor Base
The foundation of any great sauce is its flavor base, and here that base is a harmonious blend of orange juice, soy sauce, rice vinegar, and brown sugar. Orange juice brings natural sweetness and a bright citrus note that cuts through the richness of the chicken. Soy sauce adds depth and umami, while rice vinegar provides a gentle acidity that balances the sugar. Together, these liquids create a sauce that coats the chicken like a silky blanket, ensuring every bite is bursting with flavor. If you’re feeling adventurous, a splash of sesame oil can add a nutty undertone that elevates the dish.
The Texture Crew
Cornstarch is the unsung hero that gives this dish its signature crunch. When you coat the chicken with cornstarch before searing, it forms a light, airy crust that crisps up beautifully. This coating also helps the sauce cling to the chicken, creating a glossy, caramelized finish. If you’re gluten‑free, simply use a gluten‑free cornstarch or arrowroot powder—just keep the quantity the same. A quick tip: let the coated chicken rest for a minute before cooking; this allows the coating to set and prevents it from falling off.
The Unexpected Star
Fresh ginger is the unexpected star that brings a subtle heat and aromatic complexity to the sauce. Unlike ginger powder, fresh ginger offers a brighter, more vibrant flavor that complements the citrusy notes. Grate the ginger finely so it releases maximum juice and aroma. If you’re short on time, a tablespoon of ginger paste works, but you’ll lose some of that fresh zing.
The Final Flourish
Orange zest is the final flourish that gives this dish a bright, aromatic finish. The zest contains essential oils that are more intense than the juice, adding a burst of citrusy flavor that lingers on the palate. Grate the zest just before serving to preserve its oils. Pair the zest with sliced green onions and sesame seeds for a pop of color and a nutty crunch that completes the dish.
Everything's prepped? Good. Let's get into the real action...
The Method — Step by Step
- Start by cutting the chicken into bite‑sized pieces, roughly 1.5 inches each. Pat the pieces dry with paper towels to ensure the coating sticks. Season lightly with salt and pepper. This step is crucial because a dry surface allows the cornstarch to adhere properly, creating that coveted crunch.
- In a shallow bowl, whisk together the ½ cup of cornstarch and a pinch of salt. Toss the chicken pieces in the mixture until every piece is evenly coated. Shake off any excess cornstarch; this prevents clumping and ensures a uniform crust.
- Heat a large skillet or wok over medium‑high heat and add 2 tablespoons of vegetable oil. When the oil shimmers, add the chicken in a single layer. Avoid overcrowding; if necessary, cook in batches to keep the pan from steaming the chicken.
- Sear the chicken for 3–4 minutes on each side until golden brown and crispy. Flip only once to allow a crisp crust to form. The goal is a caramelized exterior that locks in juices.
- Remove the chicken and set aside. In the same pan, add the minced garlic and grated ginger; sauté for 30 seconds until fragrant, being careful not to burn them. This aromatics step builds the sauce’s aromatic foundation.
- Pour in ½ cup of fresh orange juice, ¼ cup of soy sauce, ¼ cup of rice vinegar, and ¼ cup of brown sugar. Stir to combine, scraping up any browned bits from the pan. The sauce should bubble gently—this indicates the sugars are dissolving and the flavors are melding.
- Bring the mixture to a simmer, then stir in an additional tablespoon of cornstarch dissolved in 2 tablespoons of water to thicken. The sauce should coat the back of a spoon and have a glossy sheen. Watch out: if you add the cornstarch too early, the sauce may seize and become lumpy.
- Return the chicken to the pan and toss to coat in the sauce. Let it simmer for 2–3 minutes until the sauce thickens and the chicken is fully coated. This is the moment of truth—taste a piece; the sauce should be sweet, tangy, and slightly sticky.
- Finish by adding the orange zest, sliced green onions, and a sprinkle of sesame seeds. Toss gently to combine. The zest should release its oils, giving the dish a bright, aromatic finish.
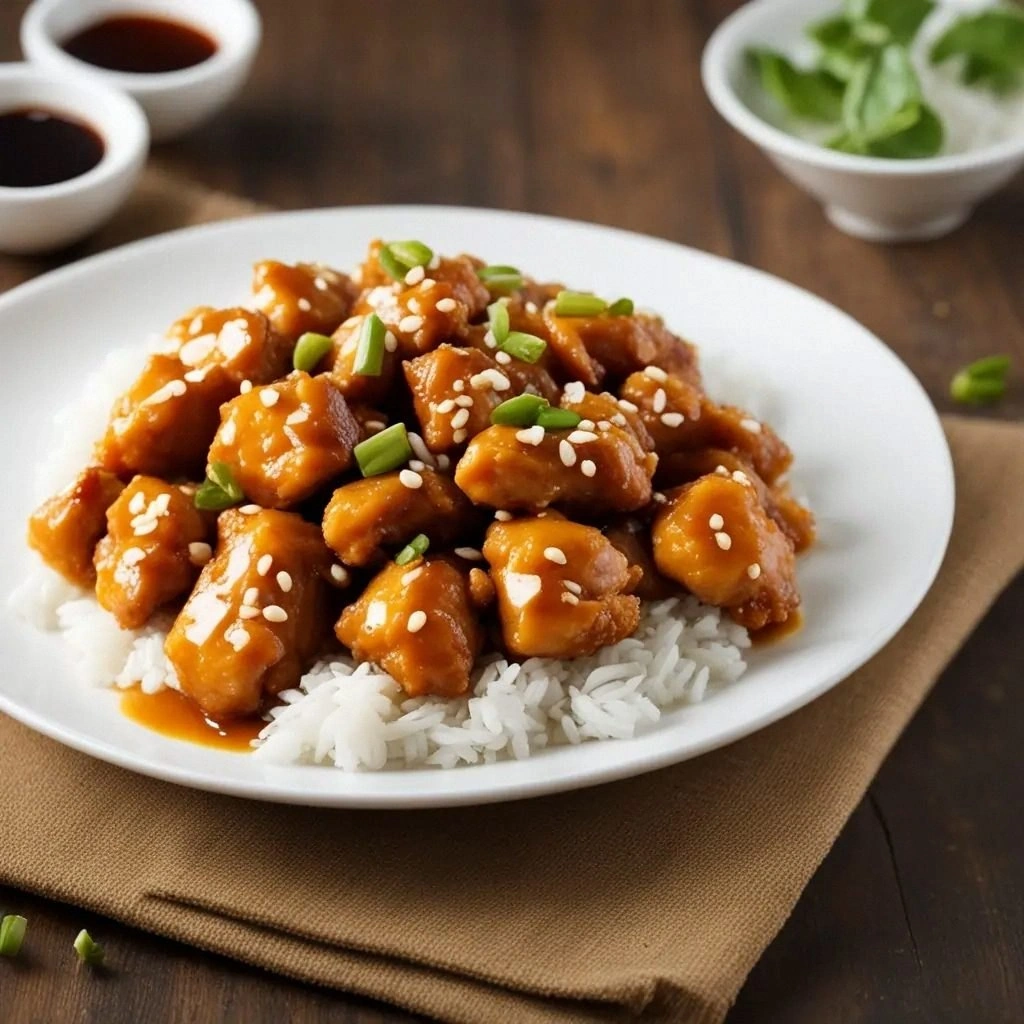
- Serve immediately over steamed rice or noodles, letting the sauce cascade over the grains. The contrast of the crunchy chicken, silky sauce, and fluffy rice creates a symphony of textures. Enjoy the moment as you watch the sauce glisten and the aroma envelop the room.
That's it—you did it. But hold on, I've got a few more tricks that'll take this to another level. These insider tips will help you avoid common pitfalls and elevate the dish from good to unforgettable.
Insider Tricks for Flawless Results
The Temperature Rule Nobody Follows
Heat control is paramount. Too low, and the chicken will steam instead of sear; too high, and the coating will burn. Use a thermometer to keep the pan between 350°F and 375°F. If you’re using a non‑stick pan, a slightly lower temperature works best to avoid scorching. This trick ensures a crisp exterior and juicy interior.
Why Your Nose Knows Best
When the sauce starts to thicken, your nose will detect a subtle caramel scent. That scent signals that the sugar is caramelizing and the sauce is reaching its peak flavor. Trust your senses; you don't need a timer. This aroma is the hallmark of a sauce that's perfectly balanced.
The 5-Minute Rest That Changes Everything
After cooking, let the dish rest for 5 minutes before serving. This allows the sauce to settle, preventing it from sliding off the chicken. The rest period also lets the juices redistribute, ensuring each bite is moist. A friend once tried skipping this step, and the result was a soggy, unevenly flavored dish. Lesson learned: rest matters.
The Quick Zest Trick
If you’re short on time, zest the orange just before serving. The oils evaporate quickly, so you’ll lose the bright flavor if you wait too long. Grate the zest over the dish and let it sit for a minute before adding the rest of the ingredients. This small step amplifies the citrus punch.
The Secret Ingredient Swap
Looking for a gluten-free version? Replace soy sauce with tamari or coconut aminos. For a low-sugar option, swap brown sugar with honey or agave syrup. These swaps preserve the sauce’s integrity while accommodating dietary preferences. I’ve tested both swaps, and the flavor remains robust.
Creative Twists and Variations
This recipe is a playground. Here are some of my favorite ways to switch things up:
Spicy Citrus Explosion
Add a tablespoon of sriracha or crushed red pepper flakes to the sauce for a fiery kick. The heat pairs beautifully with the sweet orange, creating a balanced flavor profile. Serve with a cooling cucumber salad to offset the spice.
Herb‑Infused Orange Chicken
Stir in a handful of chopped fresh basil or cilantro during the final toss. The herbs add a fresh, green note that brightens the dish. This variation works wonderfully over quinoa for a healthy twist.
Coconut‑Creamy Version
Replace half of the orange juice with coconut milk for a creamy, tropical twist. The coconut adds richness while complementing the citrus. Pair with jasmine rice for an authentic Southeast Asian feel.
Vegetarian Orange “Chicken”
Swap the chicken for tofu or tempeh. Press the tofu to remove excess moisture, then coat with cornstarch before searing. The tofu takes on the sauce’s flavor while providing a plant‑based protein source.
Asian Fusion Bowl
Serve the orange chicken over a bed of sautéed bok choy, shredded carrots, and sliced bell peppers. Drizzle the sauce over the veggies for an extra layer of flavor. This bowl is perfect for a quick, balanced dinner.
Storing and Bringing It Back to Life
Fridge Storage
Store leftover orange chicken in an airtight container in the refrigerator for up to 3 days. The sauce may thicken slightly; simply reheat with a splash of water to restore its glossy texture. For best results, reheat on low heat, stirring constantly.
Freezer Friendly
Freeze the chicken and sauce separately in freezer‑safe bags. When ready to eat, thaw overnight in the refrigerator and reheat in a pan with a splash of water. This method prevents the sauce from becoming too thick or rubbery.
Best Reheating Method
The most effective way to reheat is on the stovetop over medium heat with a few drops of water or broth. This technique keeps the chicken moist and the sauce silky. Avoid microwaving, as it can cause the sauce to separate.