Picture this: a rainy Tuesday night, the kind where you stare at the fridge and wonder if there’s a culinary miracle hiding behind the wilted lettuce. I was in that exact spot, half‑heartedly reaching for a bag of frozen pizza, when a stubborn portobello mushroom stared back at me like a tiny, earthy umbrella. I thought, “What if I could cram all that pizza goodness into this mushroom and make it look like a gourmet appetizer?” The idea was half‑crazy, half‑genius, and entirely delicious. I grabbed the nearest ingredients, turned up the oven, and the kitchen instantly transformed into a fragrant pizzeria‑forest hybrid.
The moment the sauce hit the pan, it sang a low, bubbling note that reminded me of a street‑corner pizza joint in Naples. The mushrooms, thick and meaty, soaked up the olive oil like a sponge, their caps turning a deep, glossy mahogany as they roasted. The cheese—oh, the cheese—started to melt and bubble, creating golden‑brown edges that shivered like thin ice under a summer sun. You could practically hear the crust crackle as the heat coaxed every flavor to the surface, and the whole scene was a symphony of sizzle, steam, and that intoxicating aroma of oregano and garlic.
Most stuffed‑mushroom recipes either drown the mushroom in soggy sauce or skimp on the cheesy goodness, leaving you with a bland bite. Not this one. I’ve taken the classic pizza toppings, amplified them with a splash of extra‑virgin olive oil, and paired them with the umami‑rich, meaty texture of portobello caps. The result? A handheld masterpiece that’s crisp on the edges, juicy in the middle, and packed with flavor that makes you forget you’re even eating a vegetable. I dare you to taste this and not go back for seconds.
But there’s a secret twist that most recipes miss: a quick brush of garlic‑infused oil on the mushroom stems before baking. It creates a subtle, buttery crunch that elevates the whole dish from “good” to “hands down the best version you’ll ever make at home.” Okay, ready for the game‑changer? Let me walk you through every single step — by the end, you’ll wonder how you ever made it any other way.
What Makes This Version Stand Out
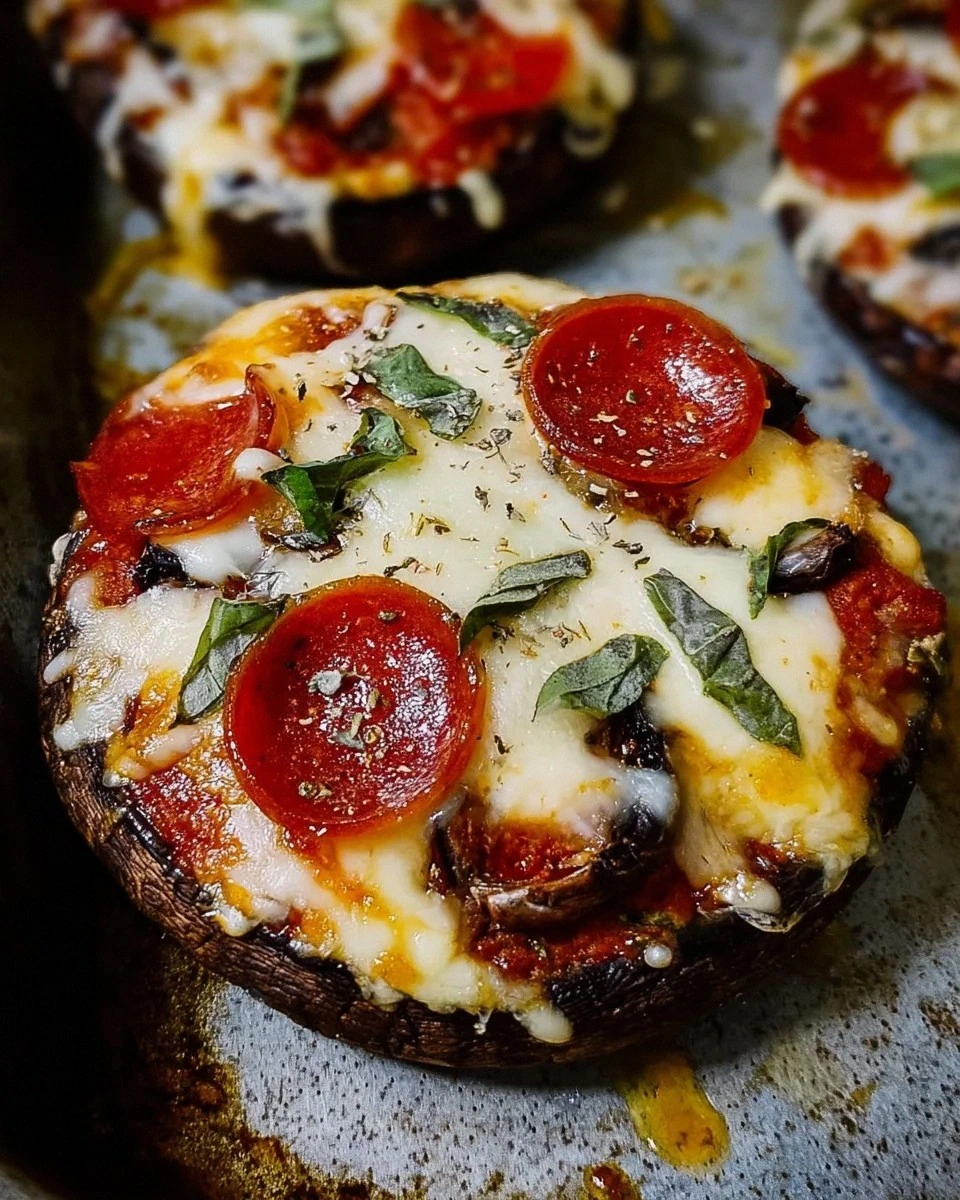
- Flavor Explosion: The combination of classic pizza sauce, pepperoni, and a blend of mozzarella and Parmesan creates a layered taste that hits your palate with every bite.
- Texture Harmony: The meaty, slightly chewy mushroom cap pairs with a crispy, caramelized cheese crust, delivering contrast that keeps you chewing happily.
- Simplicity: Only ten core ingredients are needed, and the prep steps are straightforward enough for a weekday dinner or a weekend party.
- Uniqueness: By stuffing the mushroom instead of using a crust, you get a gluten‑friendly, low‑carb alternative that still feels indulgent.
- Crowd Reaction: Guests often claim they can’t tell it’s a mushroom, and the “What is this?” gasp turns into a delighted “More, please!”
- Ingredient Quality: Fresh, large portobello caps and high‑quality mozzarella make the difference between a soggy bite and a restaurant‑level experience.
- Cooking Method: Baking at a high temperature ensures the cheese bubbles perfectly while the mushroom retains its moisture.
- Make‑Ahead Potential: You can prep the caps and stuffing ahead of time, then pop them in the oven when guests arrive, saving you stress.
Inside the Ingredient List
The Flavor Base
Pizza sauce is the heart of this dish. I use a simple marinara with crushed tomatoes, a splash of balsamic vinegar, and a pinch of sugar to balance acidity. If you skip the sauce, you lose the tangy backbone that makes each bite feel like a slice of pizza. A good rule of thumb: choose a sauce with herbs already infused, or add your own oregano and basil for that authentic Italian punch.
The Texture Crew
Shredded mozzarella provides meltiness, while grated Parmesan adds a nutty, crisp edge when it browns. The combination ensures you get that gooey pull and a satisfying crunch. If you replace mozzarella with a low‑moisture cheese, you’ll miss the stretch; if you omit Parmesan, the top won’t develop that golden‑brown finish that makes the dish Instagram‑ready.
The Unexpected Star
Garlic‑infused olive oil is the secret weapon. A quick brush on the mushroom stems before baking creates a buttery, aromatic layer that you’d never get from plain oil. It also helps the caps crisp up on the underside, preventing them from turning into soggy boats. If you’re out of fresh garlic, a pinch of garlic powder works, but the depth of flavor will be less pronounced.
The Final Flourish
Fresh basil leaves for garnish add a bright, peppery finish that cuts through the richness. A sprinkle of red‑pepper flakes brings a subtle heat that awakens the palate. Salt and pepper to taste are the final seasoning—don’t be shy, but remember the sauce already carries salt, so taste before you add more.
Everything's prepped? Good. Let's get into the real action...
The Method — Step by Step
Preheat your oven to 425°F (220°C). While the oven warms up, line a baking sheet with parchment paper. This high heat is essential; it creates that coveted cheese‑bubble and gives the mushroom caps a slightly crisp edge. If you’re using a convection oven, you can shave a few minutes off the cooking time.
Kitchen Hack: Place the mushroom caps gill‑side up on the sheet; this orientation helps any excess moisture drain away, keeping the caps firm.Clean the mushroom caps with a damp paper towel, then gently remove the stems. Preserve the stems; you’ll mince them for the garlic‑oil step later. Once cleaned, drizzle each cap with a teaspoon of olive oil, then sprinkle lightly with salt and pepper. The oil helps the caps brown evenly and prevents them from drying out.
In a small skillet, heat 2 tablespoons of olive oil over medium heat. Add the minced garlic and the finely chopped mushroom stems, sautéing until fragrant and just golden—about 2 minutes. This is the moment of pure aromatics; the kitchen will smell like an Italian trattoria. Watch Out: Garlic burns in a second, turning bitter. Keep the heat moderate and stir constantly.
While the garlic‑oil is simmering, combine the pizza sauce, dried oregano, dried basil, and red‑pepper flakes in a bowl. Stir until everything is evenly distributed. This sauce mixture will coat the mushroom interior, ensuring each bite bursts with that classic pizza tang.
Take each mushroom cap and spoon a generous layer of the sauce into the cavity, spreading it to the edges. Then sprinkle a mix of shredded mozzarella and grated Parmesan over the sauce. The cheese should be heaped—don’t be shy; the melt is the star.
Scatter sliced pepperoni (or any favorite pizza topping) over the cheese, then drizzle a little of the garlic‑infused oil you prepared earlier across the top. This final drizzle is pure magic; it adds a buttery sheen and a subtle garlic punch that you’ll taste on the very first bite.
Slide the baking sheet into the preheated oven. Bake for 12‑15 minutes, or until the cheese is bubbling, the edges are golden, and the mushroom caps have softened but still hold their shape. You’ll know it’s done when the cheese forms a slightly caramelized crust that pulls away from the sides.
Remove the mushrooms from the oven and let them rest for 2 minutes. This pause lets the cheese set just enough to avoid a total melt‑down when you bite in. Garnish each cap with fresh basil leaves and a final pinch of black pepper. The bright green basil adds a fresh pop that balances the richness.
Watch Out: Over‑baking can turn the mushroom caps rubbery. Keep a close eye after the 12‑minute mark.Serve hot, straight from the sheet, or transfer to a serving platter. Pair with a simple arugula salad or a glass of crisp white wine, and watch your guests’ faces light up. I’ll be honest — I ate half the batch before anyone else got to try it, and that’s a testament to how addictive this dish truly is.
That's it — you did it. But hold on, I've got a few more tricks that'll take this to another level...
Insider Tricks for Flawless Results
The Temperature Rule Nobody Follows
Most home cooks bake at 350°F, assuming slower is safer. In reality, the high‑heat blast of 425°F creates that coveted cheese‑bubble and a slight crisp on the mushroom cap. If you’re using a conventional oven, rotate the sheet halfway through baking to ensure even browning. I once tried a lower temp and ended up with soggy caps—lesson learned.
Why Your Nose Knows Best
Before you even open the oven, trust the aroma. When the sauce starts to caramelize and the cheese releases a nutty scent, you’re within seconds of perfection. If the kitchen smells like burnt garlic, lower the heat immediately. Your nose is a more reliable timer than any digital device.
The 5‑Minute Rest That Changes Everything
After pulling the mushrooms from the oven, let them sit for exactly five minutes. This short rest allows the cheese to firm up, making each bite less of a liquid mess and more of a satisfying chew. Skipping this step means you’ll be licking the pan—a tragic waste of flavor.
Cheese Mix Mastery
Blend mozzarella with a touch of smoked provolone for an extra depth of flavor. The smokiness pairs beautifully with the earthy mushroom, creating a complexity you won’t find in standard pizza cheese blends. I tried this once for a friend’s dinner party and the compliments kept coming.
Seasoning Layers
Season the sauce, the mushroom caps, and the cheese separately. A pinch of salt on the caps before baking draws out moisture, while a dash of pepper on the cheese adds a subtle heat. This three‑layer seasoning ensures every bite is balanced.
Creative Twists and Variations
This recipe is a playground. Here are some of my favorite ways to switch things up:
Meat‑Lover Madness
Swap pepperoni for crumbled Italian sausage, chopped prosciutto, or even bacon bits. The added fat intensifies the richness and creates a heartier bite perfect for carnivores.
Veggie Delight
Replace the meat with roasted red peppers, caramelized onions, and sliced black olives. The veggies add sweetness and a smoky undertone, making the dish suitable for a vegetarian crowd.
Spicy Inferno
Introduce sliced jalapeños, a drizzle of sriracha, or a pinch of cayenne pepper into the sauce. The heat will cut through the cheese’s creaminess and give you that tongue‑tingling kick you crave.
Herbaceous Green
Fold fresh spinach, arugula, or kale into the sauce before stuffing. The greens wilt slightly during baking, adding a fresh, slightly bitter contrast that balances the richness.
Cheesy Overload
Mix in a dollop of ricotta or a sprinkle of feta before the final cheese layer. The creamy pockets add a surprising burst of tang that elevates the flavor profile.
Gluten‑Free Crust
For a completely grain‑free version, use almond flour mixed with a bit of grated Parmesan to create a thin “crust” on the mushroom cap before adding sauce. It adds a subtle nuttiness and extra crunch.
Storing and Bringing It Back to Life
Fridge Storage
Place the cooked mushrooms in an airtight container and store them in the refrigerator for up to three days. To keep the caps from drying out, lay a sheet of parchment paper over the top before sealing.
Freezer Friendly
Freeze the assembled (uncooked) mushrooms on a baking sheet, then transfer them to a zip‑top bag. They’ll keep for up to two months. When you’re ready, bake straight from frozen, adding an extra 5‑7 minutes to the cooking time.
Best Reheating Method
Reheat leftovers in a preheated 350°F oven for 8‑10 minutes, or until the cheese bubbles again. Add a tiny splash of water to the pan before reheating; the steam revives the mushroom’s moisture and prevents it from turning rubbery.