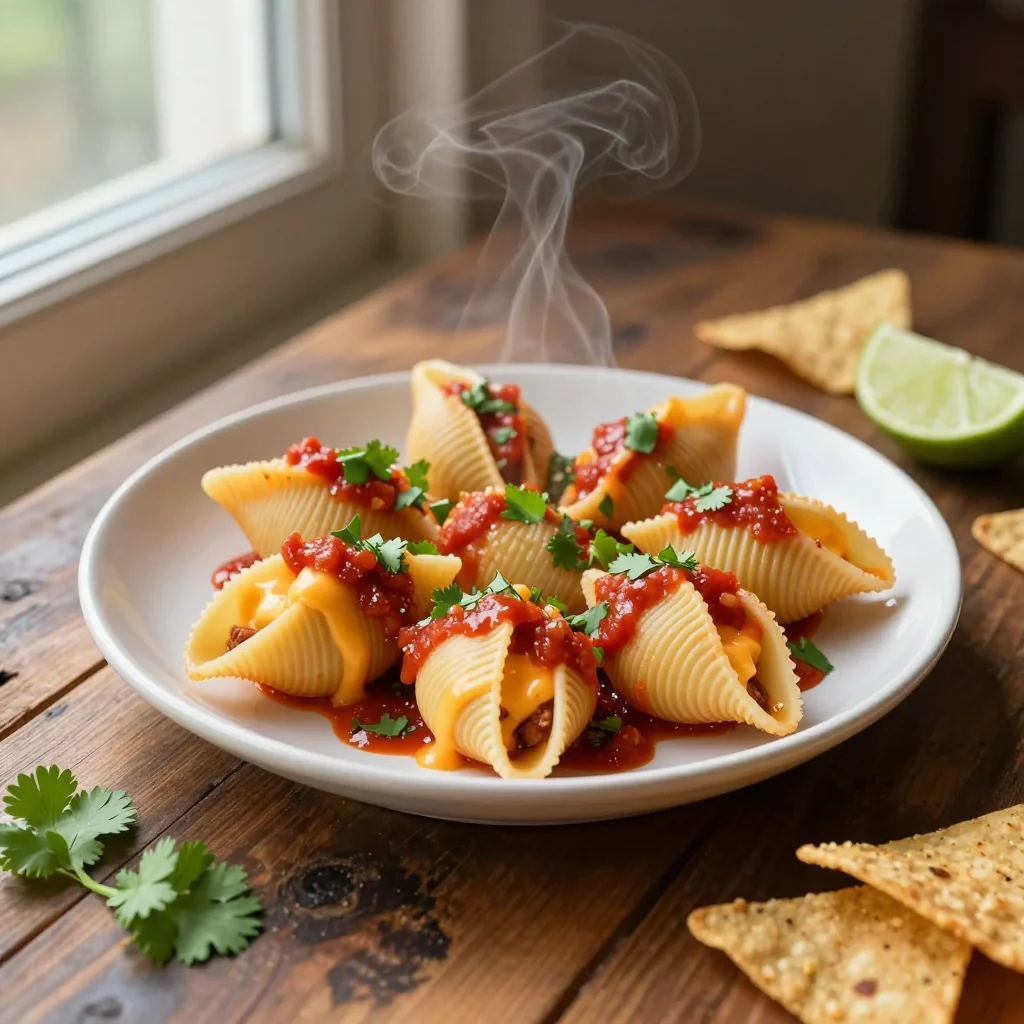
A bold fusion of Mexican zest and comforting Italian pasta that will wow your taste buds.
When I first traveled to a bustling Mexican market, the aroma of sizzling carne asada mingled with the chatter of vendors, creating a sensory tapestry I could never forget. That memory sparked a daring idea: what if the comforting embrace of Italian pasta met the bold, smoky flavors of a classic taco? The result is this Taco Stuffed Pasta Shells with Cheddar—a dish that feels like a warm hug on a chilly evening yet bursts with the lively spirit of a summer fiesta.
This recipe draws inspiration from two culinary traditions that, at first glance, seem worlds apart. The pasta shell acts as a sturdy vessel, echoing the Italian love for al dente textures, while the taco filling brings in cumin, chili powder, and a hint of cayenne that transports you straight to a street food stall in Oaxaca. By marrying these elements, we create a harmonious plate that celebrates both cultures.
In the pages that follow, you’ll discover step‑by‑step guidance, tips for perfecting the taco seasoning, and tricks to keep the shells from cracking. Whether you’re a seasoned home cook or a curious beginner, this guide equips you with everything you need to recreate a restaurant‑quality experience at home.
So roll up your sleeves, preheat that oven, and let’s embark on a flavorful adventure together!
🌟 Why This Recipe Will Capture Your Heart
From the first bite, this dish delivers a satisfying crunch, a creamy melt, and a punch of spice that keeps you coming back for more.
- ✨ Bold Flavor Fusion: The combination of Mexican spices with cheesy pasta creates a layered taste experience that feels both familiar and exciting.
- ✨ Crowd‑Pleaser: Even picky eaters love the cheesy topping, while the seasoned beef satisfies those craving a bit of heat.
- ✨ Versatile Presentation: Serve them as a main course, a party appetizer, or a make‑ahead lunch—each scenario shines.
- ✨ Balanced Nutrition: Protein‑rich beef, calcium‑laden cheddar, and wholesome pasta give you a well‑rounded meal.
- ✨ Easy Scaling: The built‑in portion adjuster lets you double or halve the recipe without a calculator.
- ✨ Fun Cooking Experience: Stuffing shells feels interactive, turning dinner prep into a playful activity for the whole family.
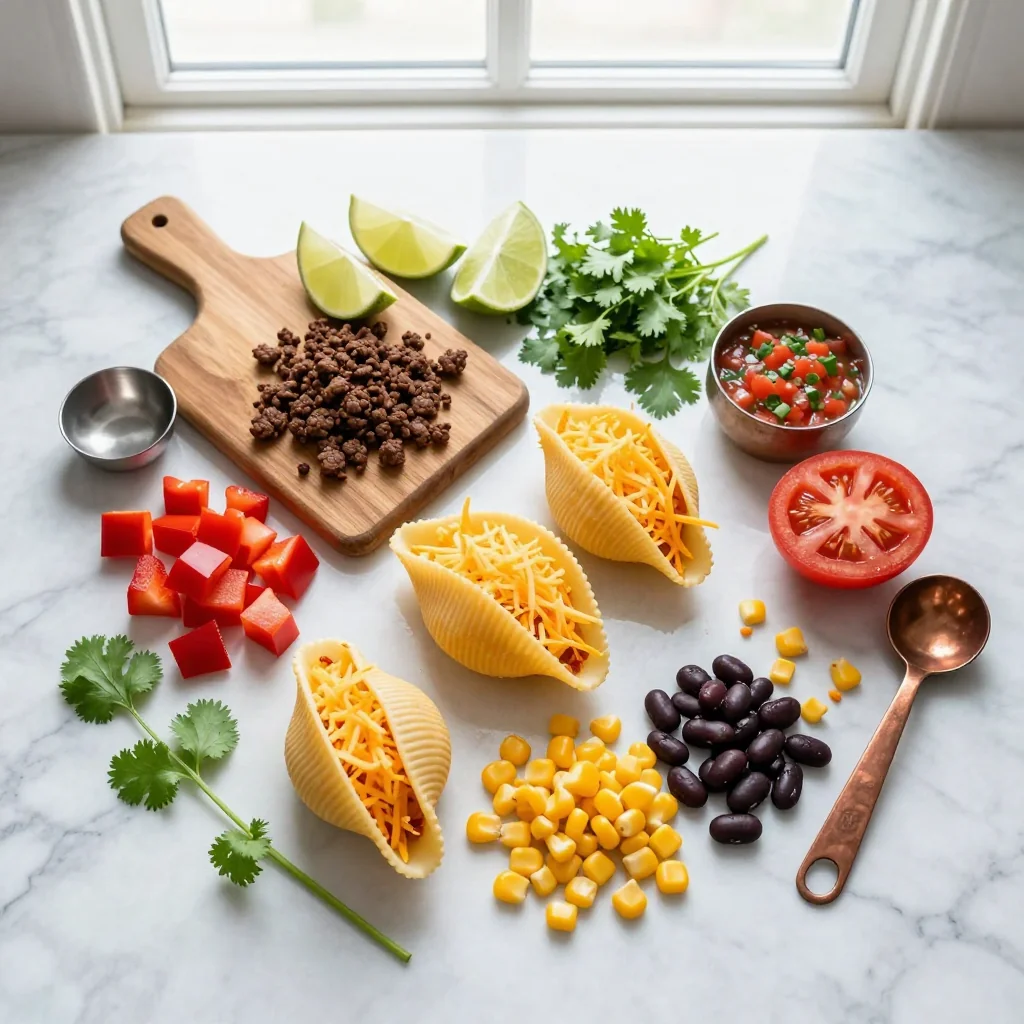
🥗 The Ingredients
📝 Complete Ingredient List
For the Pasta Shells:
For the Taco Filling:
For the Cheddar Topping:
🔍 Focus on Key Ingredients
Ground Beef
Ground beef provides the hearty backbone of the taco filling. Choose a blend with 80% lean meat for a balance of flavor and moisture. When browned, it develops a rich Maillard crust that adds depth to the overall dish. Pat the meat dry before cooking to ensure a crisp texture.
Cheddar Cheese
Sharp cheddar melts into a creamy, slightly tangy blanket that unites the pasta and taco flavors. For the best melt, grate the cheese yourself rather than using pre‑shredded varieties, which often contain anti‑caking agents that inhibit smooth melting.
Chili Powder & Cumin
These spices are the soul of any taco. Chili powder brings smoky heat, while cumin adds an earthy, citrusy note. Toast the spices briefly in the pan before adding the beef to release their aromatic oils, enhancing the overall flavor profile.
🔄 Quick Substitutions
| If you don’t have... | Use instead... |
|---|---|
| Ground beef | Ground turkey or plant‑based mince |
| Sharp cheddar | Monterey Jack or Gouda |
| Olive oil | Avocado oil or melted butter |
👨🍳 Step‑by‑Step Instructions
Follow these detailed steps to create a dish that looks as impressive as it tastes.
📋 Phase 1: Preparation & Mise en Place
Gather your tools, preheat the oven, and prep the ingredients so the cooking flow stays smooth.
Pre‑heat the oven and cook the pasta shells
Set the oven to 190°C (375°F). Bring a large pot of salted water to a rolling boil, add the pasta shells, and cook them al dente—about 8‑9 minutes. Drain and toss the shells gently with 1 tbsp olive oil to prevent sticking. Spread them on a baking sheet and let them cool slightly; this makes them easier to handle when stuffing.
Prepare the taco seasoning blend
In a small bowl, combine 1 tsp chili powder, 1 tsp ground cumin, ½ tsp smoked paprika, and ¼ tsp cayenne pepper. Stir until evenly mixed. This dry blend ensures each bite receives a balanced kick of heat and smokiness.
🔥 Phase 2: Cooking & Assembly
Now we bring together the seasoned beef, the cheese, and the pasta shells.
Cook the taco filling
Heat 1 tbsp olive oil in a large skillet over medium‑high heat. Add the diced onion and sauté for 2‑3 minutes until translucent. Add the minced garlic and cook for another 30 seconds. Introduce the ground beef, breaking it up with a wooden spoon, and brown it until no longer pink, about 5‑6 minutes.
Stir in the pre‑mixed seasoning blend, tomato sauce, and water. Reduce the heat to low and let the mixture simmer for 8‑10 minutes, allowing the flavors to meld. Season with salt and pepper to taste.
Stuff the shells
Using a small spoon or a piping bag, fill each pasta shell with a generous spoonful of the taco meat. Arrange the stuffed shells snugly in a 9‑inch (23 cm) baking dish, seam side down, to keep the filling from spilling out.
Add the cheddar topping
Sprinkle the shredded cheddar evenly over the stuffed shells, ensuring every bite gets a cheesy crown. Scatter the chopped cilantro on top for a fresh, herbaceous finish.
✨ Phase 3: Finishing & Plating
Final touches that turn a good dish into a great one.
Bake until golden and bubbling
Cover the baking dish with foil and place it in the pre‑heated oven. Bake for 15 minutes, then remove the foil and bake an additional 5‑7 minutes until the cheese is melted, bubbly, and lightly browned.
Rest and garnish
Allow the dish to rest for 5 minutes after removal. This helps the cheese set slightly, making the shells easier to serve. Drizzle a dollop of sour cream over each serving and add an extra sprinkle of cilantro if desired.
Serve and enjoy
Plate the shells on a warm platter, garnish with lime wedges for a bright citrus pop, and serve immediately while the cheese is still melty.
💡 Expert Tips & Tricks
🛒 Choosing the Best Ingredients
When shopping for ground beef, look for a bright red color and a firm texture. Avoid meat that appears gray or has a strong odor. For cheddar, a block that you grate yourself will melt more uniformly than pre‑shredded packs that contain anti‑caking agents. Fresh cilantro should have bright green leaves without wilting. Finally, select pasta shells that are thick enough to hold the filling without breaking.
🔪 Preparation Techniques
Dice the onion uniformly to ensure even cooking. Mince garlic just before use to preserve its pungency. When stuffing the shells, a small ice‑cream scoop or a piping bag with a wide tip speeds up the process and creates a tidy presentation. Keep the cooked shells covered with a clean kitchen towel to retain warmth while you finish the filling.
🌡️ Mastering the Cooking Process
Maintain a medium‑high heat when browning the beef; this encourages caramelization, adding depth to the flavor. Simmer the sauce at a low temperature to prevent it from reducing too quickly, which could make the filling dry. When baking, start with foil to keep the cheese from over‑browning, then finish uncovered for that perfect golden crust.
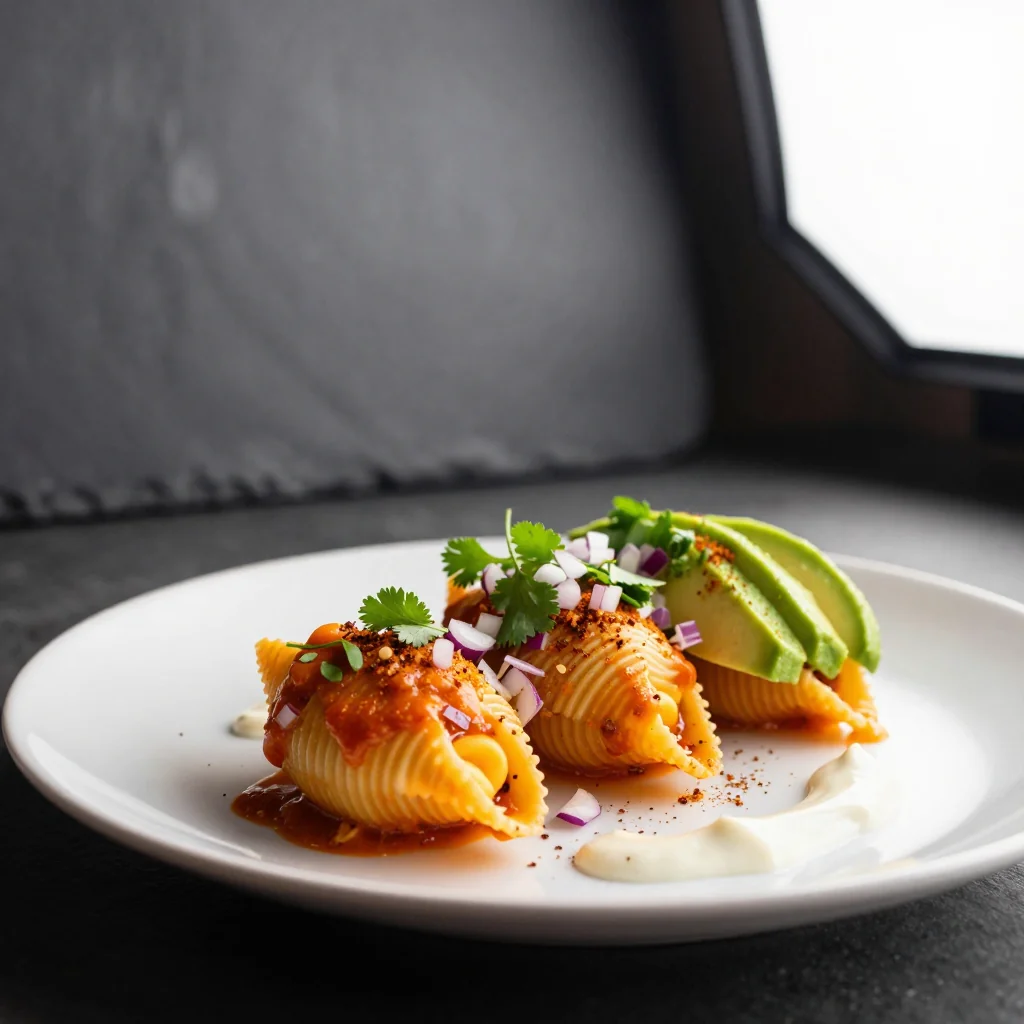
🍽️ Presentation & Service
Arrange the shells in a circular pattern on a shallow, rimmed platter for visual impact. A drizzle of sour cream in a decorative swirl adds both color and creaminess. Finish with a few extra cilantro leaves and a squeeze of fresh lime to brighten the plate. Pair with a crisp salad for contrast and a light beverage to balance the richness.
🏆 Pro Tips
Elevate this dish from home‑cooked comfort to restaurant‑level excellence with these insider techniques.
- 🎯 Temperature Layering: Sear the beef at 200°C (390°F) before reducing heat. The high initial temperature creates a Maillard crust that locks in juices, while the lower simmer melds the spices without drying the meat.
- 🎯 Cheese Layer Optimization: Mix half of the cheddar with a tablespoon of cream cheese before sprinkling. This creates a velvety melt that adheres better to the shells and prevents cheese from separating.
- 🎯 Pasta Shell Integrity: After boiling, shock the shells in an ice bath for 30 seconds. This halts cooking and firms the pasta, making it less likely to split when stuffed.
- 🎯 Spice Freshness: Toast whole cumin seeds and chili flakes for 30 seconds in a dry pan, then grind them. Freshly ground spices deliver a brighter, more complex aroma compared to pre‑ground pantry staples.
- 🎯 Portion Scaling Precision: Use the built‑in portion adjuster; the script automatically recalculates ingredient quantities, preserving flavor balance even when you double or halve the recipe.
- 🎯 Final Garnish Timing: Add the cilantro and sour cream just before serving to maintain their fresh texture and prevent bitterness from over‑cooking.
"Cooking is about balance—between tradition and innovation, simplicity and complexity." — Chef Massimo Bottura
🔄 Variations & Adaptations
The beauty of this recipe lies in its flexibility. Below are several ways to tailor it to different tastes, dietary needs, and culinary adventures.
🥬 Vegetarian / Vegan Version
Swap the ground beef for a plant‑based mince made from soy or pea protein. Replace cheddar with a sharp vegan cheese or a blend of nutritional yeast and cashew cream for a similar melt. Use a tablespoon of olive oil to sauté the vegetables, and add a cup of black beans for extra protein.
- Plant‑based mince (400 g) – provides a meaty texture.
- Vegan cheddar (1 cup) – melts well and adds tang.
- Black beans (½ cup) – boost protein and fiber.
🌶️ Flavor Variations
Experiment with global spice profiles to keep the dish exciting.
Spicy Version
Increase cayenne to ½ tsp, add 1 tsp chipotle powder, and finish with a drizzle of hot sauce. The heat intensifies without overwhelming the cheese.
Mediterranean Version
Replace cumin with 1 tsp dried oregano, add ½ cup chopped sun‑dried tomatoes, and sprinkle feta cheese instead of cheddar. Finish with a splash of lemon juice for brightness.
Asian Fusion Version
Swap chili powder for 1 tsp five‑spice powder, add 1 tbsp soy sauce to the filling, and use shredded mozzarella mixed with a teaspoon of sesame oil. Garnish with sliced scallions and toasted sesame seeds.
⚠️ Dietary Adaptations
Gluten‑Free
Use gluten‑free pasta shells (available in most supermarkets) and ensure the tomato sauce is certified gluten‑free.
Lactose‑Free
Replace cheddar with a lactose‑free cheese alternative and use coconut‑based sour cream or a dairy‑free yogurt.
Low‑Calorie
Substitute half of the ground beef with lean ground turkey, use reduced‑fat cheddar, and increase the proportion of vegetables such as bell peppers and zucchini in the filling.
👶 Family / Kids Version
Kids often prefer milder flavors. Reduce the cayenne and chili powder by half, add a pinch of smoked paprika for depth, and incorporate sweet corn kernels for a subtle sweetness. Serve with a side of carrot sticks and a mild ranch dip to make the meal more approachable.
📦 Storage & Reheating
🧊 Conservation
Refrigerator
- Duration: 3 days
- Recommended container: airtight glass or BPA‑free plastic container
- Tip: Place a sheet of parchment paper between layers to prevent sticking.
Freezer
- Duration: 2 months
- Method: Cool completely, then wrap the baking dish tightly with foil and place in a freezer‑safe bag.
- Defrosting: Transfer to the refrigerator overnight before reheating.
💡 For best texture, reheat from frozen only if you plan to bake; microwaving frozen portions may lead to soggy shells.
♨️ Reheating
🔥 Oven (Recommended)
- Preheat to 180°C (350°F).
- Cover with foil to retain moisture.
- Heat for 12‑15 minutes.
- Remove foil and continue for 5 minutes to re‑crisp the cheese.
⚡ Microwave (Quick)
- Cover with a microwave‑safe lid.
- Heat on medium power for 2‑3 minutes.
- Stir gently, then heat for another minute if needed.
🍳 Skillet
For a crisp bottom, melt a teaspoon of butter in a non‑stick skillet over medium heat, add the leftover shells, and cover for 3‑4 minutes, uncover and cook an additional 2 minutes.
🍷 Perfect Pairings
🥗 Side Dishes
- Mexican Street Corn Salad: Charred corn mixed with lime, cilantro, and a hint of mayo balances the richness of the cheese.
- Simple Arugula Salad: Peppery arugula tossed with olive oil, lemon juice, and shaved Parmesan adds freshness.
- Black Bean & Avocado Salsa: Creamy avocado and earthy beans provide texture contrast.
🍷 Wine & Drinks
- Rosé (dry, chilled): Its bright acidity cuts through the cheese and complements the taco spices.
- Zinfandel: A medium‑bodied red with subtle fruit notes enhances the beef’s umami.
- Non‑alcoholic: Sparkling lime‑infused water with a sprig of mint refreshes the palate.
🍰 To Complete the Meal
Start with a light tomato‑basil bruschetta, follow with the stuffed shells, and finish with a citrus‑infused panna cotta topped with a drizzle of caramel sauce. The dessert’s subtle sweetness balances the savory heat of the main course.
❓ Frequently Asked Questions
Q: Can I use a different type of pasta shell?
A: Absolutely. Large conchiglie or even jumbo shells work well. The key is to choose a shape that can hold a generous amount of filling without breaking. If you opt for a smaller shell, you may need to increase the number of shells to maintain portion size.
Q: How do I prevent the shells from cracking during stuffing?
A: After boiling, shock the shells in an ice bath for 30 seconds, then gently pat them dry. This firms the pasta and reduces the risk of cracks. Additionally, use a small spoon or piping bag to control the amount of filling you place inside each shell.
Q: What if I don’t have cheddar cheese?
A: Substitute with Monterey Jack, Gouda, or a blend of mozzarella and a sharp cheese like provolone. The goal is to have a cheese that melts smoothly and adds a slight tang.
Q: My filling turned out too dry—what went wrong?
A: Over‑cooking the beef or not adding enough liquid can cause dryness. Ensure you add the tomato sauce and water, and simmer gently. If the mixture looks dry, stir in an extra tablespoon of broth or water before stuffing.
Q: Can I prepare this recipe ahead of time?
A: Yes. Assemble the stuffed shells, cover, and refrigerate for up to 24 hours before baking. This allows the flavors to meld even more, and you’ll only need to add the final baking step when ready to serve.
Q: How do I adjust the spice level without compromising flavor?
A: Reduce the cayenne and chili powder by half for a milder version, or increase them gradually while tasting the filling. Adding a teaspoon of honey can also balance extra heat if you decide to turn up the spice.
🎉 Let’s Get Cooking!
This Taco Stuffed Pasta Shells with Cheddar recipe brings together the comfort of Italian pasta with the excitement of Mexican street food. The layered flavors, from the smoky beef to the creamy cheddar, create a dish that’s both hearty and vibrant. By following the detailed steps, you’ll achieve perfectly cooked shells, a juicy filling, and a golden cheese crust that will impress family and friends alike.
Remember, cooking is an adventure—feel free to experiment with the variations, adjust the spice level, or swap ingredients to suit your dietary preferences. The built‑in portion adjuster ensures you can scale the recipe up for a crowd or down for a cozy dinner without losing any of the flavor balance.
Have you tried this recipe?
Leave a comment and rating below! Share your photos on Instagram with #TacoShellsCheddar for a chance to be featured on our site.
Taco Stuffed Pasta Shells with Cheddar
A bold fusion of Mexican zest and comforting Italian pasta, perfect for any occasion.
📝 Ingredients
Pasta Shells
Taco Filling
Cheddar Topping
👨🍳 Instructions
- 1 Pre‑heat oven to 190°C (375°F) and boil pasta shells al dente, then toss with olive oil.
- 2 Mix chili powder, cumin, smoked paprika, and cayenne in a small bowl.
- 3 Sauté onion and garlic in olive oil, add ground beef, and brown thoroughly.
- 4 Stir in spice blend, tomato sauce, water, and simmer 8‑10 minutes; season.
- 5 Stuff each shell with beef mixture and arrange in a baking dish.
- 6 Top with shredded cheddar and cilantro; bake covered 15 min, then uncovered 5‑7 min.
- 7 Rest 5 min, add a dollop of sour cream and lime wedges.
- 8 Serve hot, enjoy with suggested sides and drinks.
- 9 Store leftovers in an airtight container; reheat per storage guide.
- 10 Share your creation on social media with #TacoShellsCheddar!
🥗 Nutritional Information (per serving)
*Values are estimates based on standard ingredient brands.
📚 You Might Also Like
Chipotle Mac & Cheese
Mexican Lasagna
Cheesy Taco Casserole


💬 Comments & Reviews
Leave a Comment
Comments will appear here once readers share their thoughts.