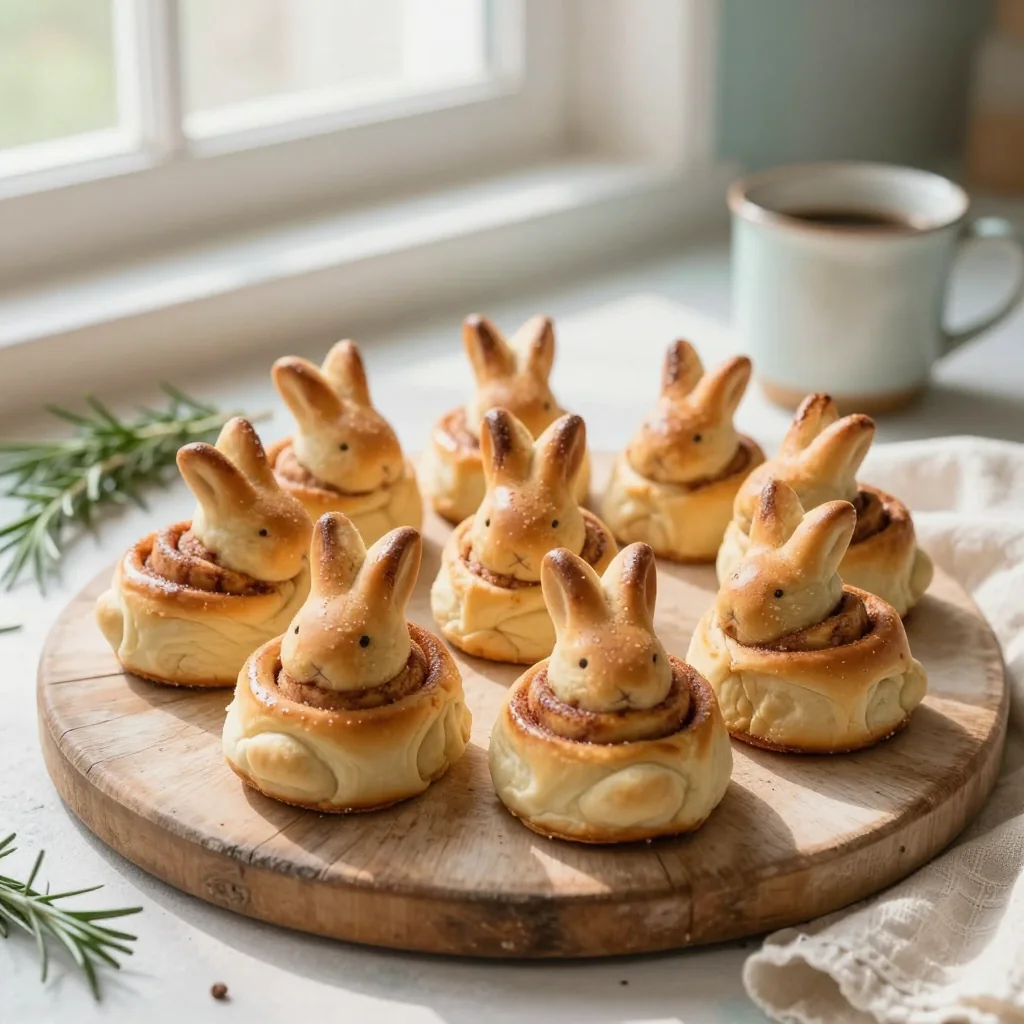
Soft, fluffy bunny-shaped cinnamon rolls that bring a whimsical touch to any breakfast or brunch.
When I was a child, my grandmother would bake cinnamon rolls every Sunday, filling the kitchen with a sweet, buttery aroma that felt like a warm hug. One rainy morning, while I was shaping dough for a school project, a sudden burst of inspiration struck: what if those beloved rolls could become adorable little bunnies? The idea sparked a playful experiment that turned a classic comfort food into a festive centerpiece perfect for Easter, birthdays, or any occasion that calls for a smile.
Cinnamon Roll Bunnies draw their roots from the traditional American cinnamon roll, a pastry that has traveled across generations and continents. By shaping the dough into bunny silhouettes and adding a delicate glaze, the recipe retains the familiar caramelized cinnamon flavor while offering a visual twist that delights both kids and adults. The result is a soft, pillowy roll that looks as delightful as it tastes.
In this guide, you’ll learn how to master the dough, achieve the perfect swirl of cinnamon sugar, and shape each roll into a bunny that holds its form during baking. I’ll share tips for achieving a glossy glaze, troubleshooting common issues, and customizing the recipe for different dietary needs.
Grab your mixing bowl, preheat the oven, and let’s hop into the kitchen together – the bunnies are waiting!
🌟 Why This Recipe Will Captivate You
Cinnamon Roll Bunnies combine the comforting flavors of a classic cinnamon roll with a whimsical presentation that makes every bite feel like a celebration.
- ✨ Irresistible Aroma: The slow caramelization of brown sugar and butter creates a sweet, nutty fragrance that fills the entire home, inviting everyone to the table.
- ✨ Fluffy Texture: A carefully balanced yeast dough yields a light, airy crumb that stays tender even after cooling.
- ✨ Visual Appeal: Shaped like bunnies, the rolls become a conversation starter, perfect for themed parties or a fun family breakfast.
- ✨ Customizable Sweetness: The glaze can be adjusted with extra spices, citrus zest, or even a chocolate drizzle for a personalized touch.
- ✨ Easy to Scale: The built‑in portion adjuster lets you double or halve the recipe without complex math, ensuring perfect results for any crowd.
- ✨ Kid‑Friendly Fun: Children love helping shape the bunnies, turning cooking into an educational activity that teaches measuring, kneading, and patience.
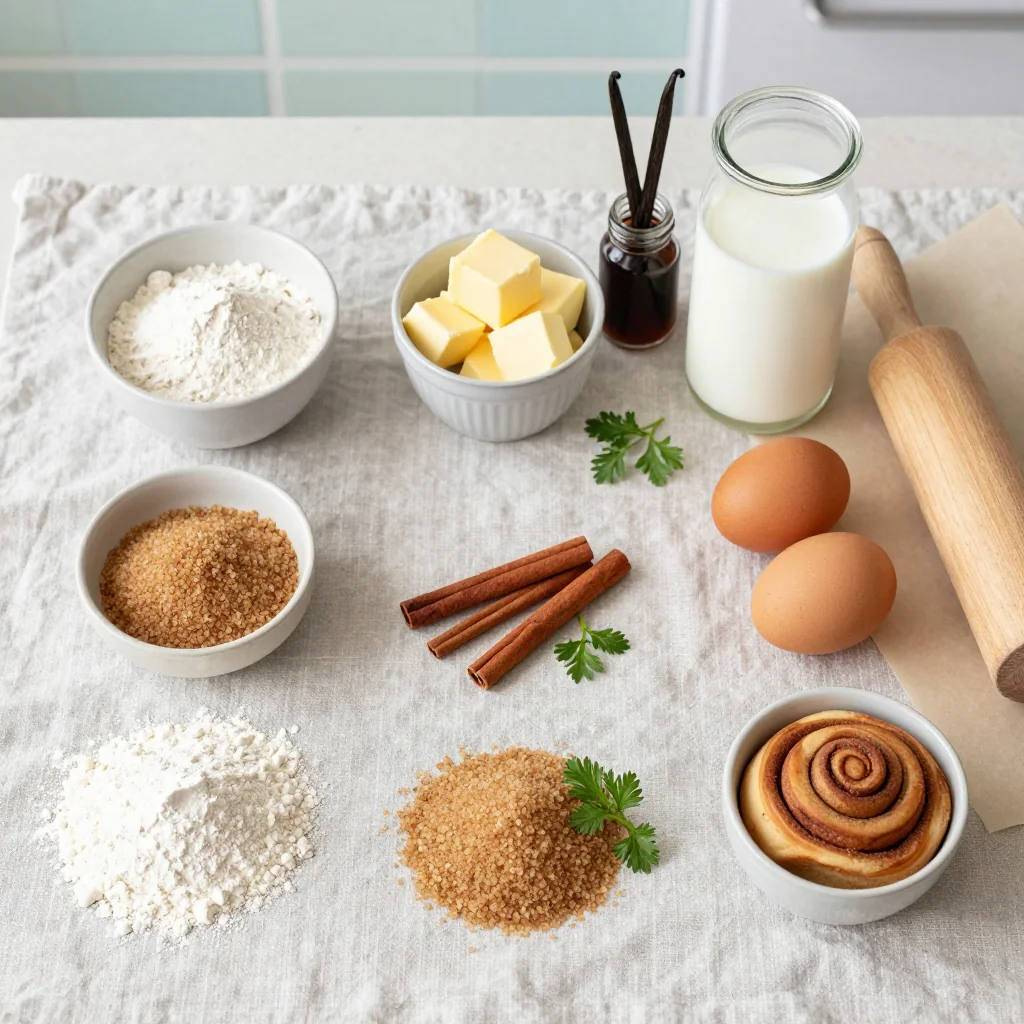
🥗 Ingredients
📝 Complete Ingredient List
For the Dough:
For the Cinnamon Filling:
For the Glaze:
🔍 Focus on Key Ingredients
All‑Purpose Flour
Flour provides the structural backbone of the dough. Using a high‑protein, all‑purpose flour ensures enough gluten formation for a light, airy crumb while still being easy to work with. If you prefer a softer texture, you can substitute half of the flour with pastry flour, but be aware that the roll may be slightly less chewy.
Dark Brown Sugar
The deep molasses flavor of dark brown sugar gives the filling its signature richness. It also contributes moisture, keeping the interior of the roll delightfully soft. For a lighter sweetness, you can swap it for light brown sugar, but the caramel notes will be milder.
Cream Cheese
Cream cheese adds a tangy counterpoint to the sweet cinnamon, creating a balanced flavor profile reminiscent of a cream cheese frosting without the heaviness. It also helps the filling stay creamy during baking, preventing it from seeping out.
🔄 Quick Substitutions
| If you don’t have… | Use instead… |
|---|---|
| Whole milk | Almond milk (unsweetened) |
| Unsalted butter | Salted butter (reduce added salt) |
| Cream cheese | Greek yogurt (full‑fat) |
👨🍳 Step‑by‑Step Instructions
Follow these detailed steps to create perfectly risen, sweetly spiced bunnies that will impress every guest.
📋 Phase 1: Preparation & Mise en Place
Gather all ingredients, measure precisely, and set up your workstation.
Activate the Yeast
In a small bowl, combine the warm milk (around 38 °C/100 °F) with the instant yeast and a pinch of sugar. Stir gently and let sit for 5‑7 minutes until a light foam forms, indicating that the yeast is alive and ready.
Mix the Dry Ingredients
In a large mixing bowl, whisk together the flour, granulated sugar, and salt. Create a well in the center to receive the wet ingredients.
Combine and Knead
Pour the melted butter, the beaten egg, and the foamy yeast mixture into the flour bowl. Stir with a wooden spoon until a shaggy dough forms, then turn onto a lightly floured surface. Knead for 8‑10 minutes until the dough is smooth, elastic, and slightly tacky.
First Rise
Place the dough in a lightly greased bowl, cover with plastic wrap, and let it rise in a warm spot for 1‑1½ hours, or until doubled in size. This fermentation stage builds flavor and creates the airy crumb.
🔥 Phase 2: Shaping, Filling & Baking
After the dough has risen, we’ll create the cinnamon swirl and shape the bunnies.
Prepare the Filling
In a medium bowl, combine the softened butter, cream cheese, dark brown sugar, ground cinnamon, and vanilla extract. Mix until smooth and creamy. This spread will be rolled into the dough, creating pockets of gooey sweetness.
Roll Out the Dough
Turn the risen dough onto a parchment‑lined baking sheet. Using a rolling pin, flatten it into a rectangle about 40 cm × 30 cm (16 in × 12 in) and roughly 1 cm (⅓ in) thick.
Spread the Filling
Evenly spread the cream‑cheese cinnamon mixture over the rolled dough, leaving a 2 cm (¾ in) border around the edges. This border helps seal the rolls later.
Form the Bunny Shapes
Using a sharp knife, cut the rectangle into 8 equal squares. For each square, make two diagonal cuts from opposite corners, leaving a small triangle in the center. Gently pull the two outer corners apart to create the bunny’s ears, and press the central triangle slightly inward to form the face. The result is a cute bunny silhouette with a swirl of cinnamon inside.
Second Rise
Cover the shaped bunnies loosely with a clean kitchen towel and let them rise for an additional 30‑40 minutes. They should puff up noticeably, indicating they’re ready for the oven.
Bake to Golden Perfection
Preheat the oven to 190 °C (375 °F). Bake the bunnies for 18‑22 minutes, or until the tops are a deep golden brown and the glaze is bubbling. Rotate the tray halfway through for even browning.
✨ Phase 3: Finishing Touches & Serving
A quick glaze and a beautiful presentation complete the experience.
Prepare the Glaze
While the bunnies are still warm, whisk together powdered sugar, milk, and lemon zest until smooth. The glaze should be pourable but not too thin; adjust with a splash more milk or powdered sugar as needed.
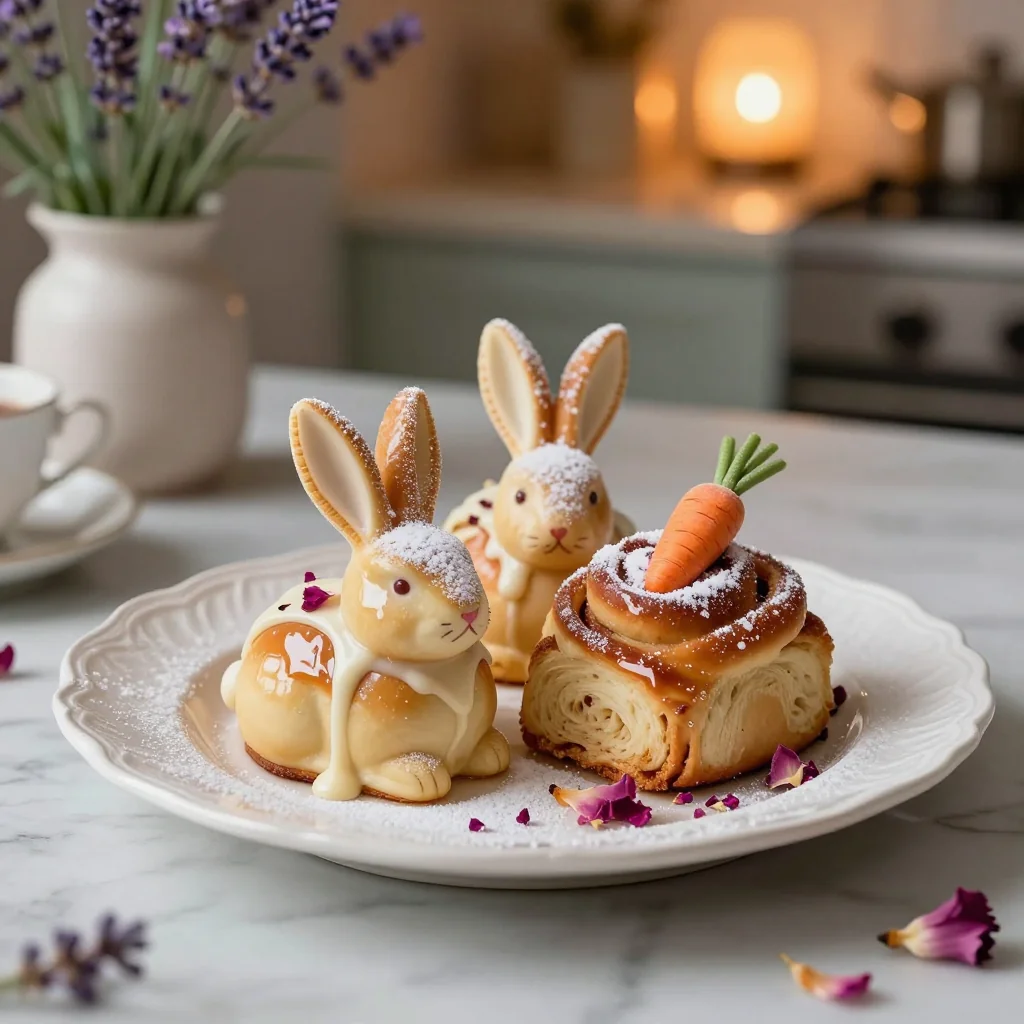
Drizzle and Rest
Using a spoon or a small ladle, drizzle the glaze over each bunny, letting it cascade down the ears and fill the crevices. Allow the glaze to set for 5 minutes before serving.
Serve Warm
Transfer the bunnies to a serving platter. They are best enjoyed warm, paired with a cup of freshly brewed coffee or a glass of cold milk. For a festive touch, sprinkle a few extra cinnamon sticks around the platter.
💡 Expert Tips & Tricks
🛒 Choosing the Right Ingredients
Opt for European‑style butter with a higher butterfat content (82 % or more) for a richer flavor and a softer crumb. When selecting flour, look for a protein content around 10‑11 %; this balances elasticity with tenderness. Fresh yeast gives the most reliable rise, but if you must use active dry yeast, increase the proofing time by 10‑15 minutes.
🔪 Preparation Techniques
When kneading, use the “stretch and fold” method to develop gluten without over‑working the dough. After the first rise, gently deflate the dough before rolling it out; this preserves air pockets and prevents a dense interior. Keep the work surface lightly floured to avoid sticking but avoid excess flour, which can dry the dough.
🌡️ Mastering the Bake
Use an oven thermometer to verify the temperature; many home ovens run hotter than displayed. If the tops brown too quickly, tent the bunnies with foil after 12 minutes. The internal temperature of a fully baked roll should reach about 95 °C (203 °F).
🍽️ Presentation & Service
Arrange the bunnies on a rustic wooden board or a pastel‑colored ceramic plate. Add a dusting of powdered sugar shaped like tiny snowflakes for a winter‑themed brunch. Serve with a side of fresh berries or a dollop of whipped mascarpone for extra decadence.
🏆 Pro‑Level Secrets
Professional bakers differentiate themselves through precision, technique, and an understanding of food science.
- 🎯 Temperature‑Controlled Fermentation: Keep the first rise at 27 °C (80 °F) for optimal yeast activity. Too warm will cause over‑proofing; too cool will stall the rise, resulting in a dense texture.
- 🎯 Laminated Dough Technique: For an even flakier interior, fold the dough once after the first rise. Roll it out, fold it into thirds, and let it rest 15 minutes before shaping. This creates micro‑layers that mimic a croissant’s tenderness.
- 🎯 Precise Sugar Ratio: The 200 g brown sugar to 100 g powdered sugar ratio ensures a caramelized interior while keeping the glaze light. Adjusting this balance can shift the flavor profile toward either deeper caramel or brighter citrus.
- 🎯 Steam Injection: Place a shallow pan of hot water on the lower rack while baking. The steam delays crust formation, allowing the rolls to expand fully before setting, resulting in a softer crust.
- 🎯 Gluten Development Monitoring: Use a dough hook on a stand mixer set to low speed for 6 minutes, then test elasticity. Over‑mixing can lead to a tough crumb, while under‑mixing yields a crumbly texture.
- 🎯 Resting the Glaze: Allow the glaze to sit for 2‑3 minutes before drizzling. This brief rest lets the powdered sugar fully hydrate, preventing a watery glaze that would soak the rolls.
"Great baking is 90 % patience and 10 % precision; the rest is love." — Dominique Ansel
🔄 Variations & Adaptations
Cinnamon Roll Bunnies are a versatile canvas. Below are several ways to tailor them to specific tastes, dietary needs, and seasonal inspirations.
🥬 Vegetarian / Vegan Version
Replace the egg with 1 fl oz (30 ml) of flaxseed “egg” (1 tbsp ground flaxseed mixed with 3 tbsp water, let sit 5 minutes). Swap butter for a plant‑based margarine and use almond milk instead of dairy milk. For the cream cheese filling, blend silken tofu with vegan cream cheese and a pinch of nutritional yeast for a tangy note.
- Flaxseed “egg” – adds binding without animal products.
- Vegan butter – maintains richness and flakiness.
- Silken tofu filling – keeps the creamy texture while staying dairy‑free.
🌶️ Flavor Variations
Experiment with additional spices or complementary ingredients to create new taste experiences.
Spicy Mexican Twist
Add ½ tsp cayenne pepper and 1 tbsp chopped chipotle in adobo to the cinnamon filling. Finish with a drizzle of honey‑lime glaze for a sweet‑heat contrast.
Mediterranean Herb Version
Mix 1 tbsp finely chopped fresh rosemary and 1 tsp orange zest into the filling. Replace the glaze with a honey‑yogurt drizzle and garnish with toasted pine nuts.
Asian Matcha Infusion
Blend 1 tsp matcha powder into the dough and swap the cinnamon filling for a white chocolate‑sesame paste. Top with a light drizzle of black sesame glaze.
⚠️ Dietary Adjustments
Gluten‑Free
Use a 1:1 gluten‑free flour blend (rice flour, tapioca starch, potato starch) and add 1 tsp xanthan gum to mimic gluten elasticity. The dough will be slightly more delicate, so handle with care.
Lactose‑Free
Swap butter for lactose‑free margarine and use oat milk in place of dairy milk. Ensure the cream cheese alternative is certified lactose‑free.
Low‑Calorie
Reduce butter by 30 % and substitute half of the brown sugar with a natural sweetener like erythritol. Use a light powdered sugar blend for the glaze and serve with fresh fruit instead of a heavy side.
👶 Family/Children Friendly Version
For picky eaters, omit the cream cheese filling and replace it with a simple vanilla custard. Reduce the cinnamon to 1 tsp for a milder flavor, and add tiny chocolate chips for a surprise burst of sweetness.
📦 Storage & Reheating
🧊 Conservation
Refrigerator
- Duration: 4 days
- Container: Airtight plastic container or zip‑lock bag
- Tip: Place a damp paper towel over the bunnies to maintain moisture.
Freezer
- Duration: 2 months
- Method: Wrap each bunny individually in parchment, then place in a freezer‑safe bag.
- Defrosting: Transfer to the refrigerator overnight, then reheat gently.
💡 Note: For optimal texture, reheat from frozen rather than thawed to avoid sogginess.
♨️ Reheating
Oven (Recommended)
- Preheat to 175 °C (350 °F).
- Cover each bunny loosely with aluminum foil.
- Heat for 8‑10 minutes.
- Remove foil and bake an additional 2‑3 minutes to restore crispness.
Microwave (Quick)
- Place bunny on a microwave‑safe plate, cover with a microwave‑safe lid.
- Heat on medium power for 30‑45 seconds.
- Check and repeat in 10‑second intervals if needed.
Skillet
Heat a non‑stick skillet over low heat, add a splash of water, cover, and warm for 2‑3 minutes, turning once.
🍷 Perfect Pairings
🥗 Side Dishes
- Fresh Berry Salad: A mix of strawberries, blueberries, and mint provides a bright, acidic contrast.
- Greek Yogurt Parfait: Layers of Greek yogurt, honey, and granola add texture and a tangy counterpoint.
- Sautéed Spinach with Garlic: The earthy greens balance the sweetness of the bunnies.
🍷 Wine & Beverage Matches
- Late Harvest Riesling: Its honeyed notes echo the cinnamon while its acidity cuts through the richness.
- Espresso: The deep, bitter profile of a well‑pulled espresso balances the sweet glaze.
- Non‑Alcoholic: Sparkling apple cider with a cinnamon stick offers a festive, kid‑friendly option.
🍰 Complementary Courses
Start the meal with a light citrus‑infused avocado toast, followed by the Cinnamon Roll Bunnies as the main sweet‑savory centerpiece. Finish with a lemon‑ricotta cheesecake to keep the palate bright and refreshing.
❓ Frequently Asked Questions
Q: Can I make the dough ahead of time?
A: Absolutely. After the first rise, you can shape the dough into a flat rectangle, wrap tightly in plastic, and refrigerate for up to 24 hours. Bring it to room temperature before adding the filling and shaping the bunnies.
Q: My bunnies spread too much during baking; what went wrong?
A: Over‑proofing or an oven that’s too hot can cause excessive spread. Ensure the dough rises only until doubled, not beyond, and verify oven temperature with an independent thermometer. Tenting with foil after 12 minutes also helps control expansion.
Q: How can I make the glaze more stable for transport?
A: Add a teaspoon of cornstarch dissolved in a tablespoon of cold water to the glaze before heating. This creates a slightly thicker coating that won’t run off during travel.
Q: I’m allergic to nuts; are there hidden nut ingredients?
A: The core recipe contains no nuts. However, if you purchase pre‑ground cinnamon or brown sugar that’s processed in a facility handling nuts, verify the labeling. All other ingredients are nut‑free.
Q: Can I freeze the unbaked bunnies?
A: Yes. After shaping, place the unbaked bunnies on a parchment‑lined tray, flash freeze for 30 minutes, then transfer to a freezer‑safe bag. Bake directly from frozen, adding an extra 5‑7 minutes to the baking time.
Q: How do I adjust the recipe for a different number of servings?
A: Use the portion adjuster below the recipe card. Click the plus or minus buttons to set your desired servings; the ingredient quantities will automatically update based on the original 8‑serving baseline.
🎉 Let’s Get Baking!
These Cinnamon Roll Bunnies bring together the comfort of a classic cinnamon roll with a playful shape that turns any gathering into a celebration. The buttery, caramelized interior, the glossy citrus‑zest glaze, and the adorable bunny silhouette combine to create a memorable culinary experience that’s as fun to make as it is to eat. Whether you’re serving them at a brunch, a birthday party, or a cozy weekend morning, they’re sure to become a beloved tradition in your household.
Don’t hesitate to experiment with the variations, share your personal twists, and let your creativity run wild. The kitchen is a laboratory of joy—so roll up your sleeves, pinch those ears, and enjoy the sweet rewards of your hard work.
Have you tried this recipe?
Leave a comment and rating below! Share your photos on Instagram with #CinnamonBunnyDelight for a chance to be featured on our blog.
Cinnamon Roll Bunnies
Fluffy bunny‑shaped cinnamon rolls with a sweet lemon glaze.
📝 Ingredients
Dough
Cinnamon Filling
Glaze
👨🍳 Instructions
- 1 Activate the yeast in warm milk; let foam.
- 2 Mix dry ingredients, create a well, add wet ingredients.
- 3 Knead dough until smooth and elastic, about 8‑10 minutes.
- 4 First rise in a greased bowl until doubled, 1‑1½ hours.
- 5 Prepare filling by blending butter, cream cheese, brown sugar, cinnamon, vanilla.
- 6 Roll dough into a rectangle, spread filling, leaving a border.
- 7 Cut into squares, shape each into a bunny silhouette.
- 8 Second rise for 30‑40 minutes, covered.
- 9 Bake at 190 °C for 18‑22 minutes until golden.
- 10 Drizzle with lemon‑zest glaze and serve warm.
🥗 Nutrition per Serving
*Values are estimates based on standard ingredient data.
📚 You Might Also Like
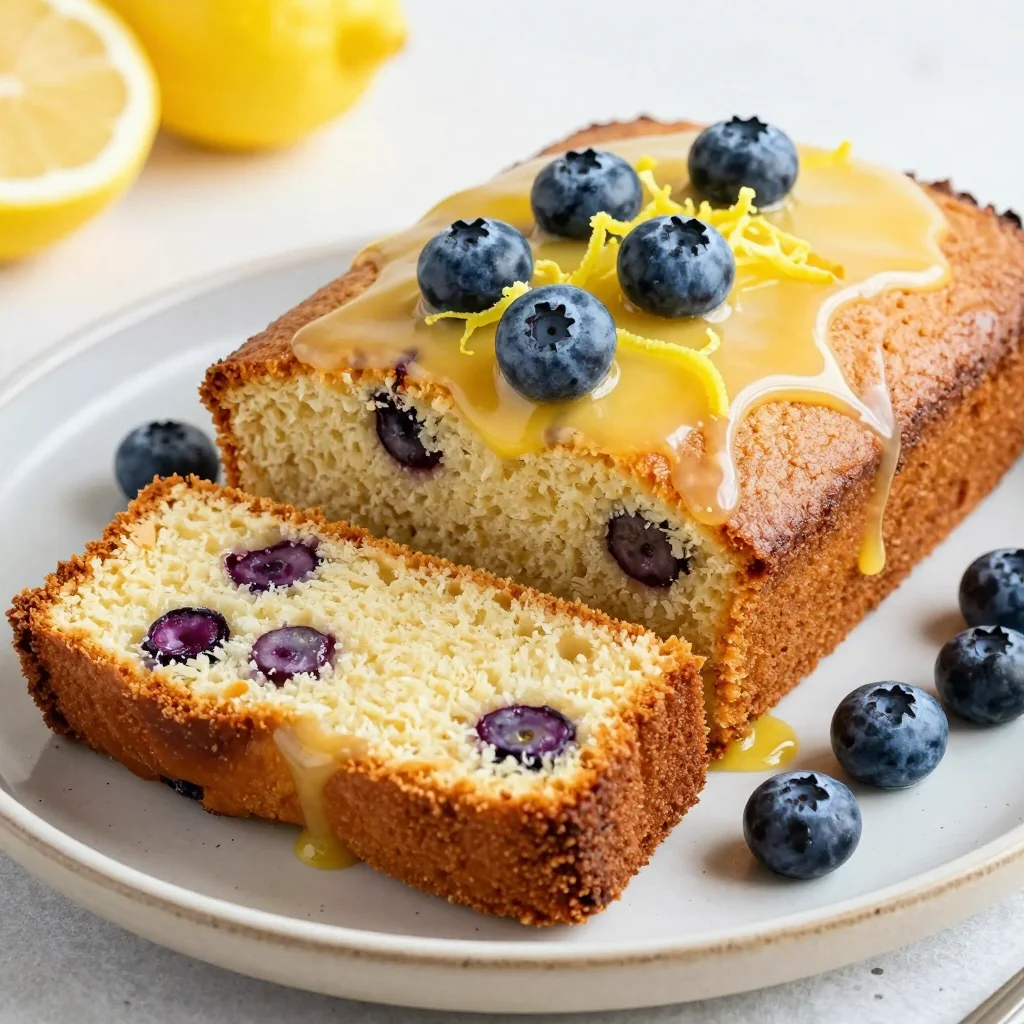
Maple Pecan Cinnamon Rolls
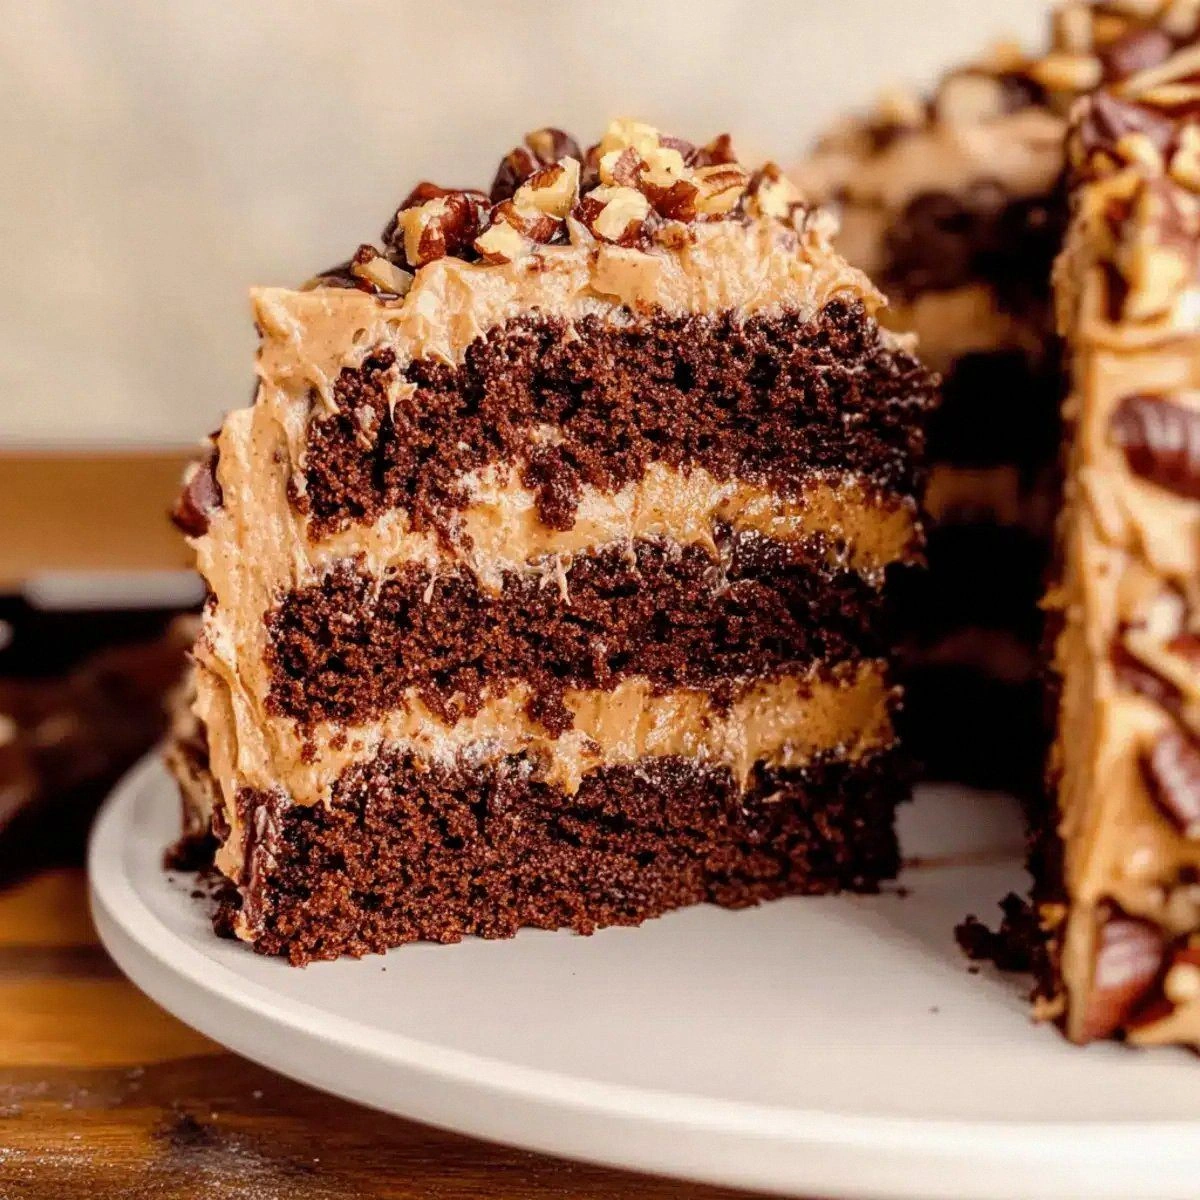
Chocolate Hazelnut Swirl Buns
Lemon Ricotta Breakfast Croissants


💬 Comments & Reviews
LLeave a Comment
No comments yet. Be the first to share your thoughts!