Picture this: I’m in a cramped kitchen, juggling a pot of boiling pasta and a bag of pre‑made pizza dough when the stove goes rogue, splattering sauce everywhere. The chaos was so intense that the family’s pizza night turned into a soggy disaster, and my kids were staring at the mess with eyes that said, “What’s next?” That night, I swore I’d never let a kitchen catastrophe dictate how we eat again. I’m talking about a recipe that turns a simple tortilla into a pocket of cheesy, pepperoni‑laden happiness that even the most skeptical eater will love. The lesson? A good plan and a little culinary courage can transform a kitchen nightmare into a family triumph.
When I first tried this roll‑up, the aroma of garlic and Italian seasoning hit me like a warm hug, promising comfort in every bite. The sight of the golden tortillas, the glistening mozzarella, and the pepperoni’s bright red streaks made my taste buds tingle with anticipation. The sound of the sizzling pan was a lullaby, and the texture—crispy on the outside, gooey on the inside—was a revelation. The first bite was a symphony of flavors that made the whole room feel like a pizza parlor, minus the greasy counter. My kids’ delighted squeals were the sweetest soundtrack to this culinary triumph.
What sets this version apart from every other pizza roll recipe out there is a meticulous balance of simplicity, flavor depth, and crowd‑pleasing execution. I’ve stripped the process down to a handful of ingredients that still deliver a full pizza experience, ensuring that even novice cooks can replicate the magic. The use of whole wheat tortillas adds a wholesome twist that satisfies parents looking for a healthier option. The sauce’s velvety coating on the tortilla is like a blanket that keeps everything moist and flavorful. And the pepperoni’s perfect crunch adds that satisfying contrast that makes each bite unforgettable.
But here’s the kicker: I’ve discovered a secret technique that turns ordinary tortillas into a crisp, flaky pastry that holds the filling like a well‑guarded treasure. By lightly brushing the tortillas with oil before rolling, you create a barrier that prevents sogginess and enhances the golden edges. This subtle step is a game‑changer that most recipes overlook, and it’s the reason this version is hands down the best you’ll ever make at home. Trust me, the difference is palpable, and I dare you to taste this and not go back for seconds.
Now, if you’re ready to elevate your family dinner routine and create a dish that will have everyone begging for more, I’m going to walk you through every single step. By the end, you’ll wonder how you ever made it any other way, and your kitchen will smell like a cozy pizzeria. Picture yourself pulling this out of the oven, the whole kitchen smelling incredible, and your family’s faces lighting up with excitement. Stay with me here—this is worth it.
Kids are notoriously picky, and finding a dish that satisfies both their cravings and your desire for a quick, healthy meal can feel like searching for a unicorn. This roll‑up is the unicorn you’ve been looking for, with a flavor profile that feels indulgent yet is actually wholesome. The combination of pizza sauce, mozzarella, and pepperoni wrapped in a whole wheat tortilla is a comfort food that never feels like a cheat meal. I’ve seen toddlers and teens alike devour these rolls with gusto, and they’re even willing to help assemble them—talk about a kitchen co‑op!
Family traditions often involve dishes that are passed down, but sometimes the best traditions are the ones you create from scratch. This recipe is a new tradition that will become a staple in your household, from weekday dinners to weekend brunches. The best part? It’s so adaptable that you can tweak it for different dietary needs without compromising taste. Whether you’re feeding a crowd or just a few, this roll‑up scales effortlessly.
The sauce is the heart of this dish, and it’s not just any marinara. I use a homemade blend of crushed tomatoes, garlic, and a splash of red wine, simmered to a silky consistency that coats the tortilla like velvet. The sauce’s subtle sweetness balances the pepperoni’s saltiness, creating a harmonious flavor dance. This is the kind of sauce that makes every bite feel like a mini celebration.
And let’s talk pepperoni, the star that brings the crunch and the zing. I’ve sourced pepperoni from a local deli, where each slice is seasoned to perfection, offering a savory bite that complements the cheese. The pepperoni’s crisp edges add a delightful textural contrast that keeps the roll from feeling too uniform. If you’re feeling adventurous, try a spicy pepperoni for an extra kick.
In summary, this recipe is a blend of convenience, flavor, and family appeal. It’s the kind of dish that brings people together and creates memories around the dinner table. The next time you’re planning a meal, consider this roll‑up as your go‑to option. Trust me, you won’t regret it.
Let’s dive into the details that make this recipe so special.
What Makes This Version Stand Out
- Flavor: The sauce is simmered with a splash of red wine and fresh herbs, creating a depth that’s usually reserved for gourmet pizzas.
- Texture: The tortillas are lightly oiled before rolling, giving them a crisp, flaky edge that holds the cheese and pepperoni in place.
- Health: Whole wheat tortillas provide a fiber boost, making this dish a wholesome option for families that want a balanced meal.
- Simplicity: With only eight ingredients, the recipe is easy to remember and quick to assemble, perfect for busy weeknights.
- Make‑ahead: You can pre‑roll the bites and freeze them, then bake them straight from the freezer—great for last‑minute dinner plans.
- Kids’ Appeal: The roll‑up’s bite‑size form and cheesy goodness make it a hit with picky eaters, turning dinner into a fun activity.
- Versatility: Swap the pepperoni for turkey sausage or mushrooms for a vegetarian twist, and the dish still shines.
- Presentation: The golden, pepperoni‑topped surface looks as good as it tastes, making it a showstopper on any plate.
Alright, let’s break down exactly what goes into this masterpiece…
Inside the Ingredient List
The Flavor Base
The pizza sauce is the first layer of flavor, and it’s more than just tomato. I simmer crushed tomatoes with minced garlic, oregano, and a hint of red wine until it thickens to a silky consistency. This slow reduction caramelizes the natural sugars, giving the sauce a depth that feels like a gourmet pizza. If you’re short on time, a high‑quality store‑bought sauce will work, but the homemade version adds a personal touch that elevates every bite.
The Texture Crew
Whole wheat tortillas bring both structure and nutrition to the roll‑ups. They’re sturdy enough to hold the sauce, cheese, and pepperoni without tearing, yet light enough to provide a pleasant bite. The tortillas also offer a subtle nutty flavor that contrasts nicely with the savory fillings. When you lightly brush them with oil before rolling, you create a barrier that keeps them from becoming soggy, giving each roll a crisp, flaky edge.
The Unexpected Star
Pepperoni is the star that delivers the classic pizza punch. I choose pepperoni from a local deli where each slice is seasoned with a blend of paprika, garlic, and a touch of cayenne. The pepperoni’s slightly charred edges add a smoky flavor that lingers on the palate. If you’re watching sodium, look for a low‑sodium option or cut the slices in half to reduce the salt content.
The Final Flourish
Mozzarella cheese is the gooey glue that binds everything together. I shred it fresh, which ensures a melt that’s both creamy and stretchy. The cheese’s mild flavor balances the boldness of the pepperoni and the richness of the sauce. A small pinch of garlic salt and Italian seasoning rounds out the seasoning profile, adding a fragrant finish that makes each bite irresistible.
Everything's prepped? Good. Let’s get into the real action…
The Method — Step by Step
- Begin by preheating your oven to 400°F (200°C). Let the oven heat fully to ensure a consistent baking temperature. While the oven warms, lay out all your ingredients on a clean work surface. This preparation step will keep the process smooth and efficient. The aroma of the spices will start to mingle, setting the stage for a delicious experience.
- Spread a thin layer of pizza sauce across each tortilla, leaving a small border around the edges. The sauce should coat the tortilla like a fine blanket, ensuring every bite is flavorful. Don’t be tempted to over‑coat; a light, even spread keeps the roll from becoming soggy. Use a spoon to spread the sauce evenly, smoothing out any lumps. This step is crucial for a balanced flavor profile.
- Sprinkle shredded mozzarella evenly over the sauce, covering each tortilla completely. The cheese acts as a binder, keeping the fillings together as they bake. Press the cheese lightly into the sauce to ensure good adhesion. This layer of cheese is what gives the roll‑ups their signature gooey texture. The cheese also melts into a golden crust that’s visually appealing.
- Place four slices of pepperoni on top of the cheese, spacing them evenly across the tortilla. The pepperoni should be slightly overlapping to create a cohesive filling. The pepperoni’s fat will render slightly during baking, adding richness to the roll‑ups. This is the moment where the classic pizza flavor truly comes alive. Keep the pepperoni slices flat to avoid uneven cooking.
- Brush the edges of the tortilla lightly with cooking oil. This step creates a seal that helps the roll stay intact while baking. The oil also adds a subtle crispness to the outer crust. Use a pastry brush to apply a thin, even coat. This small detail is what separates a good roll‑up from a great one.
- Roll the tortilla tightly from one end to the other, forming a snug cylinder. Use your fingers to keep the roll tight, but avoid squeezing too hard, which can cause the filling to spill. The roll should be firm enough to hold its shape during baking. This technique ensures even cooking and prevents the cheese from oozing out. Practice makes perfect—keep rolling until you feel confident.
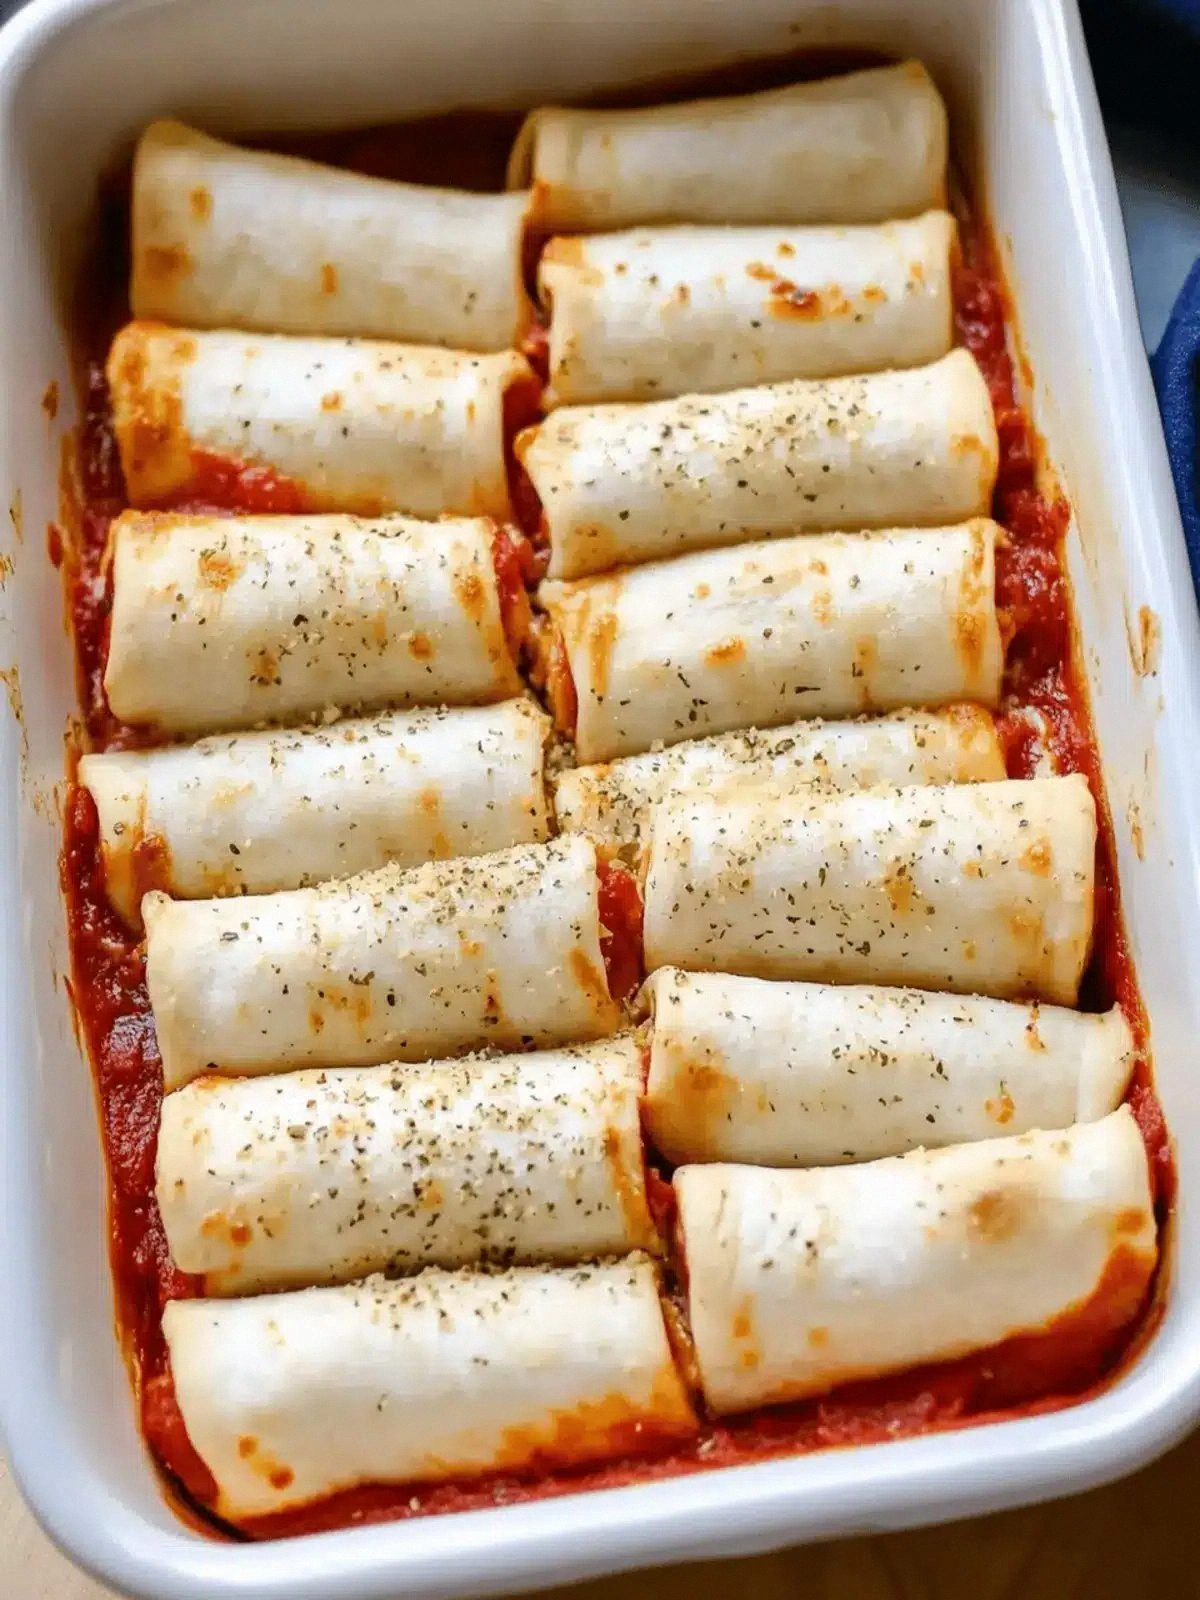
- Place the rolled tortillas seam‑side down on a parchment‑lined baking sheet. Arrange them so they have a little space between each roll. This spacing allows heat to circulate evenly, ensuring a uniform bake. The parchment prevents sticking and makes cleanup a breeze. Keep an eye on the rolls as they bake for optimal results.
- Bake for 12–15 minutes, or until the edges turn golden brown and the cheese has melted into a bubbly, golden crust. The rolls should look slightly puffed and the cheese should have a caramelized finish. Use a spatula to flip the rolls halfway through if you want even browning on all sides. The aroma at this point will be irresistible, making it hard to resist checking on them. This is the moment of truth.
- Remove the rolls from the oven and let them rest for 2–3 minutes. This brief rest allows the cheese to set slightly, making them easier to slice without tearing. While resting, the flavors meld together, creating a harmonious taste experience. Slice the rolls into bite‑sized pieces if desired, or serve them whole for a fun, interactive meal. The result is a warm, cheesy delight that satisfies everyone.
That’s it — you did it. But hold on, I’ve got a few more tricks that'll take this to another level…
Insider Tricks for Flawless Results
The Temperature Rule Nobody Follows
Many cooks underestimate the importance of oven temperature. Baking at 400°F (200°C) is crucial for a crisp exterior while keeping the inside moist. If your oven runs hot, the rolls may burn on the outside before the cheese melts. Conversely, a cooler oven will result in a soggy crust. Using an oven thermometer can help you maintain consistency every time.
Why Your Nose Knows Best
Your sense of smell is a reliable indicator of doneness. When the rolls start to emit a deep, caramelized aroma, they’re nearly ready. The scent of melted cheese and browned pepperoni signals that the flavors are fully developed. Trust your nose; it’s a seasoned chef’s secret weapon.
The 5-Minute Rest That Changes Everything
Resting the rolls after baking is not just a courtesy; it’s a necessity. A quick 5‑minute rest allows the cheese to set, preventing it from sliding off when you cut the rolls. It also lets the flavors meld, creating a more cohesive taste. Skipping this step may lead to a messier eating experience.
Keep the Oil on Hand
A small bottle of cooking oil near your workstation saves time and keeps the tortillas from sticking. Use a light spray or a brush for a thin, even coat. This simple trick ensures a smooth roll‑up process and a cleaner finish. Plus, it adds a subtle sheen to the final product.
Use a Silicone Mat
A silicone baking mat keeps the rolls from sticking to the sheet and makes cleanup effortless. It also provides a slightly uneven surface that helps the rolls puff up more evenly. This mat is a versatile tool that can be used for many other baking projects.
Mind the Filling Ratio
Balancing the amount of sauce, cheese, and pepperoni is key to a perfect roll. Too much sauce can make the tortilla soggy, while too little can leave it dry. The ratio I use works well for most ovens, but feel free to adjust slightly if your oven runs hot or cold. A well‑balanced filling ensures every bite is delicious.
Creative Twists and Variations
This recipe is a playground. Here are some of my favorite ways to switch things up:
Mediterranean Roll‑Ups
Swap the pepperoni for sliced kalamata olives and add a drizzle of tzatziki after baking. The olives bring a briny depth, while the tzatziki adds a cooling, garlicky finish. This version is perfect for a Mediterranean-inspired dinner.
Spicy Cajun Roll‑Ups
Use spicy Cajun seasoning instead of Italian seasoning, and add sliced jalapeños to the filling. The heat from the peppers pairs beautifully with the savory cheese. Serve with a side of cool ranch dip to balance the spice.
Breakfast Roll‑Ups
Replace the pizza sauce with a thin layer of scrambled eggs and sprinkle shredded cheddar instead of mozzarella. Add diced ham or bacon for a hearty breakfast. These rolls are great for a quick, protein-packed morning meal.
Vegan Roll‑Ups
Use a plant‑based pizza sauce, vegan mozzarella, and vegan pepperoni. The result is a cruelty‑free, flavorful treat that satisfies everyone at the table. This version is also gluten‑free if you use gluten‑free tortillas.
Cheesy Sausage Roll‑Ups
Swap pepperoni for crumbled Italian sausage and add a handful of sautéed bell peppers. The sausage adds a robust flavor, while the peppers provide sweetness and color. This variation is a crowd‑pleaser for any occasion.
Sweet & Savory Roll‑Ups
Add a thin layer of honey or maple syrup to the sauce before rolling, and sprinkle a pinch of cinnamon. The sweet glaze contrasts with the savory fillings, creating an unexpected flavor profile. This twist is a fun experiment for adventurous cooks.
Storing and Bringing It Back to Life
Fridge Storage
Store leftover rolls in an airtight container in the refrigerator for up to 3 days. The rolls will maintain their freshness and flavor when reheated. Keep them in a single layer to avoid crushing. This method is ideal for meal prepping or quick lunches.
Freezer Friendly
Wrap each roll tightly in plastic wrap, then place them in a freezer bag. They can be frozen for up to 2 months. When ready to eat, bake directly from the freezer for 12–15 minutes. This keeps the rolls delicious and convenient.
Best Reheating Method
To reheat, place the rolls on a parchment‑lined tray and bake at 375°F (190°C) for 8–10 minutes. Add a tiny splash of water before reheating; it steams the rolls back to perfection. This technique restores the crispness of the crust and the gooeyness of the cheese. Serve immediately for the best texture.