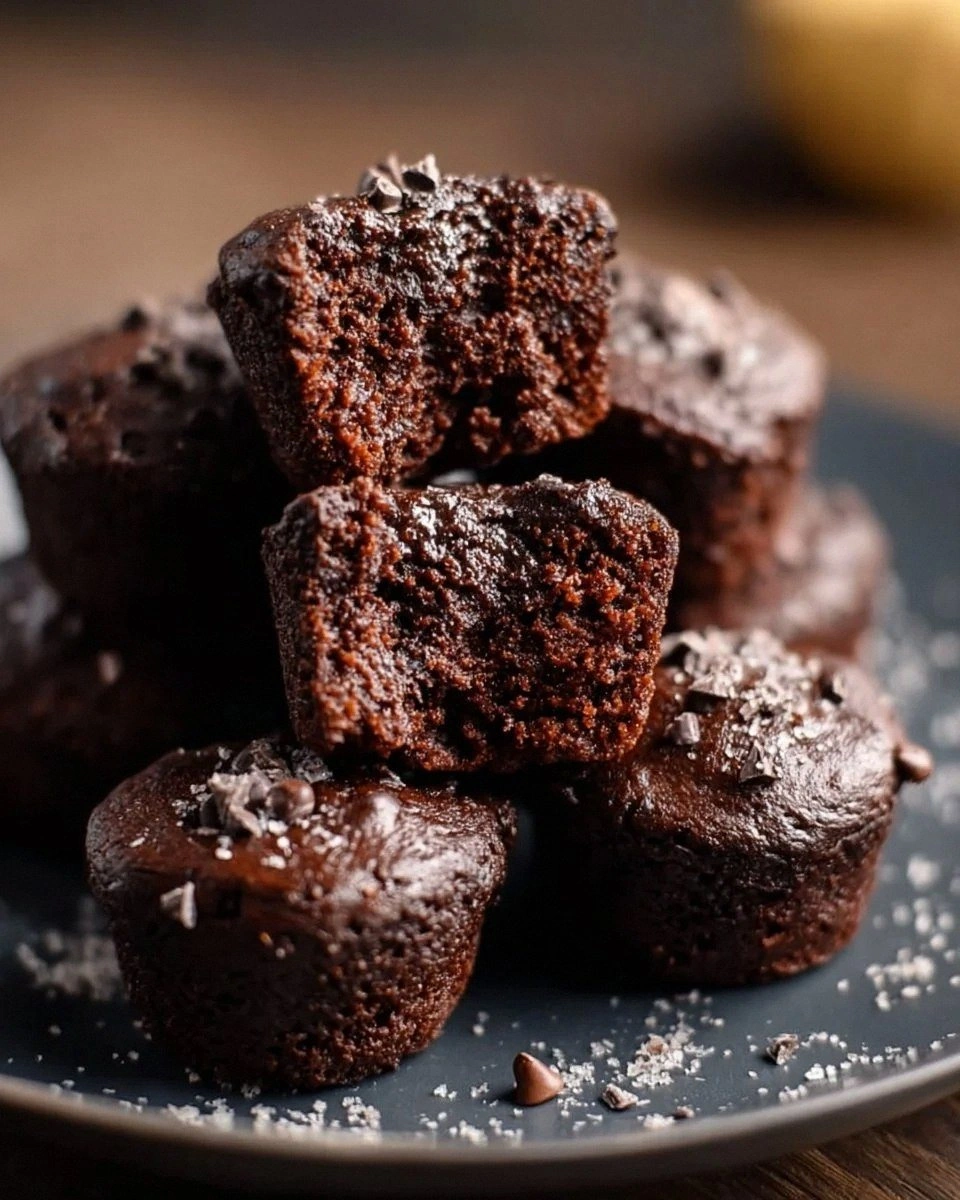
Picture this: it’s a rainy Tuesday night, the kind where the universe conspires to make you feel like a couch‑potato, but your stomach is shouting for something that feels both indulgent and guilt‑free. I was halfway through a binge‑watching session when a sudden craving for a fudgy brownie hit me like a plot twist—only I didn’t want the usual sugar‑laden, protein‑deficient disaster that leaves you with a sticky spoon and a guilty conscience. I raided the pantry, found a half‑empty jar of almond flour, a lonely tub of cocoa, and that protein powder I swear I’ll use someday. The result? A batch of Protein Brownie Bites that turned my kitchen into a chocolate‑scented sanctuary and made my taste buds do a happy dance.
The moment the batter hit the mixing bowl, it was like watching a love story unfold. The almond flour swirled with the deep, almost bitter cocoa, while the maple syrup glistened like liquid amber, promising sweetness without the crash. The faint hiss of coconut oil melting in the microwave added a buttery whisper, and the apple sauce brought a subtle fruitiness that balanced the richness. As I folded in the protein powder, the mixture thickened, taking on a texture that reminded me of a velvety ganache—rich, dense, but still light enough to melt in your mouth. The aroma that rose from the bowl was pure comfort: earthy chocolate, a hint of nutty almond, and a sweet undertone that made my kitchen feel like a boutique bakery.
Most brownie recipes out there either skimp on protein or drown you in sugar, and they often require a dozen obscure ingredients you’ll never see again. This version, however, flips the script. By using almond flour as the base, we get a gluten‑free crumb that’s naturally moist, while the cocoa provides that classic brownie depth without the need for extra fats. The protein powder not only boosts the nutritional profile but also gives the bites a satisfying chew that’s reminiscent of a protein bar, but way more decadent. And the best part? The optional add‑ins—crunchy nuts, toasted coconut, dark chocolate chips—let you customize the texture and flavor to your heart’s desire. I dare you to taste this and not go back for seconds.
But hold on, there’s a secret weapon hidden in this recipe that most bakers overlook: a splash of unsweetened apple sauce. It’s the silent hero that keeps the brownies moist, adds a hint of natural sweetness, and cuts down on the need for extra oil, making these bites perfect for anyone watching their macros. Okay, ready for the game‑changer? Let me walk you through every single step — by the end, you’ll wonder how you ever made it any other way.
What Makes This Version Stand Out
- Taste: The balance of deep cocoa, natural maple sweetness, and a hint of nutty almond creates a flavor profile that rivals any gourmet brownie.
- Texture: A fudgy interior with a slightly crisp edge, thanks to the almond flour and the optional crunchy add‑ins.
- Simplicity: Only ten core ingredients, most of which you probably already have in your pantry.
- Uniqueness: The use of apple sauce as a moisture keeper is a twist most recipes miss, giving you a healthier yet equally indulgent bite.
- Crowd Reaction: Friends will ask for the recipe within minutes, and you’ll watch them devour the batch like it’s the last dessert on Earth.
- Ingredient Quality: Almond flour and high‑quality cocoa powder ensure a rich, buttery mouthfeel without the need for excess butter.
- Cooking Method: Baked in a single pan, no fancy equipment required—just a trusty oven and a silicone muffin tray.
- Make‑Ahead Potential: These bites keep beautifully in the fridge or freezer, ready for a post‑workout snack or a midnight treat.
Alright, let's break down exactly what goes into this masterpiece...
Inside the Ingredient List
The Flavor Base
Almond Flour (1 cup): This is the backbone of our brownies, providing a soft, moist crumb while keeping them gluten‑free. If you skip it, you’ll end up with a dense, dry texture that feels more like a protein bar than a brownie. For the best results, choose a finely milled, blanched almond flour—no gritty bits.
Cocoa Powder (1 cup): The darker, the better; I recommend a Dutch‑process cocoa for a smoother, less acidic flavor. It gives the brownies that deep, almost espresso‑like richness that makes you forget you’re eating something healthy. If you only have natural cocoa, add a pinch of baking soda to balance the acidity.
The Texture Crew
Protein Powder (½ cup): This is where the magic happens for the fitness‑focused palate. It adds a subtle chew and boosts the protein content to keep you satiated longer. Choose a vanilla or chocolate whey or plant‑based powder that blends well—avoid anything with a chalky aftertaste.
Maple Syrup or Honey (½ cup): This natural sweetener provides a caramel‑like depth that white sugar can’t match. It also helps the brownies stay moist during baking. If you’re watching carbs, opt for pure maple syrup; it has a lower glycemic index than honey.
Coconut Oil, melted (¼ cup): Adds a subtle tropical note and a glossy finish. It also helps the batter spread evenly, giving you those coveted crackly tops. Make sure it’s fully melted but not smoking before mixing.
Unsweetened Apple Sauce (¼ cup): The unsung hero that keeps the brownies tender and reduces the need for extra oil. It also adds a faint fruitiness that balances the chocolate. If you’re allergic to apples, plain Greek yogurt works as a substitute.
The Unexpected Star
Baking Powder (1 tsp): Provides a gentle lift, ensuring the brownies are light enough to bite through without becoming cake‑like. Too much will make them rise too much and collapse; stick to the exact amount.
Salt (½ tsp): Enhances the chocolate flavor and balances the sweetness. Skipping salt is a rookie mistake that leaves the brownies tasting flat.
The Final Flourish
Chopped Nuts (to taste): Adds crunch and a buttery richness. Pecans or walnuts work best; they toast quickly and complement the chocolate.
Shredded Coconut (to taste): Gives a tropical whisper and a chewy texture. Lightly toast it first for extra aroma.
Dark Chocolate Chips (to taste): For those pockets of molten chocolate that burst like tiny fireworks when you bite in. Choose 70% cacao or higher for a less sweet, more intense flavor.
Everything's prepped? Good. Let's get into the real action...
The Method — Step by Step
Preheat your oven to 350°F (175°C) and line a 12‑cup silicone muffin tray with paper liners or lightly grease it. As the oven warms, the kitchen fills with a faint, anticipatory hum—like the audience waiting for the curtain to rise. This step is crucial; a proper preheat guarantees even baking and that coveted crackly top.
In a large mixing bowl, whisk together the almond flour and cocoa powder until they form a uniform, dark dust. This dry blend should look like a rich, velvety sand—no clumps, no specks of white. Pro tip: Sift them together for an ultra‑smooth base.
Kitchen Hack: If you don’t have a whisk, a fork works fine—just make sure you break up any lumps.In a separate bowl, combine the melted coconut oil, maple syrup (or honey), and unsweetened apple sauce. Stir until the mixture is glossy and fully integrated. When you lift the spoon, the liquid should coat the back of it like a thin veil—this is the sign of a well‑emulsified batter.
Add the protein powder, baking powder, and salt to the wet mixture. Whisk gently; you’ll notice the batter thickening almost immediately. Watch Out: Over‑mixing can cause the protein to become rubbery, so stop as soon as everything is just combined.
Watch Out: If the batter looks too thick, add a splash of almond milk—just a tablespoon at a time.Gradually fold the dry cocoa‑almond mixture into the wet ingredients. Use a spatula and employ a gentle “fold‑over” motion; this keeps the air in the batter, leading to a lighter bite. The batter will become thick and glossy, almost like a chocolate mousse that’s ready to be poured.
Now, the fun part: stir in your chosen add‑ins—chopped nuts, shredded coconut, and dark chocolate chips. Distribute them evenly so every bite gets a surprise burst of texture. If you love extra gooeyness, reserve a handful of chocolate chips to sprinkle on top just before baking.
Spoon the batter into the prepared muffin tray, filling each cup about three‑quarters full. The batter should sit in the cups like a thick, dark batter that’s ready to rise. Lightly tap the tray on the counter to settle the batter and release any air bubbles.
Slide the tray into the preheated oven and bake for 18‑22 minutes. Around the 15‑minute mark, the edges will start pulling away from the sides of the cups—a visual cue that the brownies are nearly done. The tops should look set, with a faint crackle; if you insert a toothpick, it should come out with a few moist crumbs but no wet batter.
Kitchen Hack: For an extra glossy finish, brush the tops with a thin layer of melted coconut oil during the last 3 minutes of baking.Remove the tray from the oven and let the brownies cool in the pan for 10 minutes. This resting period allows the interior to set fully, preventing them from falling apart when you remove them. Afterward, gently pop each bite out of the silicone cups; they should release with a soft “pop” sound.
Transfer the cooled bites to a wire rack or an airtight container. If you’re not eating them immediately, let them cool completely before sealing—this keeps the texture perfect. And now the fun part: taste a warm bite, feel the fudgy center melt, and revel in the fact that you just created a protein‑packed dessert that tastes like a cheat day.
That's it — you did it. But hold on, I've got a few more tricks that'll take this to another level...
Insider Tricks for Flawless Results
The Temperature Rule Nobody Follows
Most home bakers set the oven to 350°F and forget that every oven behaves differently. Use an oven thermometer and aim for a stable 345°F; a few degrees lower can prevent over‑browning while still giving you that coveted crackle. I once baked at 375°F and ended up with a crust that tasted like burnt toast—never again.
Why Your Nose Knows Best
The moment the brownies start to smell toasty, you’re within two minutes of perfection. Trust that aromatic cue more than the timer. If the scent turns sweet and caramelized, pull them out; over‑cooking turns the protein powder bitter.
The 5‑Minute Rest That Changes Everything
After removing the bites from the oven, let them sit untouched for exactly five minutes. This short rest lets the interior finish setting and the flavors meld. Skipping this step is the reason many brownies turn out crumbly.
Silicone vs. Metal: The Battle of the Bites
Silicone trays give a soft, even crumb because they don’t conduct heat as aggressively as metal. Metal tins create a firmer crust, which some prefer. I personally love silicone for its easy release and gentle bake.
Protein Powder Placement Matters
Mix the protein powder with the wet ingredients rather than the dry. This prevents clumping and ensures a smoother batter. A friend once added it straight to the flour and ended up with gritty brownies—lesson learned.
Creative Twists and Variations
This recipe is a playground. Here are some of my favorite ways to switch things up:
Mocha Madness
Swap half of the maple syrup for strong brewed espresso and add a tablespoon of instant coffee granules. The result is a brownie that wakes you up and satisfies your sweet tooth simultaneously. Perfect for a post‑workout pick‑me‑up.
Peanut Butter Swirl
Drop a teaspoon of natural peanut butter into the center of each batter mound before baking, then use a skewer to create a marble effect. The creamy peanut butter ribbons melt into gooey pockets that contrast beautifully with the chocolate.
Berry Burst
Fold in a handful of freeze‑dried raspberry pieces or fresh blueberries. The tartness cuts through the richness, adding a bright pop of flavor. Just be mindful of extra moisture if you use fresh fruit.
Coconut Lime
Replace the shredded coconut with toasted coconut flakes and add a teaspoon of lime zest to the batter. The citrus zing lifts the chocolate, making it feel lighter and more refreshing.
Spicy Chili
Incorporate a pinch of cayenne pepper or a dash of chipotle powder for a subtle heat that lingers after the first bite. It’s a daring twist that turns the brownies into a sophisticated dessert for adventurous palates.
Storing and Bringing It Back to Life
Fridge Storage
Place the cooled bites in an airtight container lined with parchment paper. They’ll stay fresh for up to five days. The fridge keeps the texture firm, making them perfect for a quick snack.
Freezer Friendly
For longer storage, arrange the bites on a baking sheet, freeze them individually for an hour, then transfer to a zip‑top bag. They’ll keep for up to three months. When you’re ready, thaw at room temperature for 20 minutes.
Best Reheating Method
To revive that fresh‑out‑of‑the‑oven feel, microwave a single bite for 10‑15 seconds, adding a tiny splash of water (about a teaspoon) before heating. The steam created restores moisture, and the brownie will be soft inside with a slightly crisp edge.